First Sample
Now that you've confirmed that your FRAME was not damaged during shipping, we're ready to view microscopic samples with your FRAME.
In this tutorial, we will preview, save, and view our first images of a microscopy sample. Along the way, we will use the FRAME's ImSwitch app for microscopy, and we will see how to adjust imaging settings in ImSwitch's Live View page.
Insert your first sample
Depending on the specific FRAME hardware configuration you purchased from openUC2, your FRAME will come with a preinstalled sample holder for holding either well plates or microscope slides:
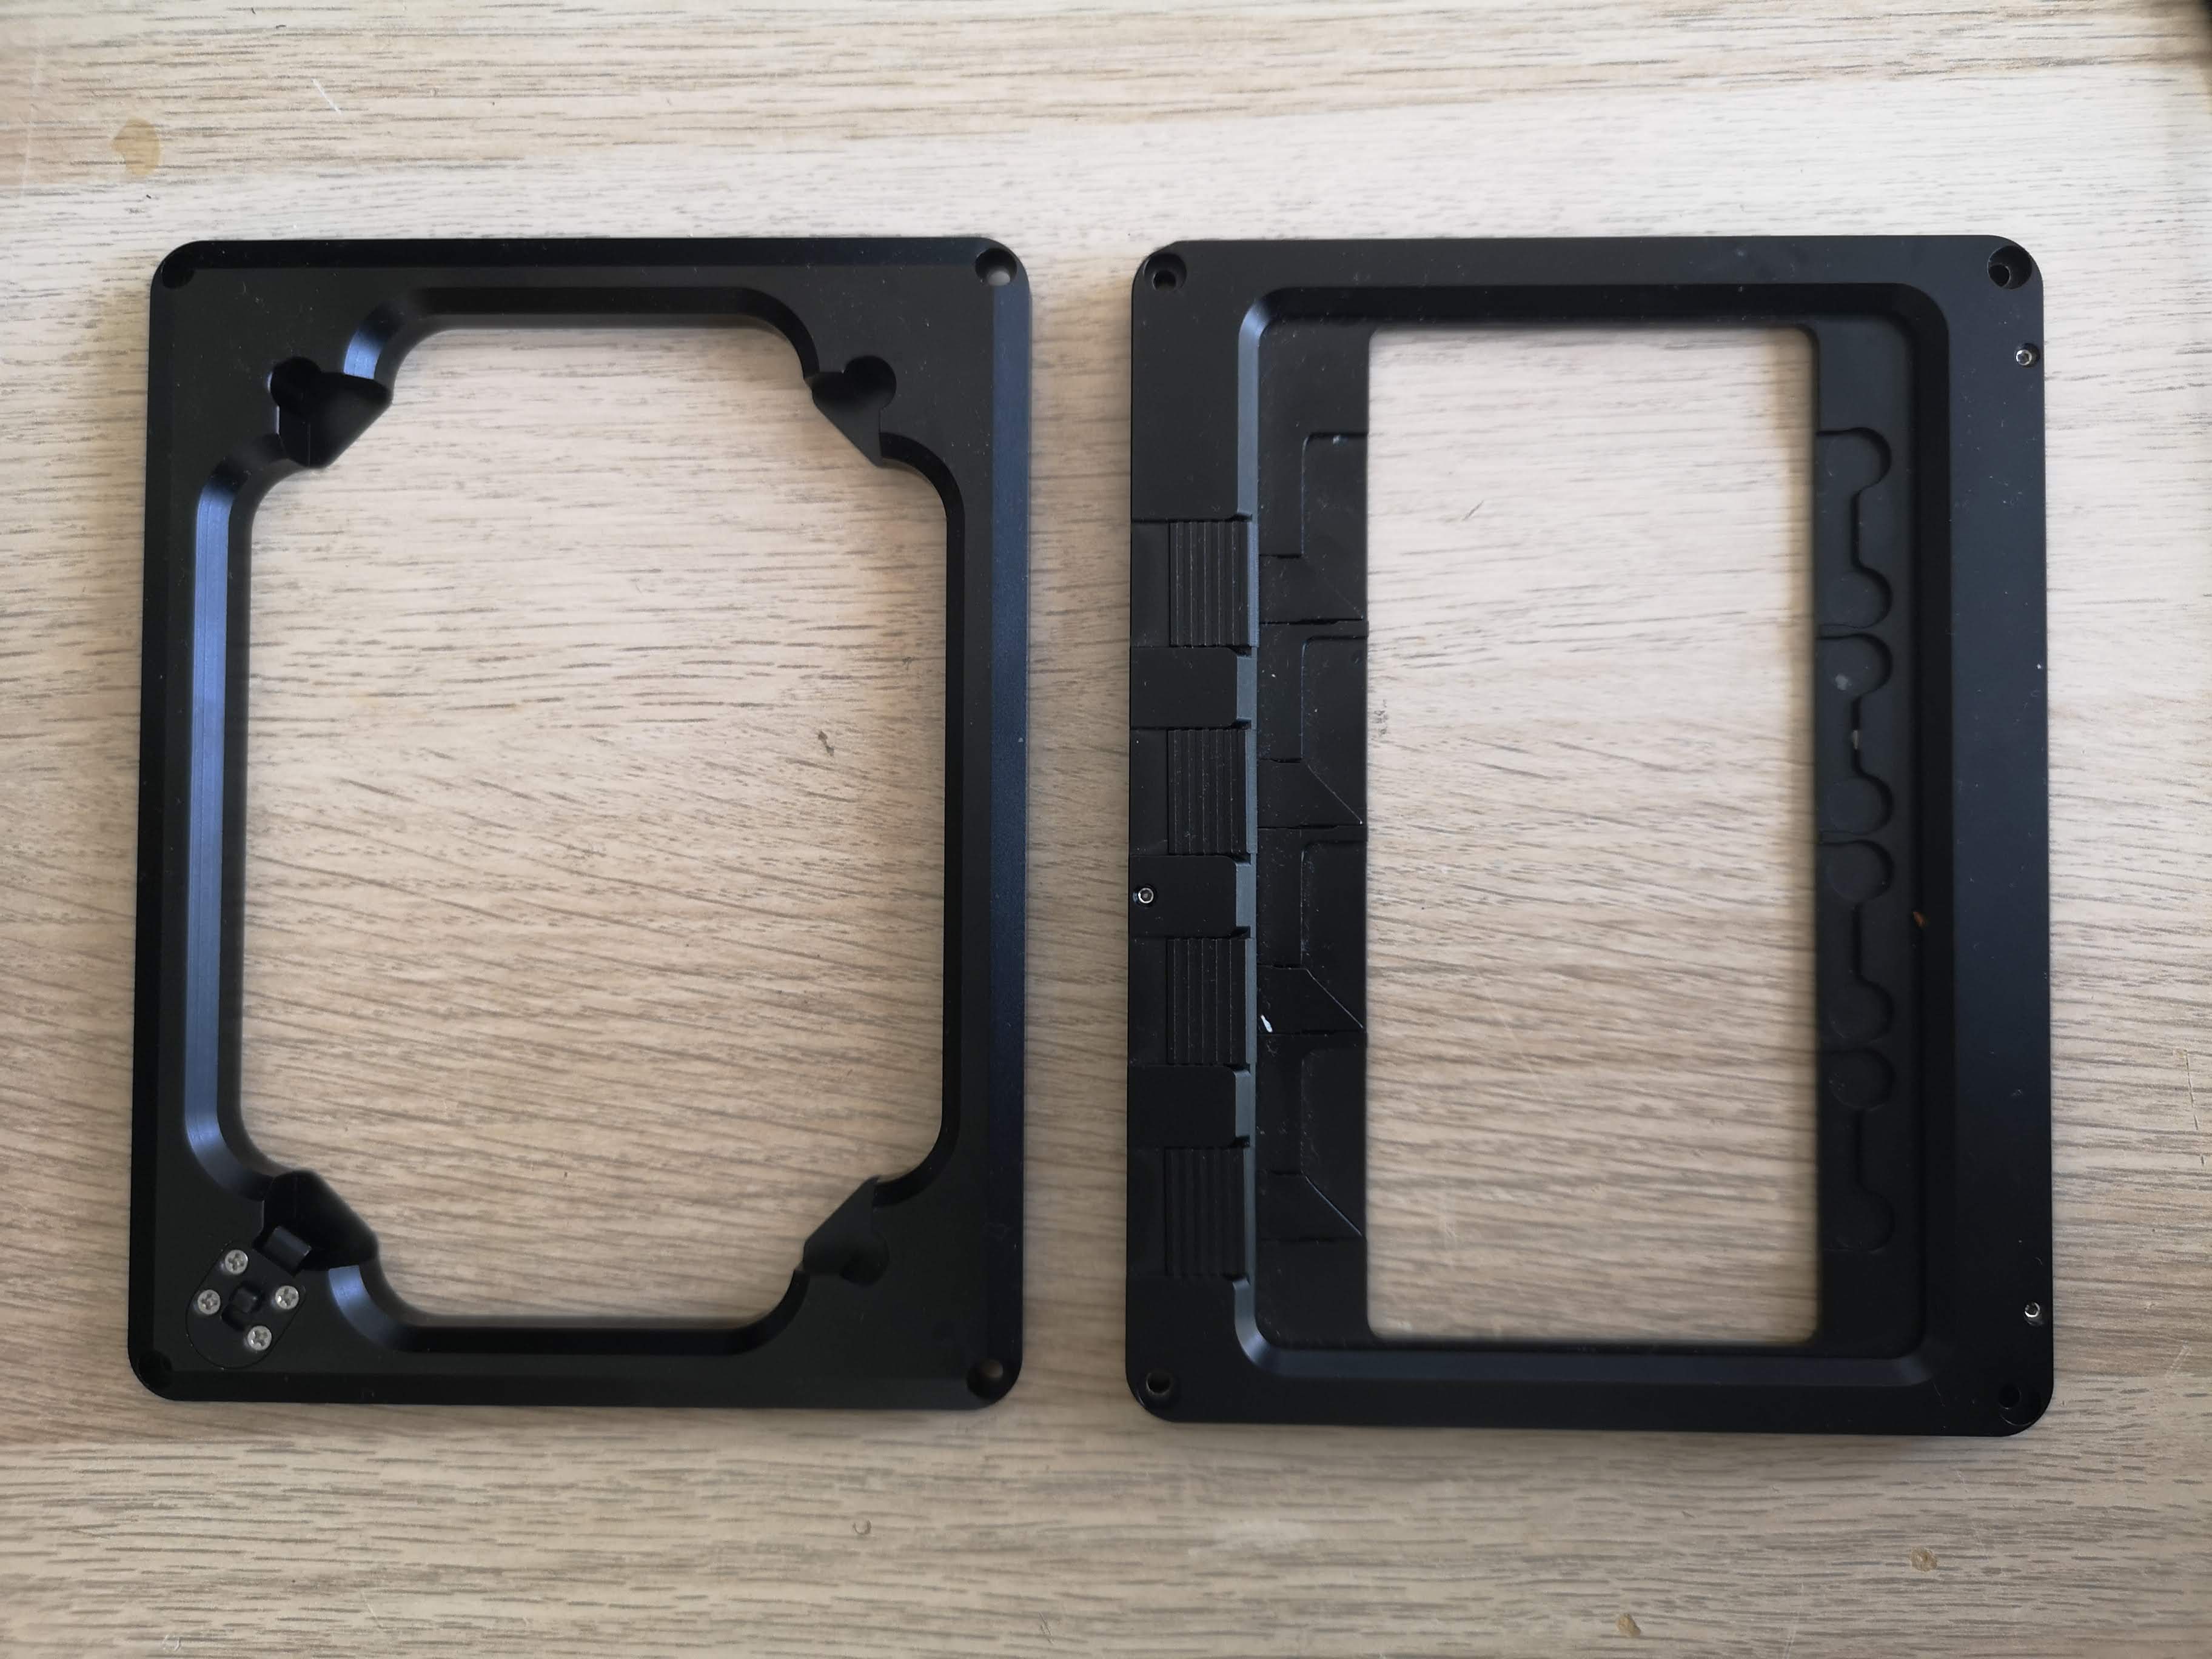
In the above image, we can see a well plate holder on the left and a microscope slide holder on the right.
In our day-2 tutorials we'll learn how to change the sample holders, but for now you should insert a sample matching the sample holder which has been preinstalled in your FRAME:
- if your FRAME has a slide holder, continue to the tutorial section for inserting a microscope slide
- if your FRAME has a well-plate holder, continue to the tutorial section for inserting a well plate
on a microscope slide
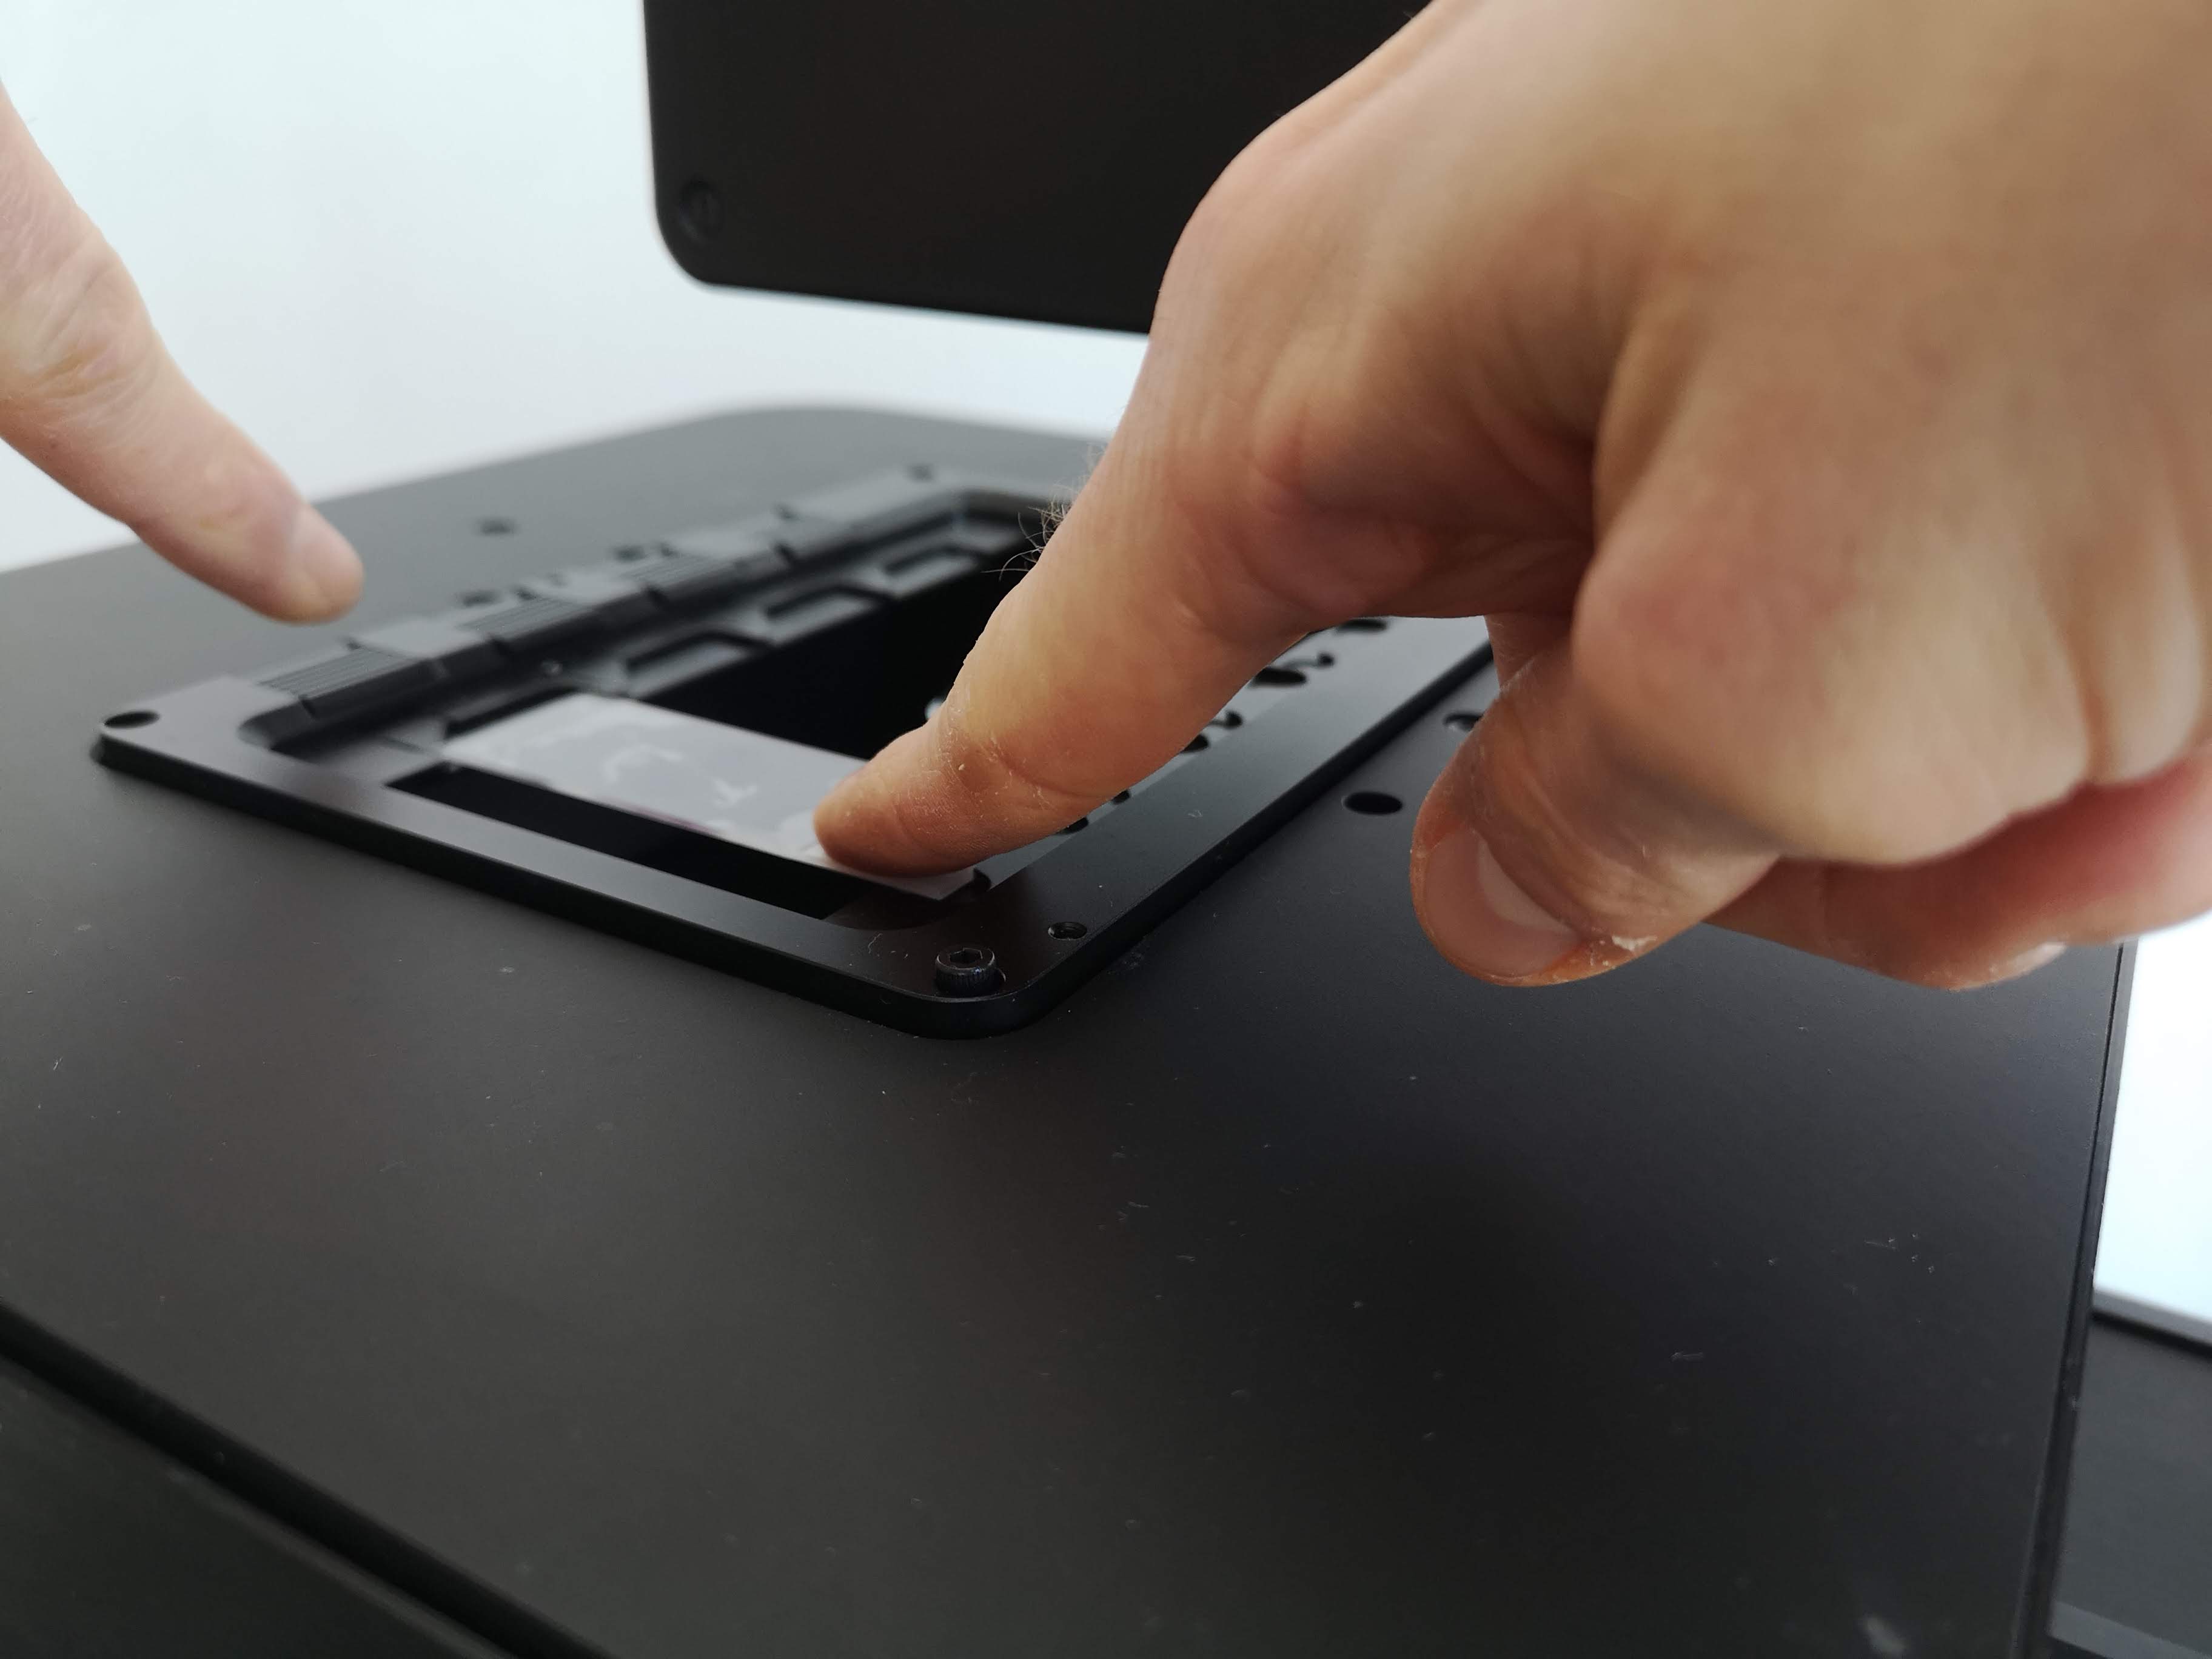
Take a microscope slide with a sample and place it on one of the slots of the slide holder like in the below sequence of images:
| Insert into flat edge | Pull back spring-loaded mechanism | Insert into spring-loaded edge |
|---|---|---|
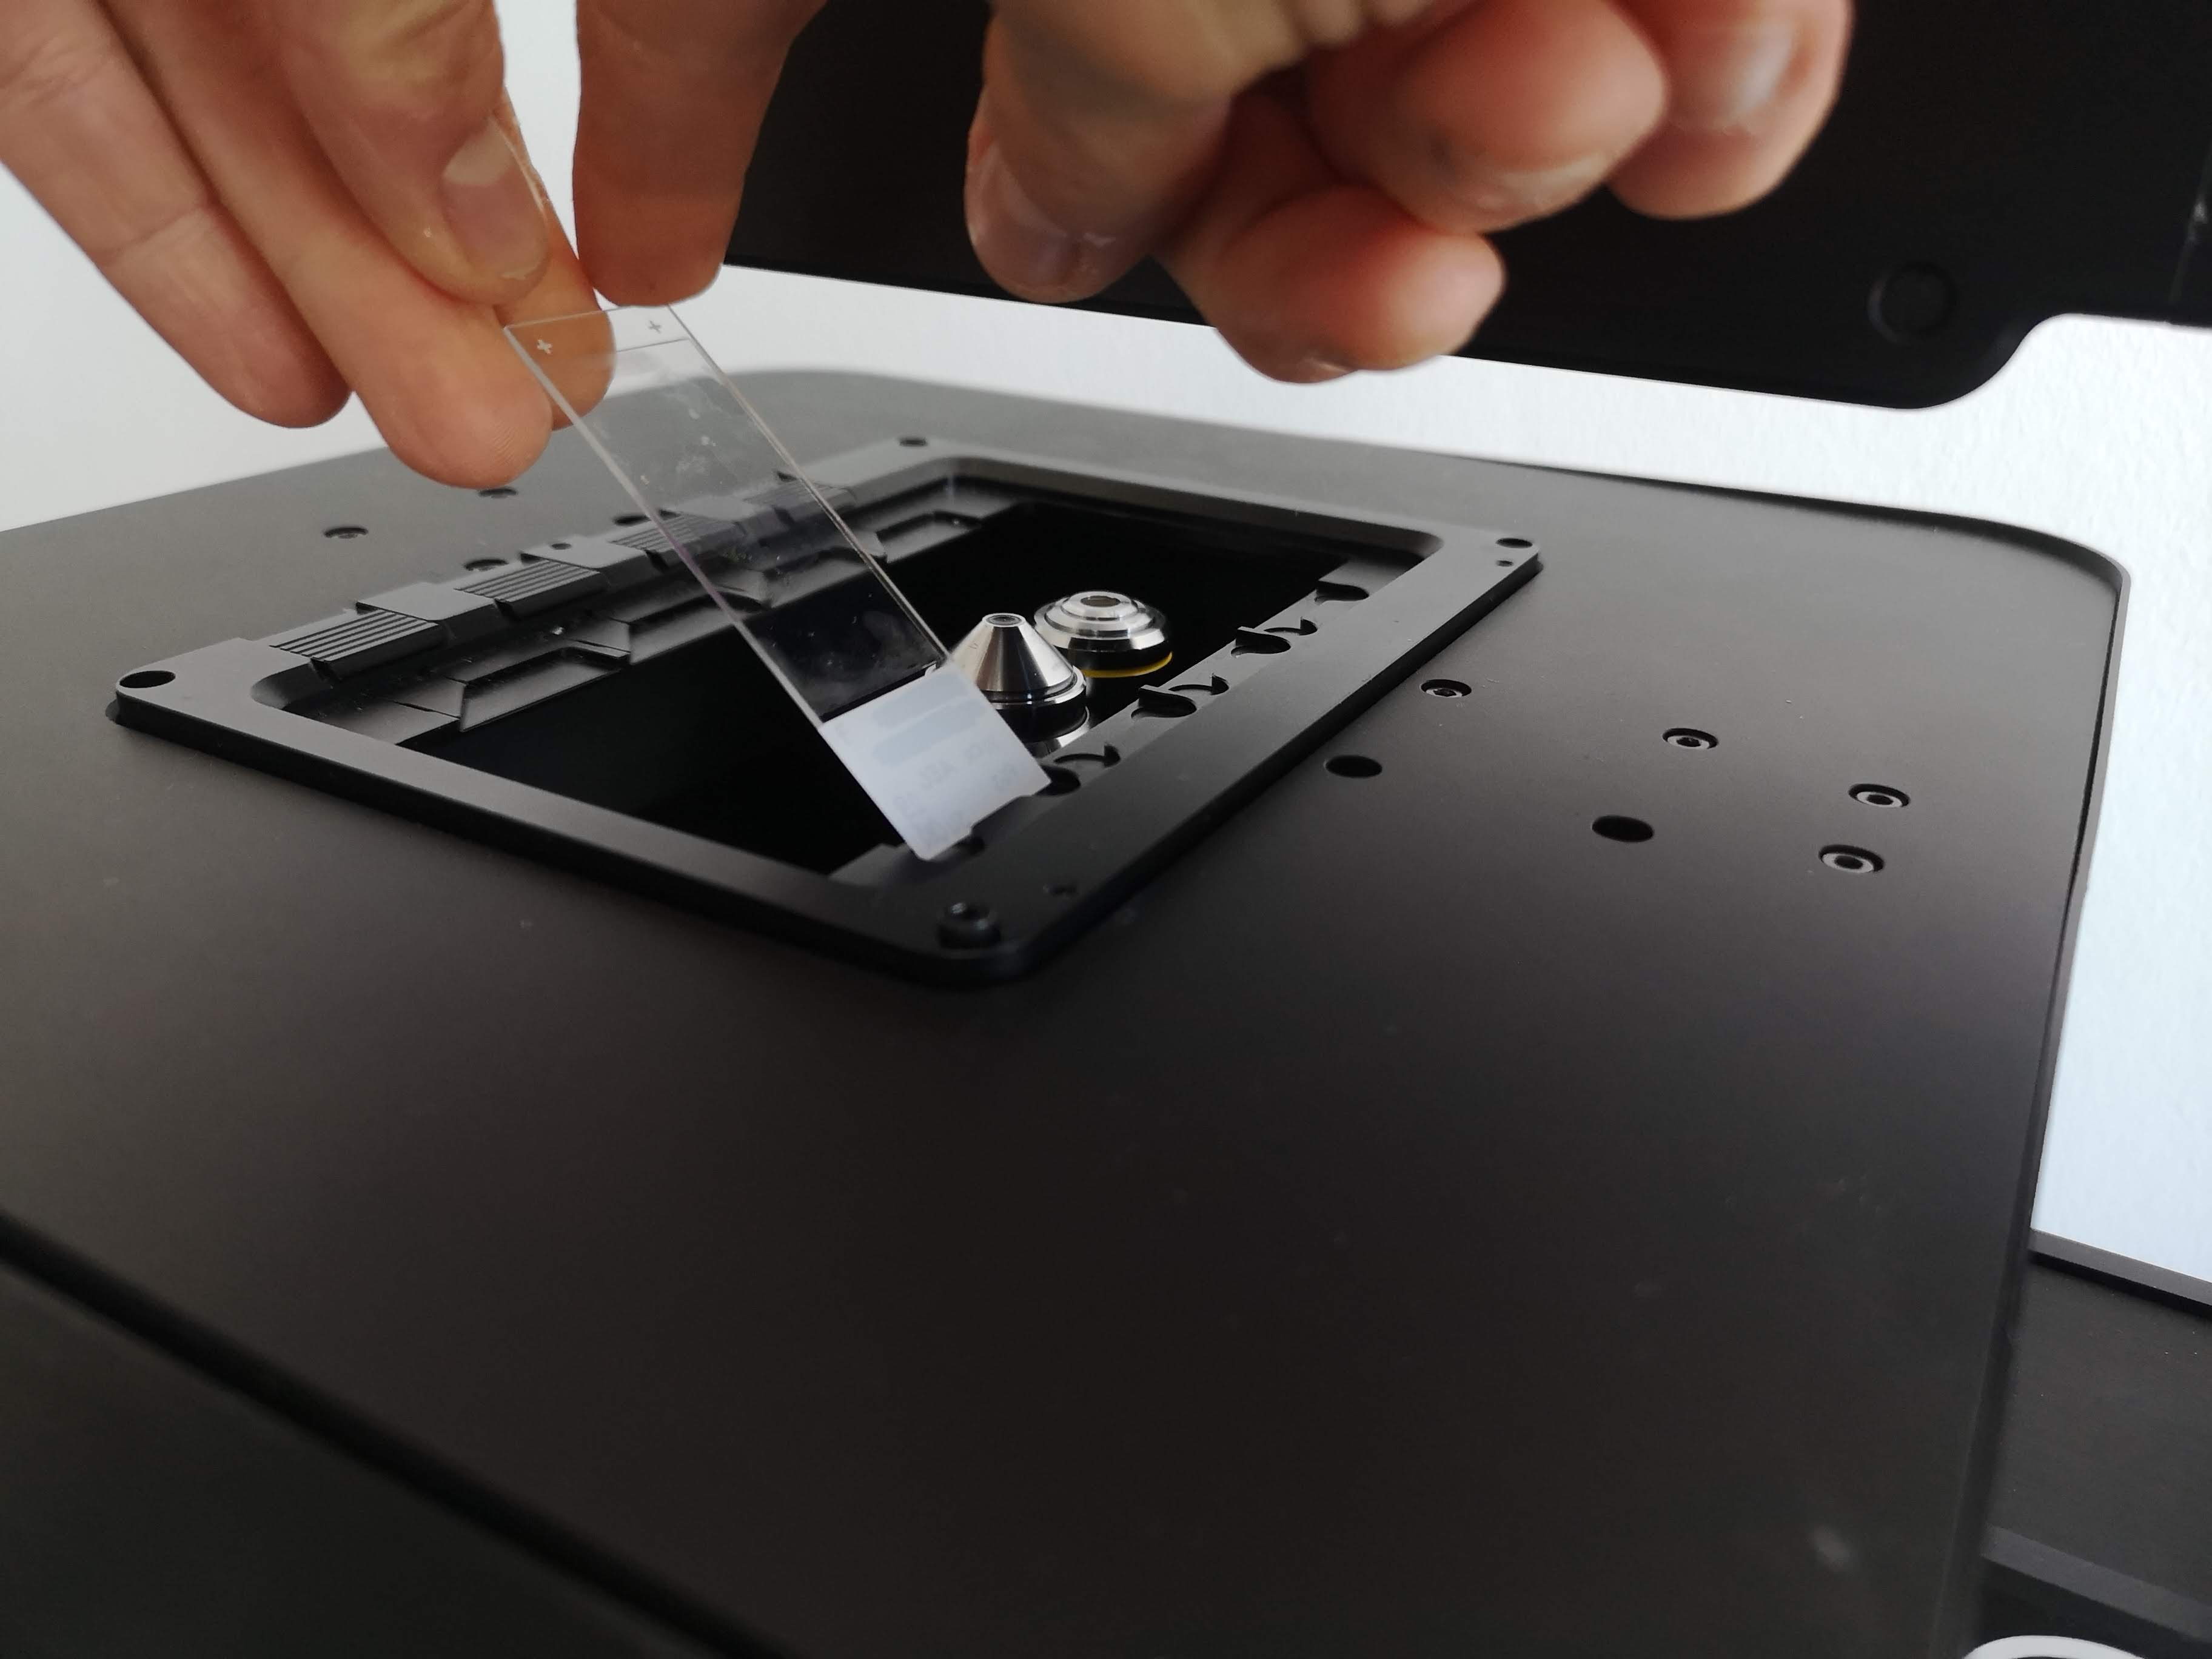 | 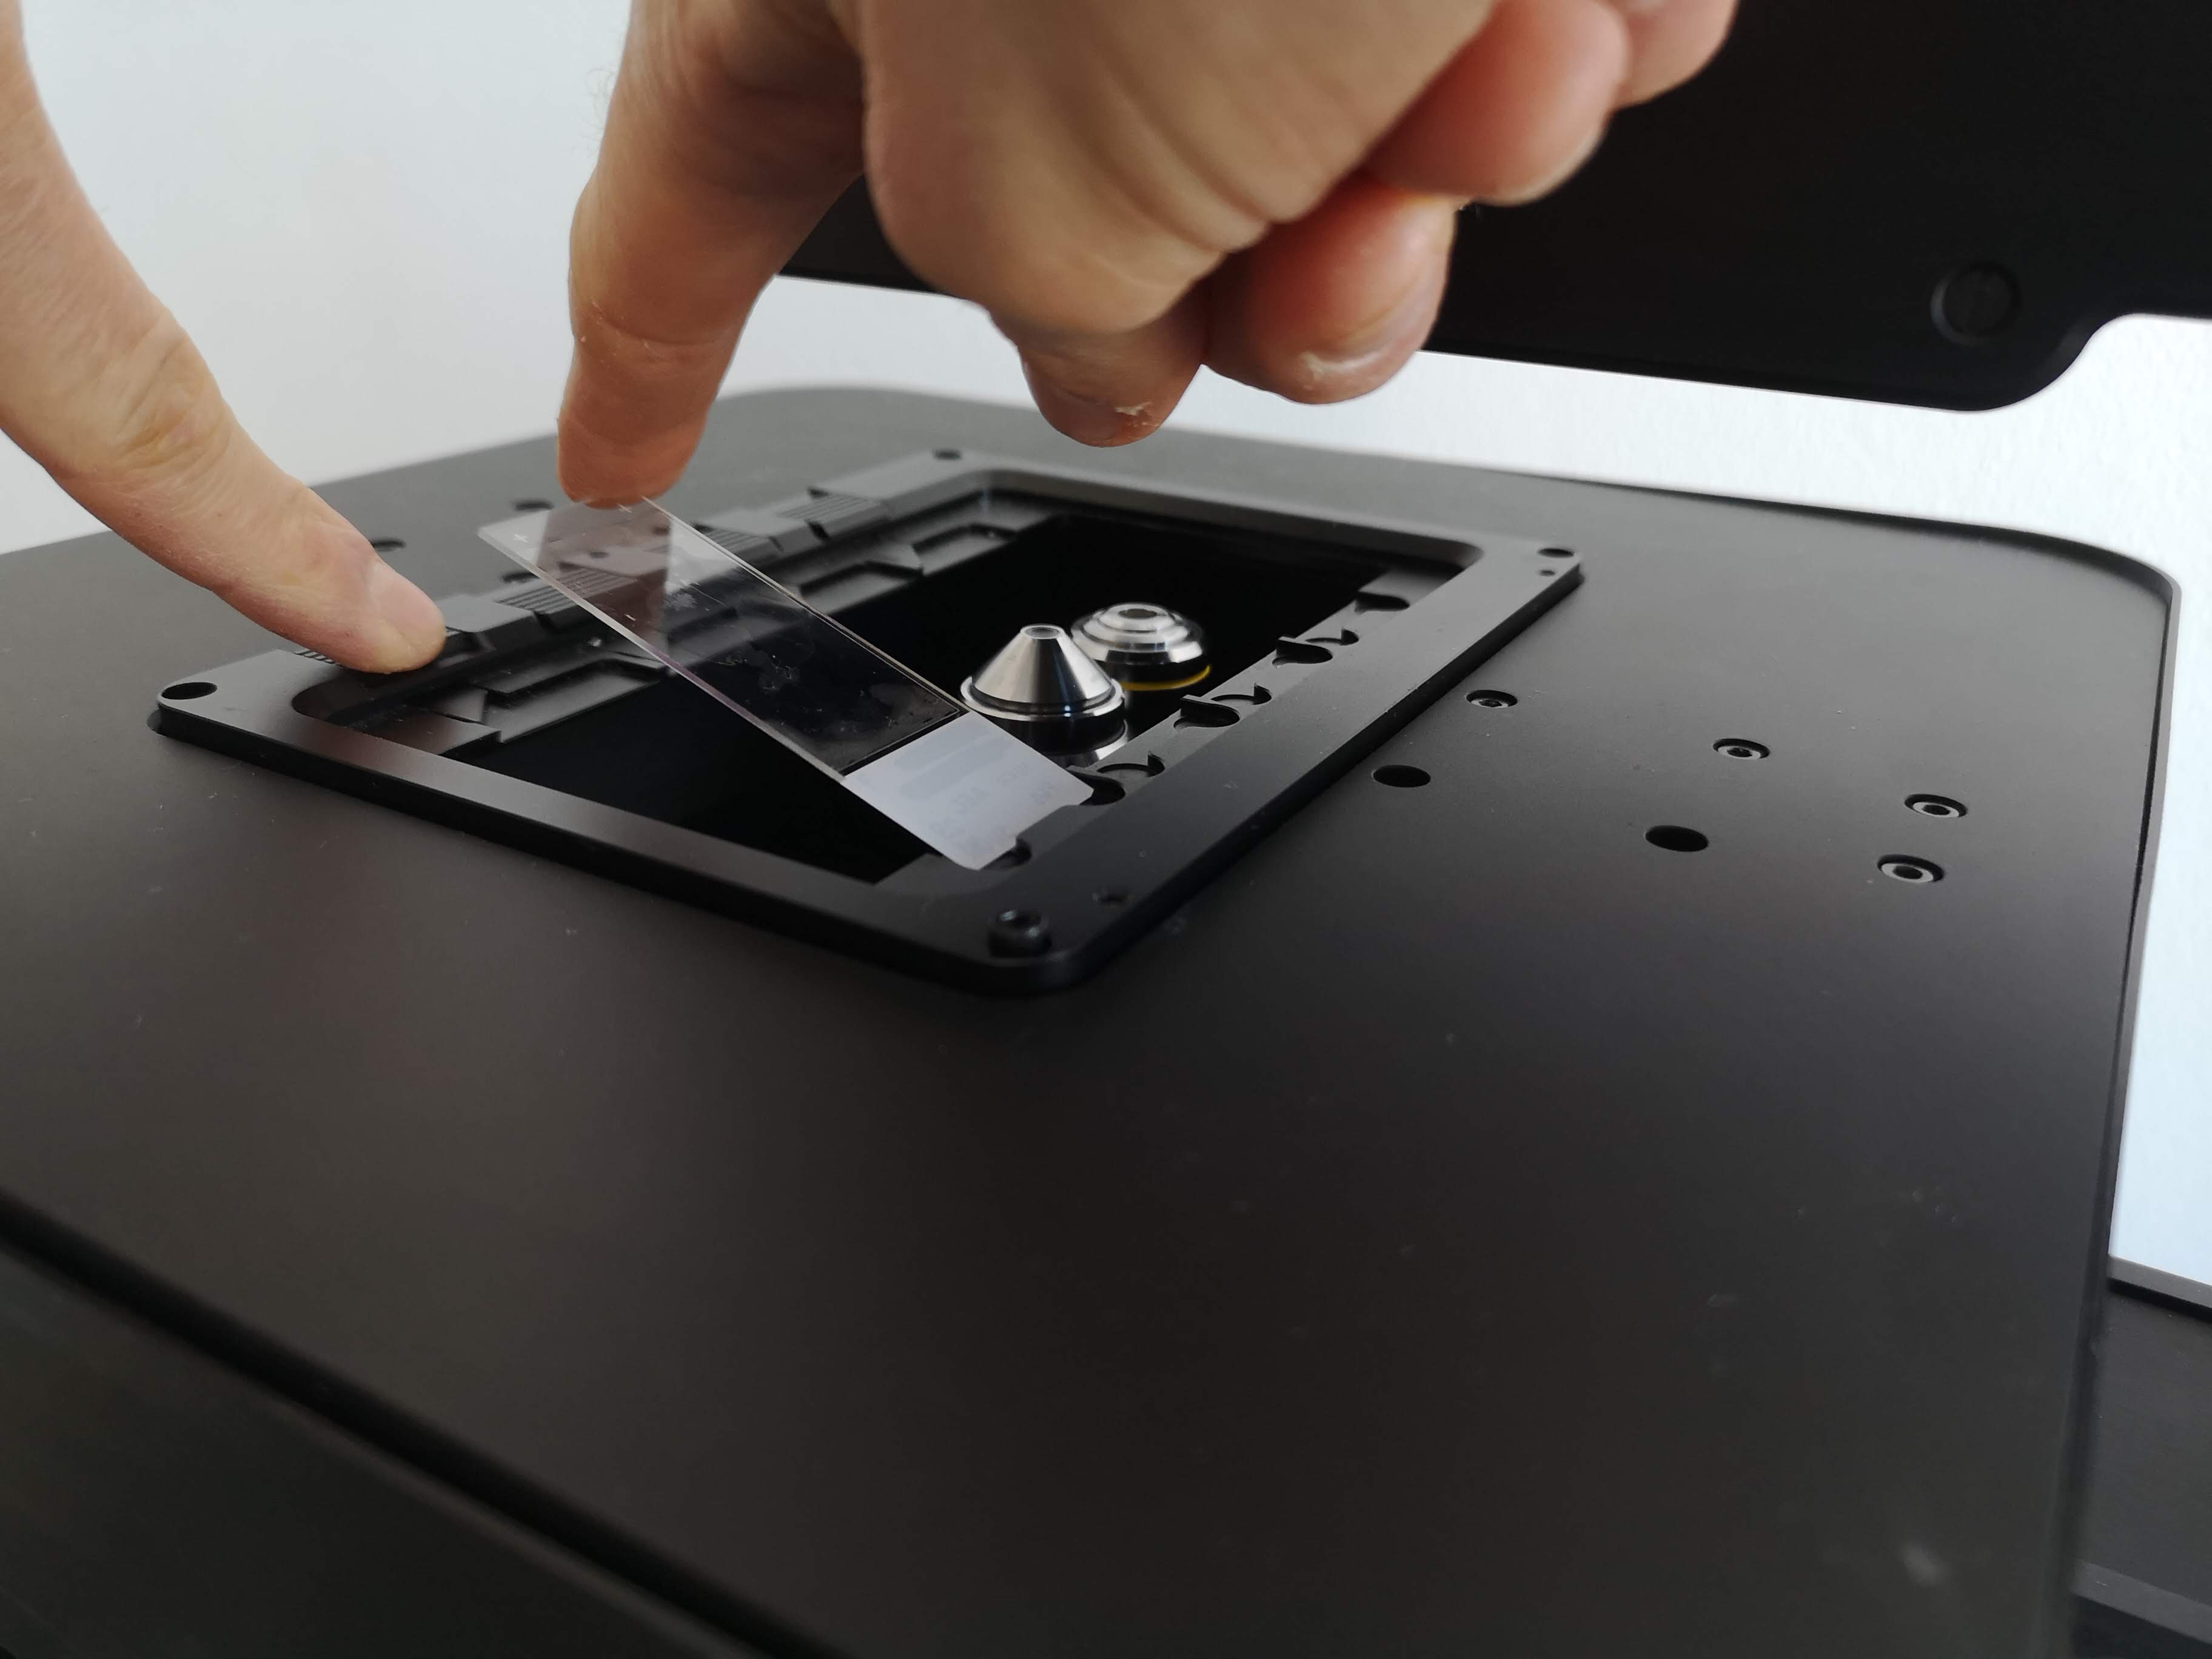 | 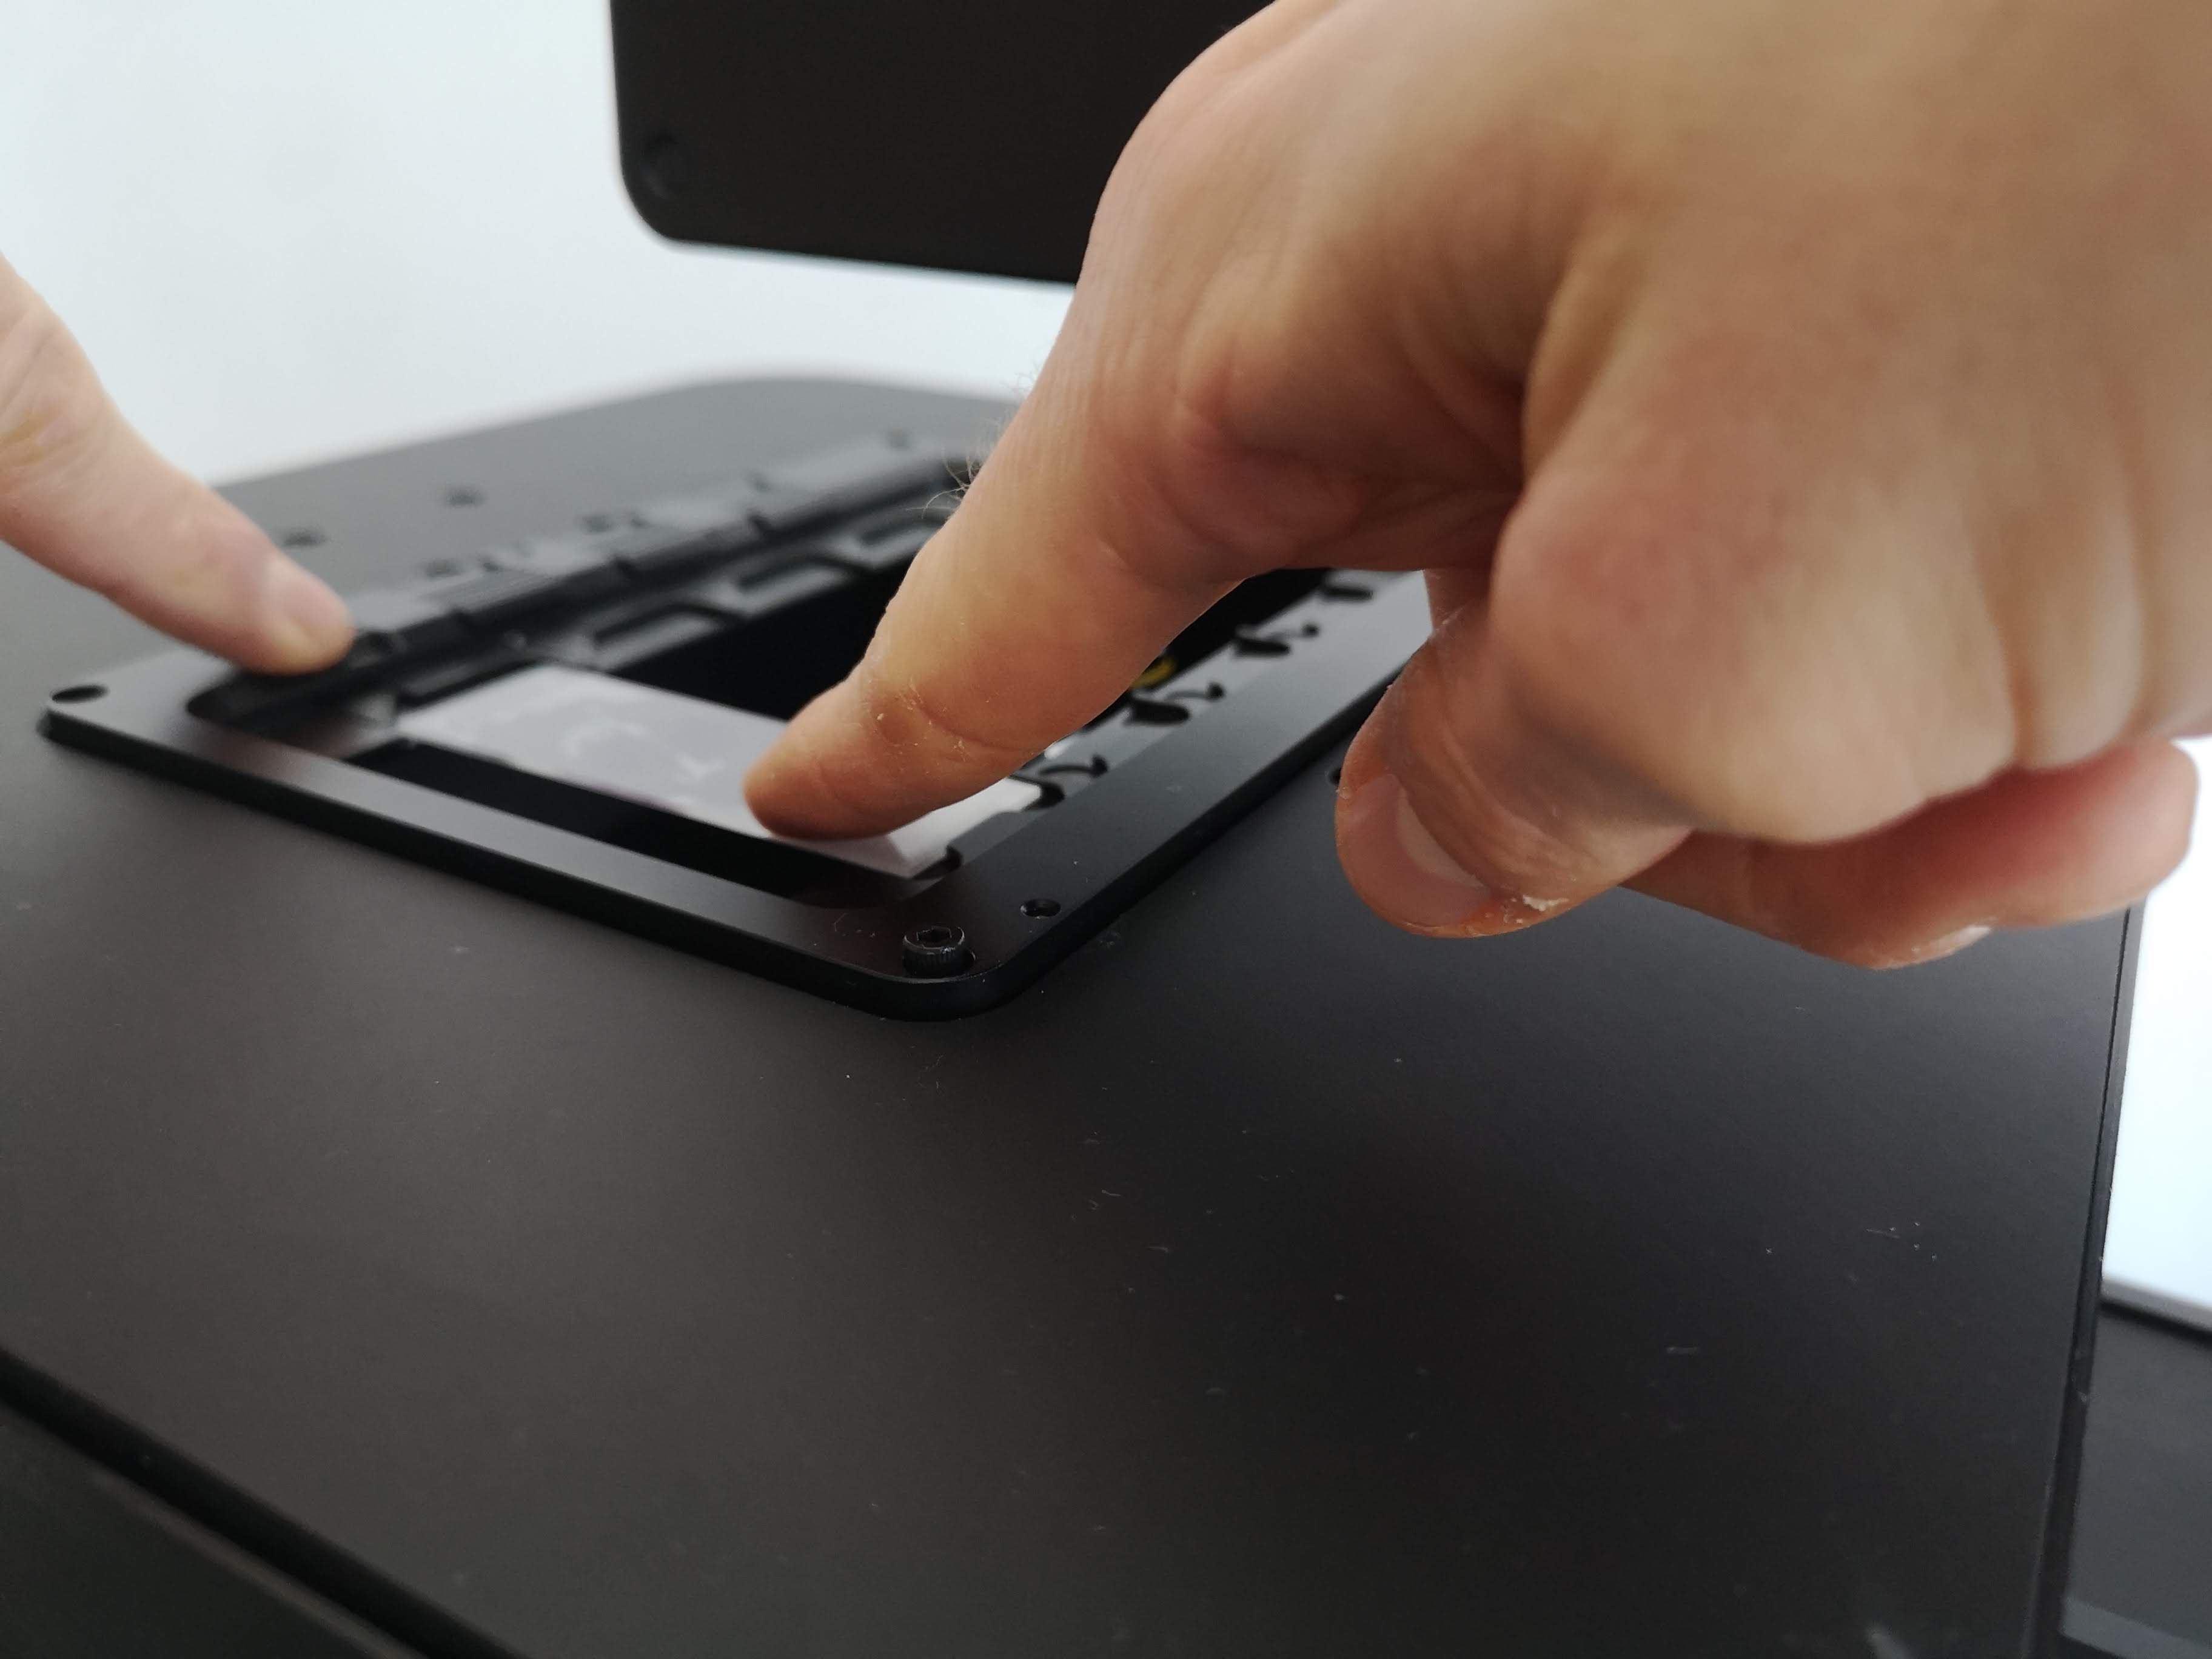 |
As we can see above, first one shorter edge of the microscope slide is placed against the flat edge of the slide slot; and then a finger pulls back the spring-loaded edge at the other end of the slot; and then the other shorter edge of the microscope slide is dropped into the spring-loaded edge of the slot.
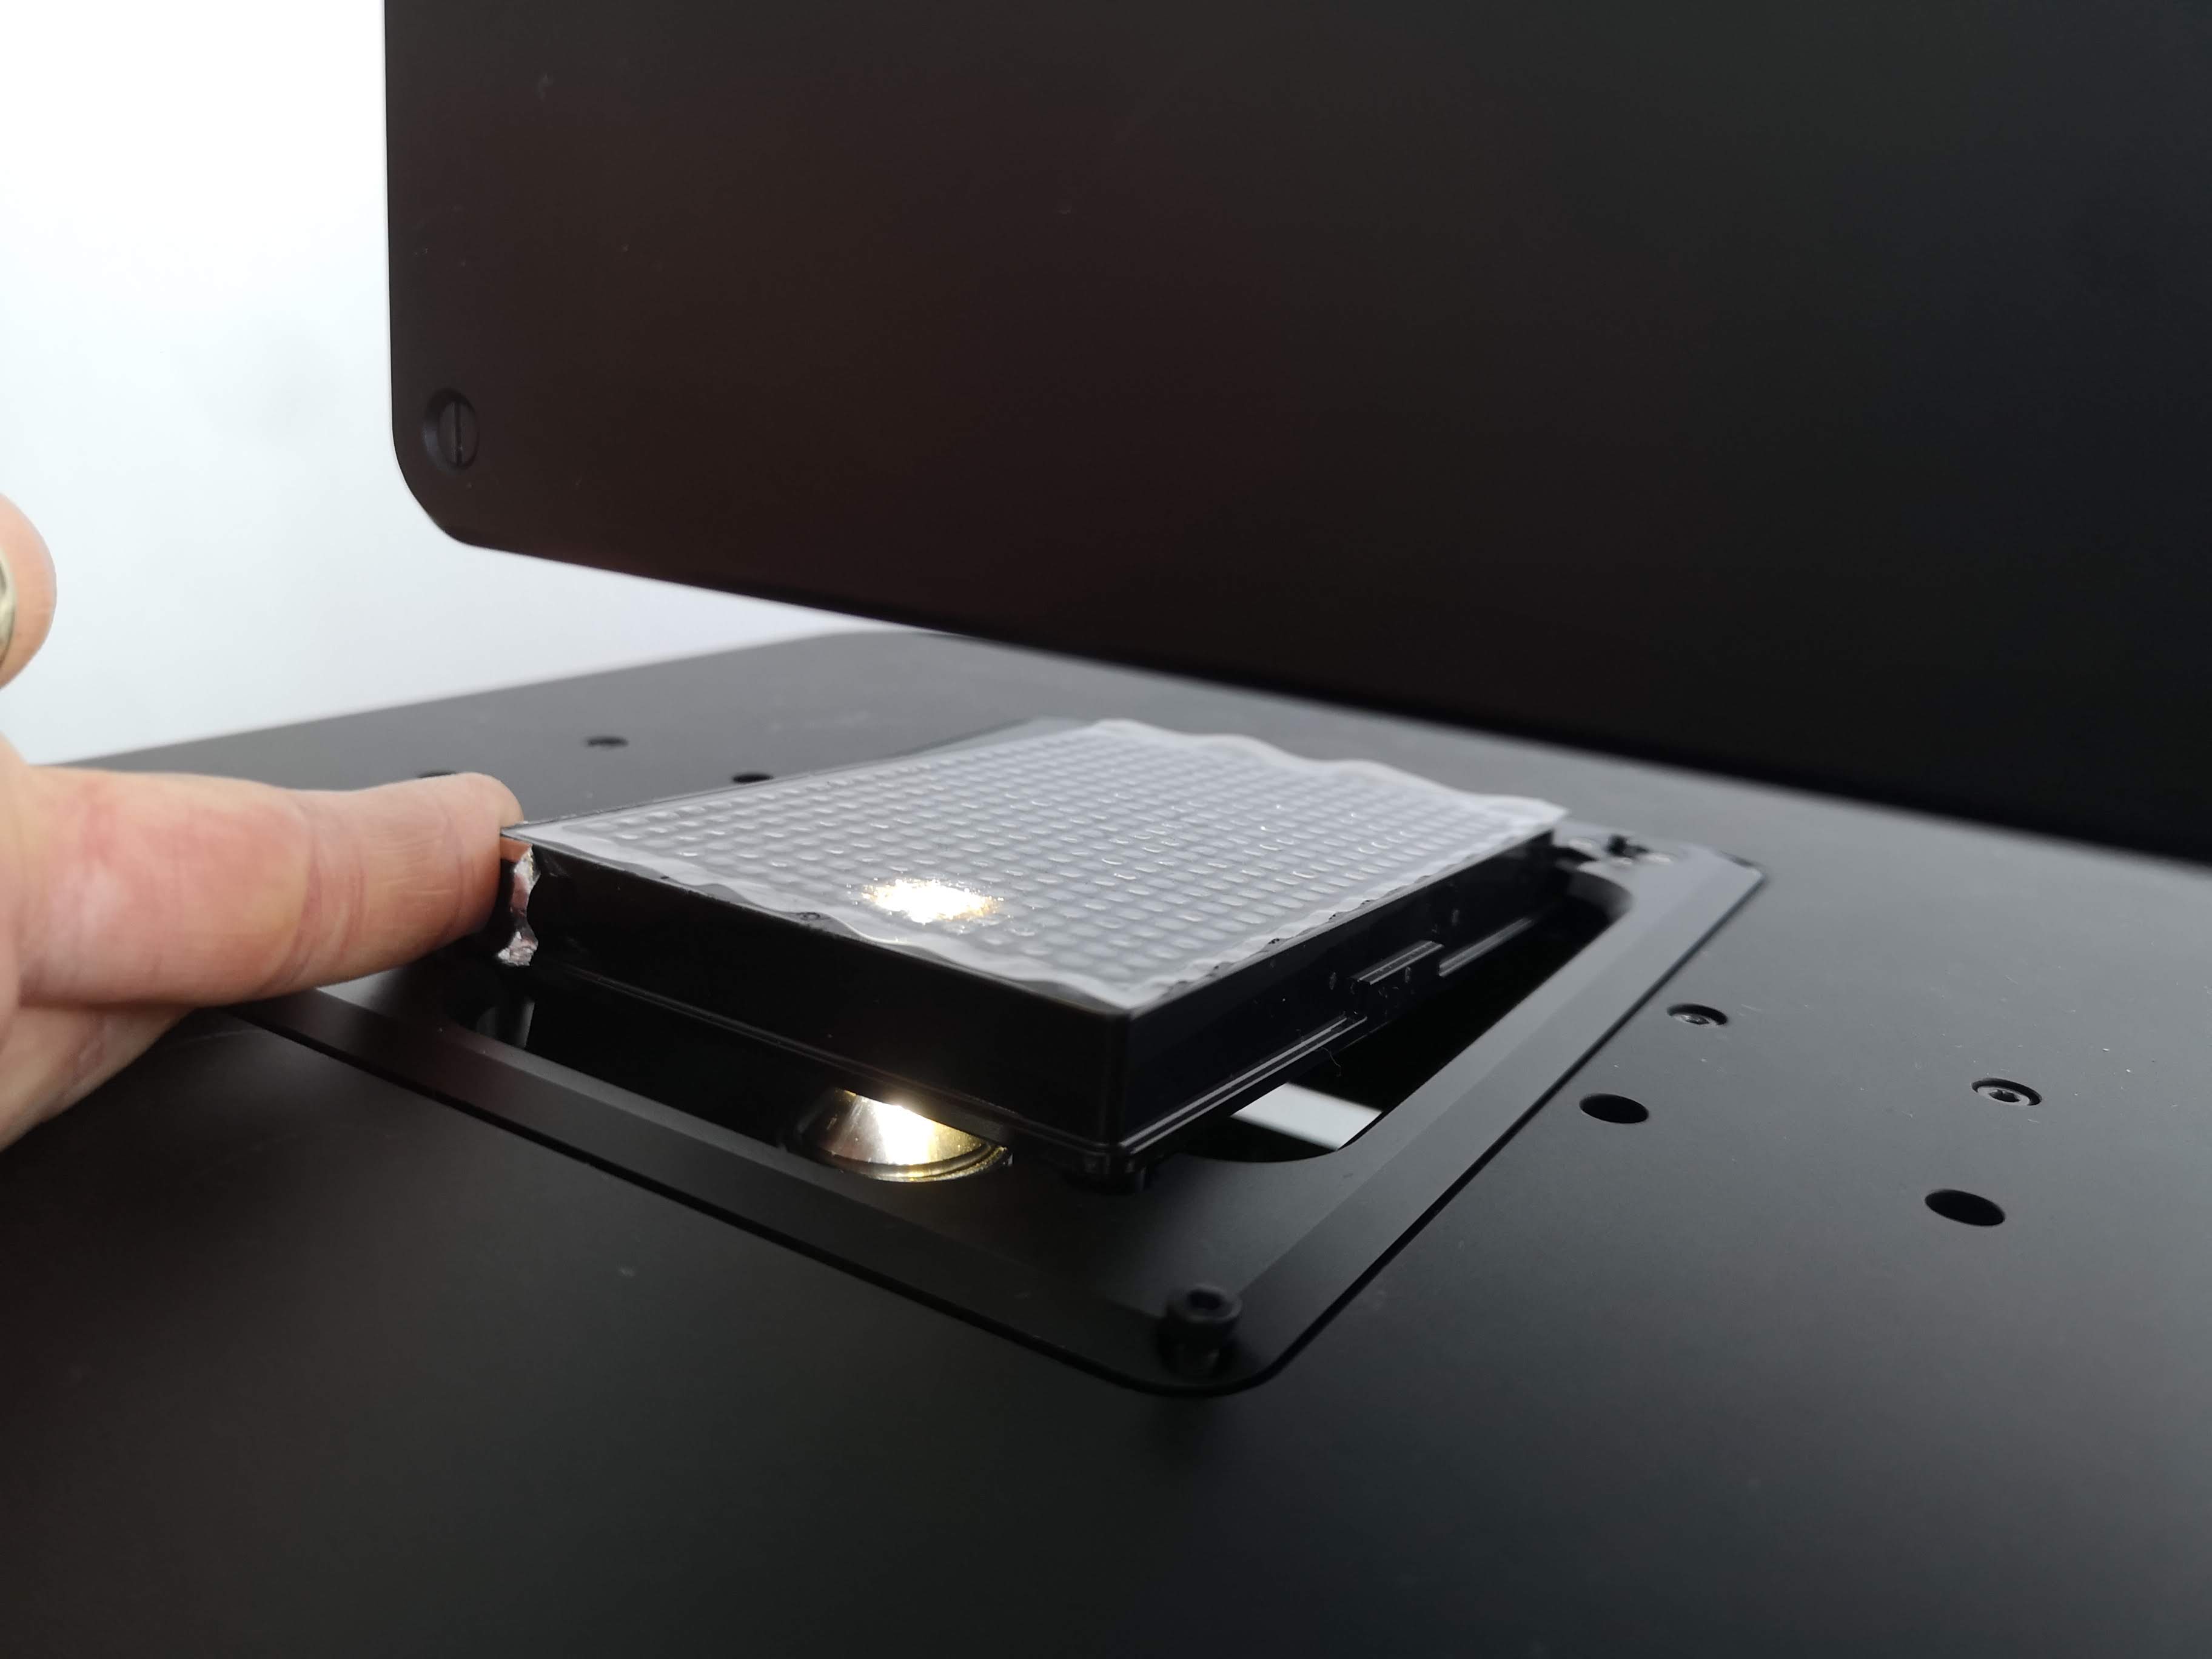
Now you can let go of the spring-loaded edge:
Now that we've inserted your first sample on a microscope slide, we can continue to the tutorial section to position your sample for imaging.
on a well plate
Take a well plate with a sample and place its A1 corner into the corner with the spring-loaded button, and then push the opposite corner of the well plate into the well-plate holder:
| Insert into corner with button | Insert into opposite corner |
|---|---|
 |  |
Now that we've inserted your first sample on a well plate, we can continue to the tutorial section to position your sample for imaging.
Open the live viewer
The basic interface for exploring microscopy samples and adjusting imaging settings is ImSwitch's Live View page. The Live View page is ImSwitch's home page, so it's what we see when we initially open ImSwitch. We can also open the Live View page from other pages in ImSwitch by clicking on the "Live View" entry in ImSwitch's navigation sidebar.
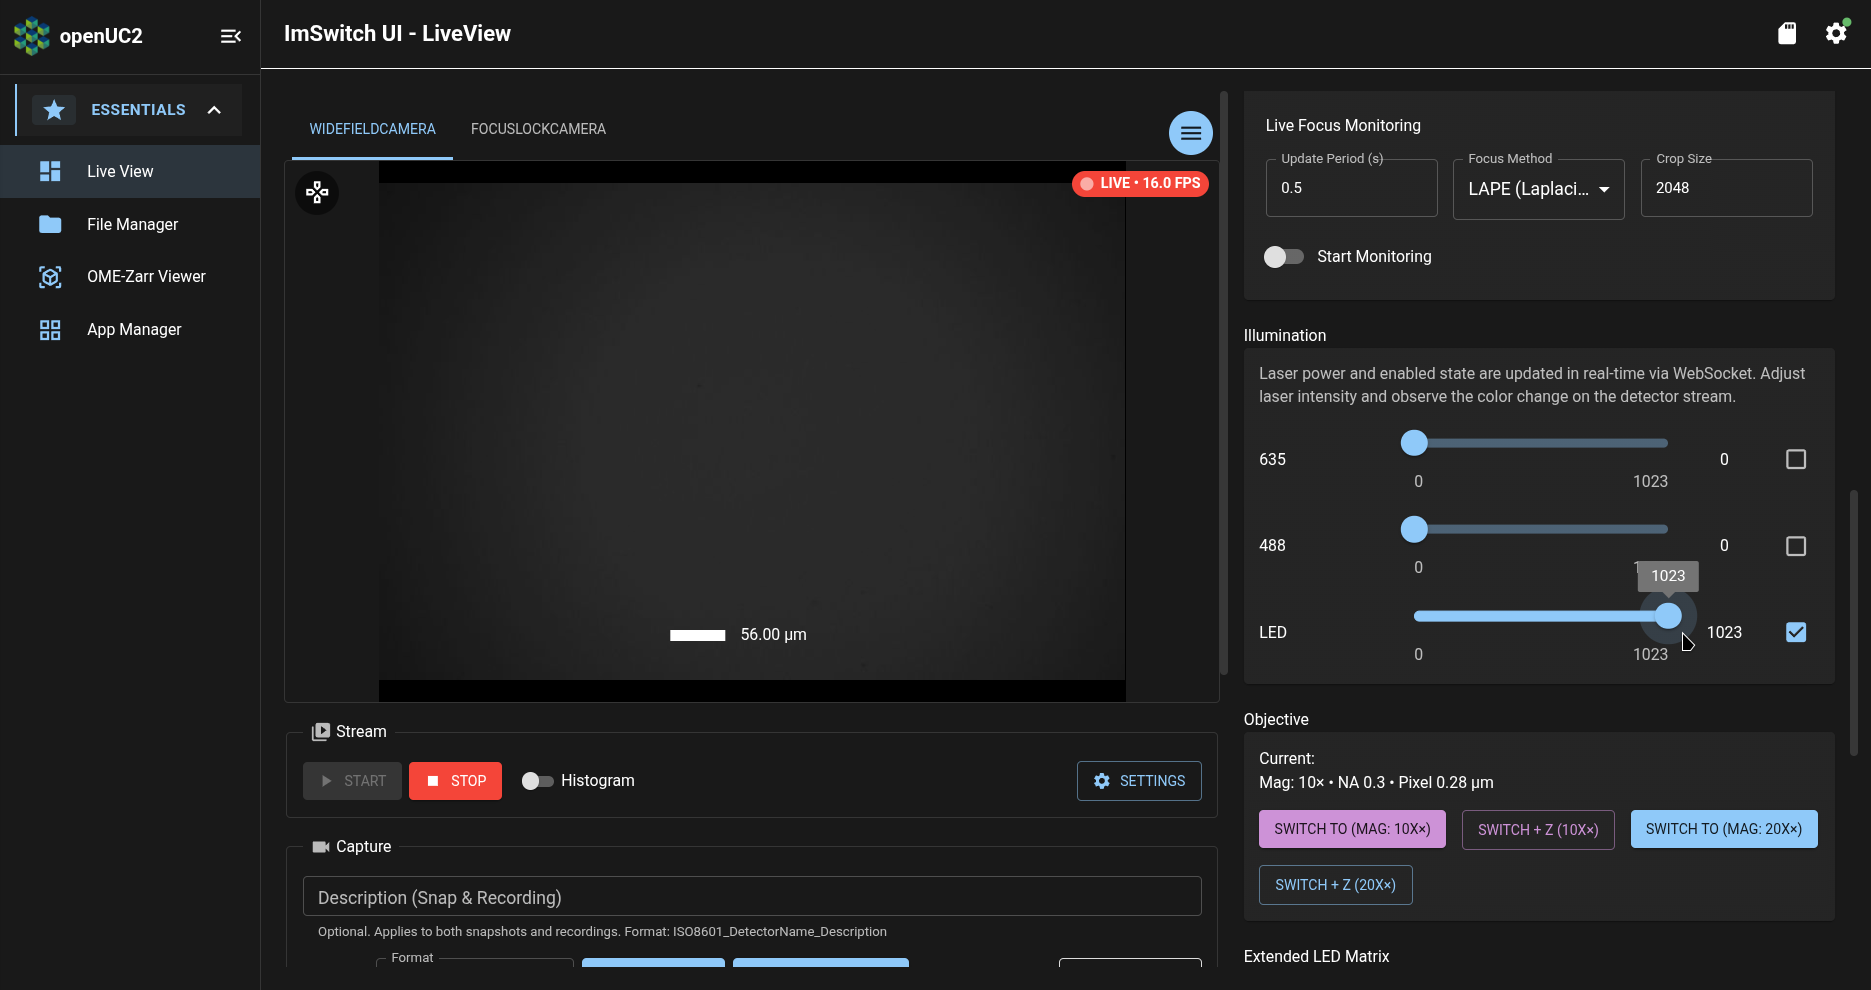
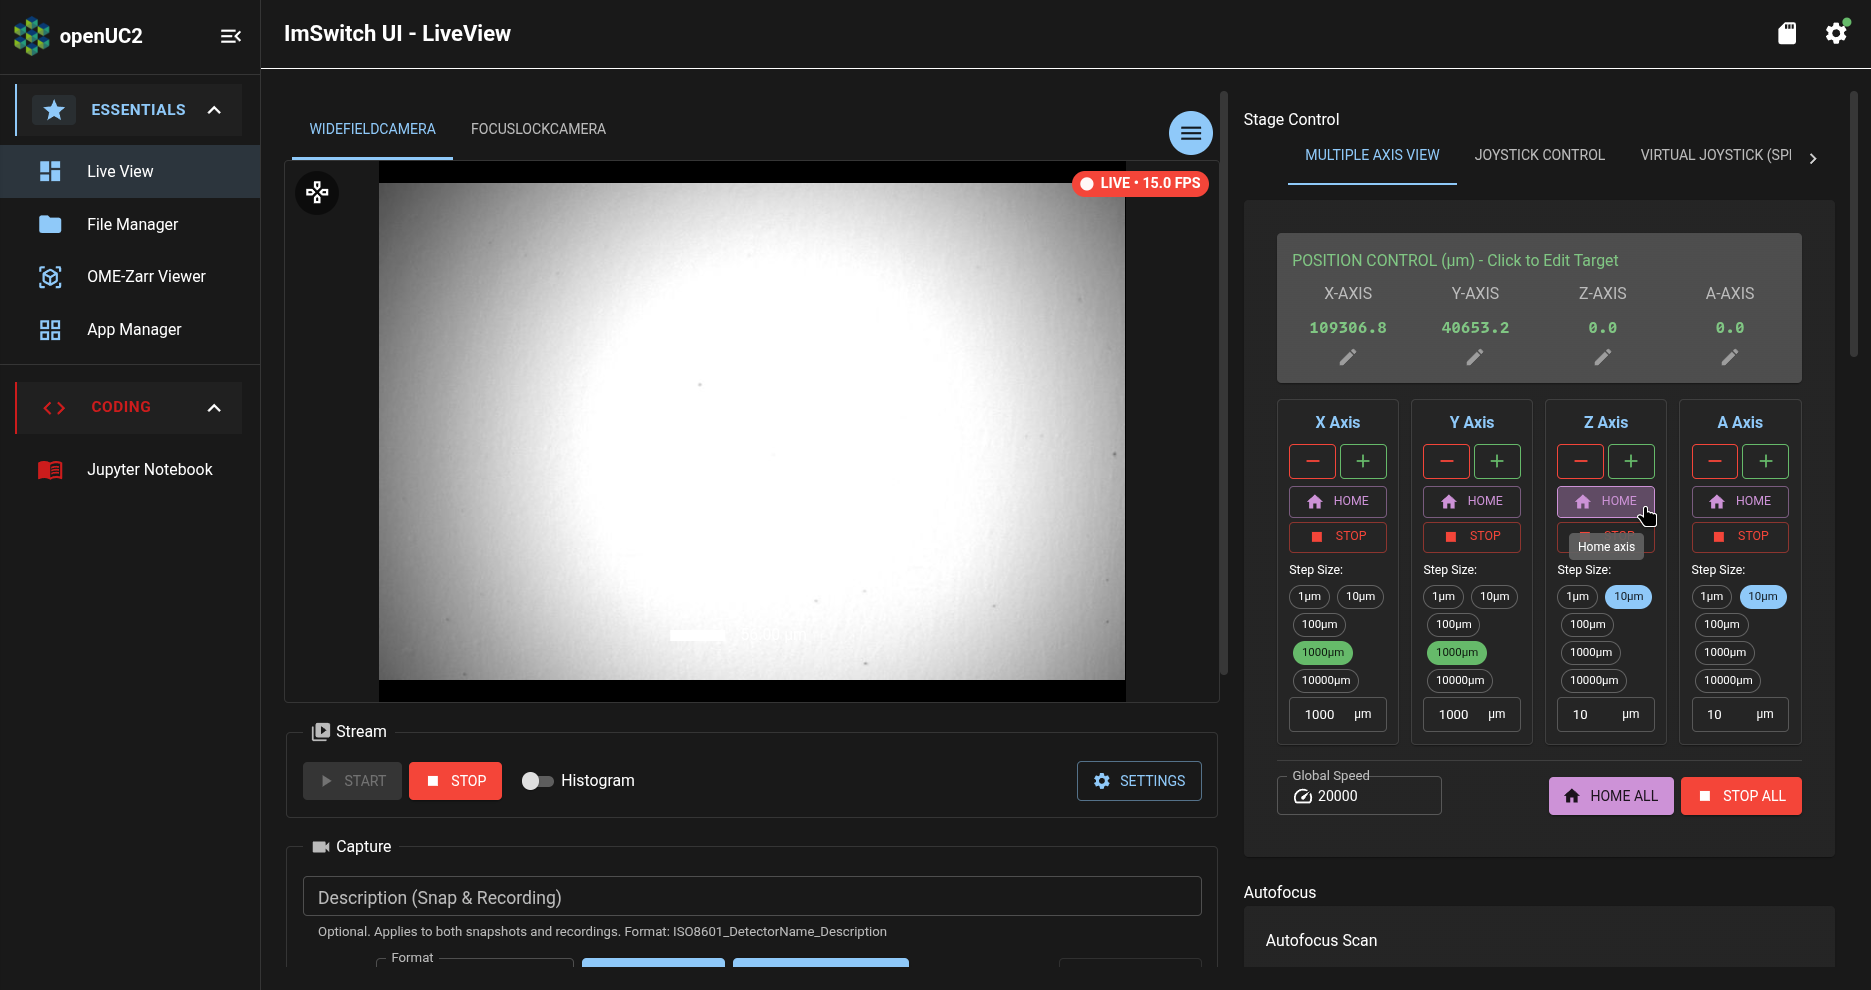
Once you open the Live View page, it will look something like this:
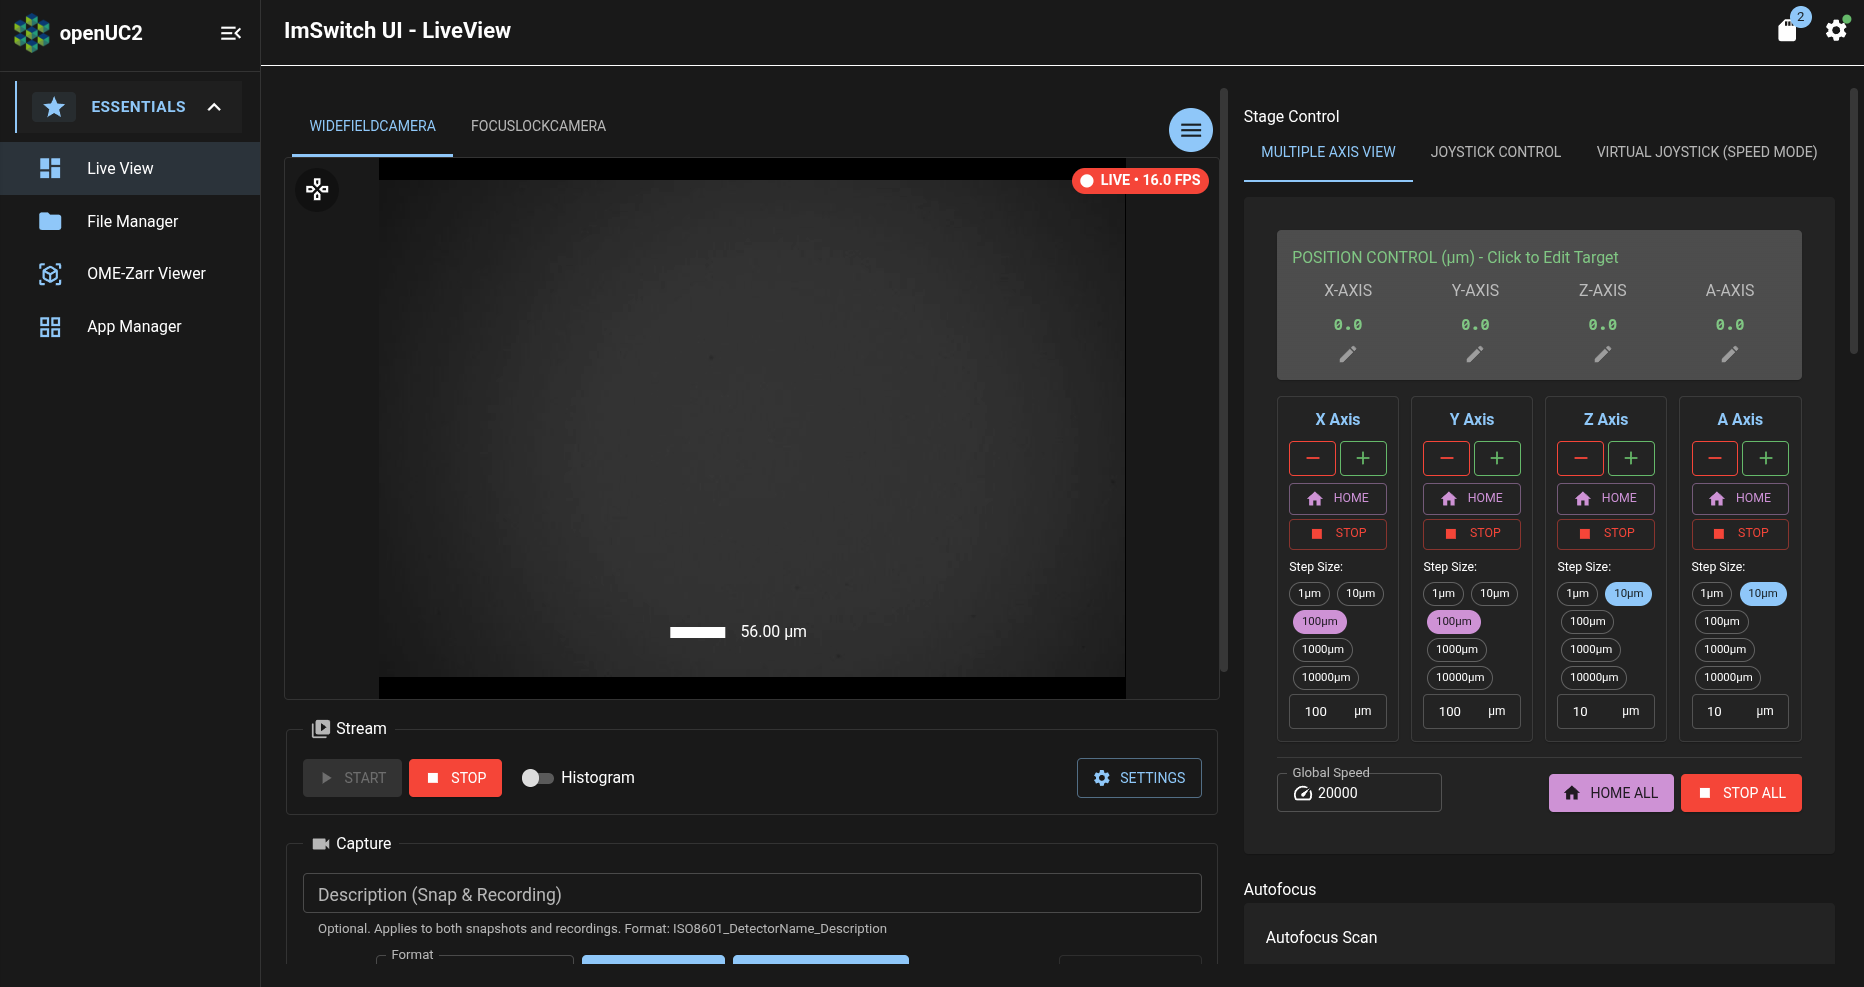
In the center of the above screenshot, under the "WIDEFIELDCAMERA" tab, we can see a camera preview stream from your FRAME's main camera. This preview stream has red indicator (which says "LIVE - 16.0 FPS" in the above screenshot) in its upper-right corner which indicates whether the preview is a live preview, as well as the framerate of the preview stream.
Position your first sample
Now we'll adjust the FRAME stage's position to bring your sample into the view of the camera preview stream.
Turn on illumination
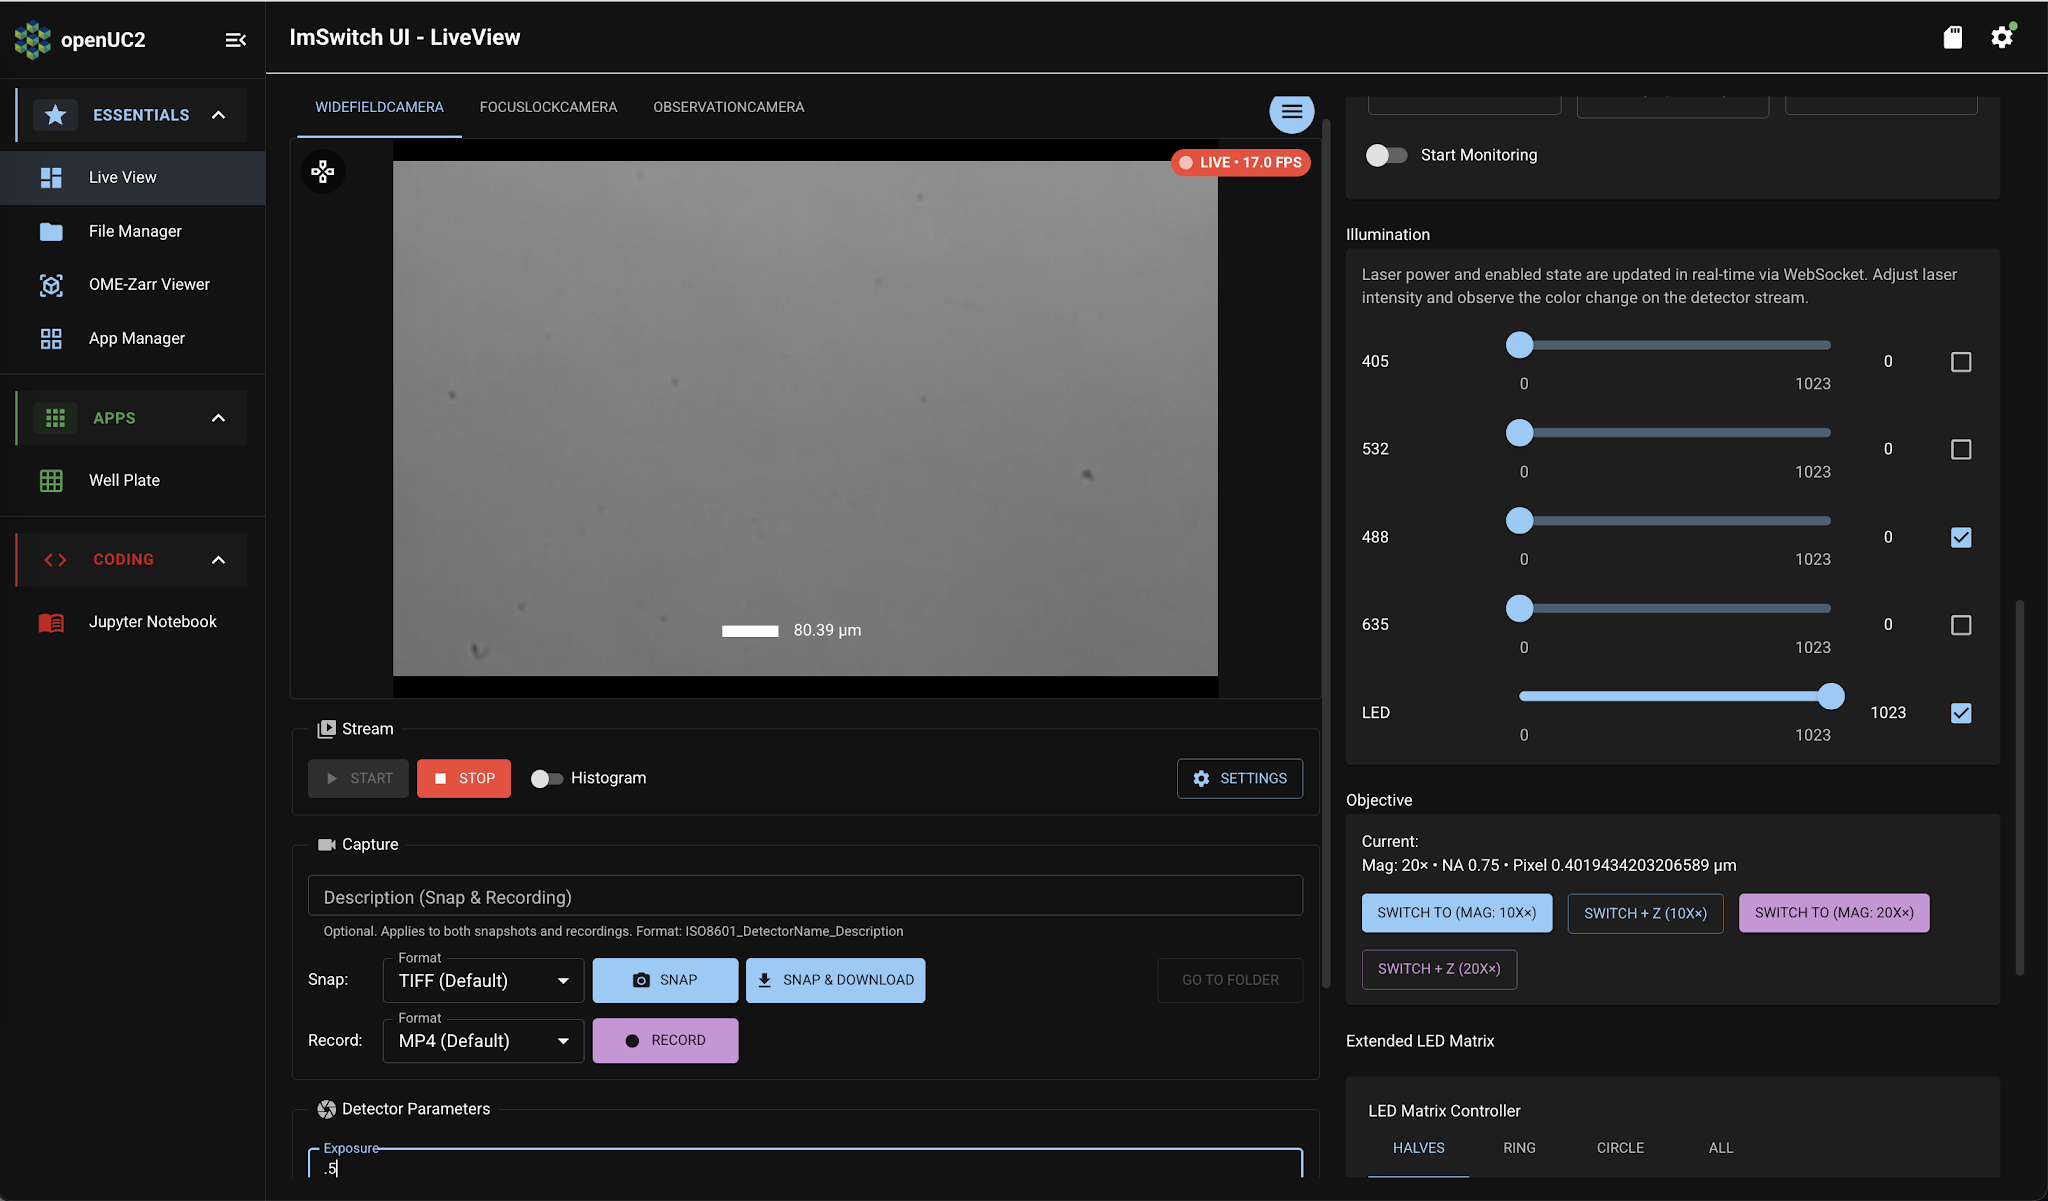
First, we'll need to illuminate the sample. In the right column of the Live View page, which has the "Stage Control" and "Autofocus" sections, scroll down to the "Illumination" section:
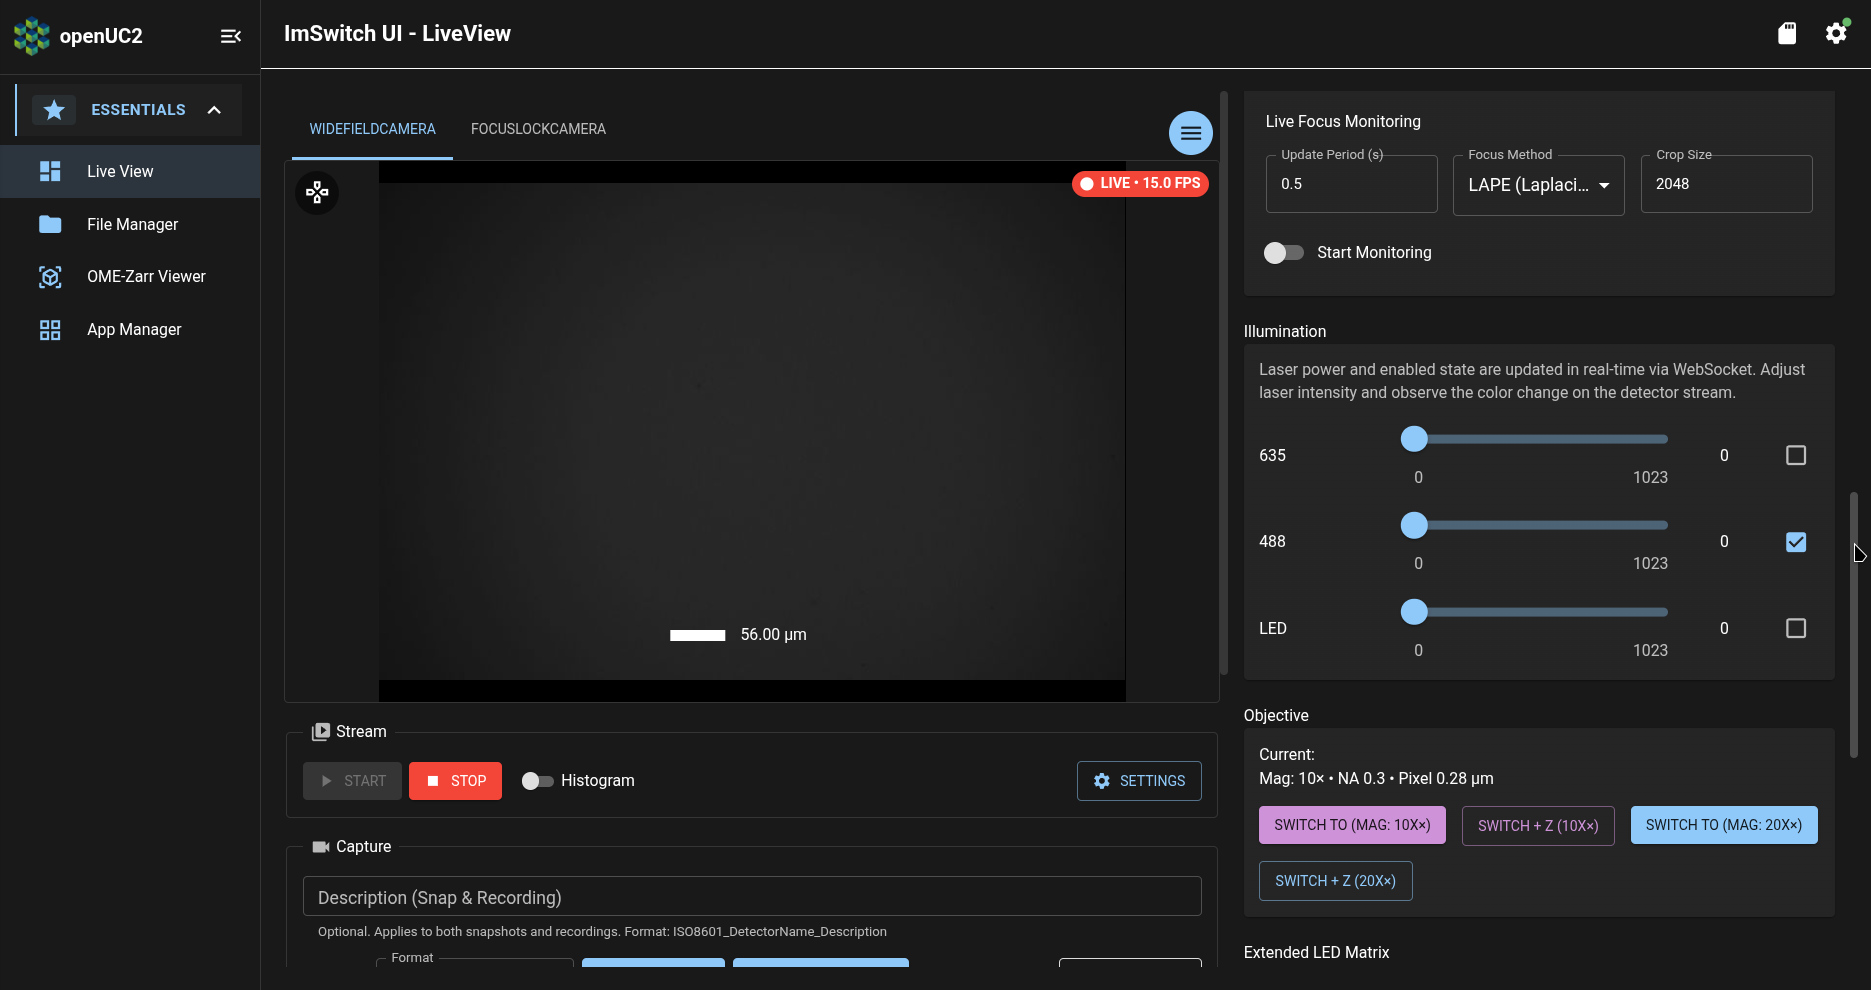
Now uncheck the checkbox for 488 nm fluorescence illumination, and check the checkbox for LED illumination, and adjust the slider for LED illumination to 1023 for maximum illumination intensity:
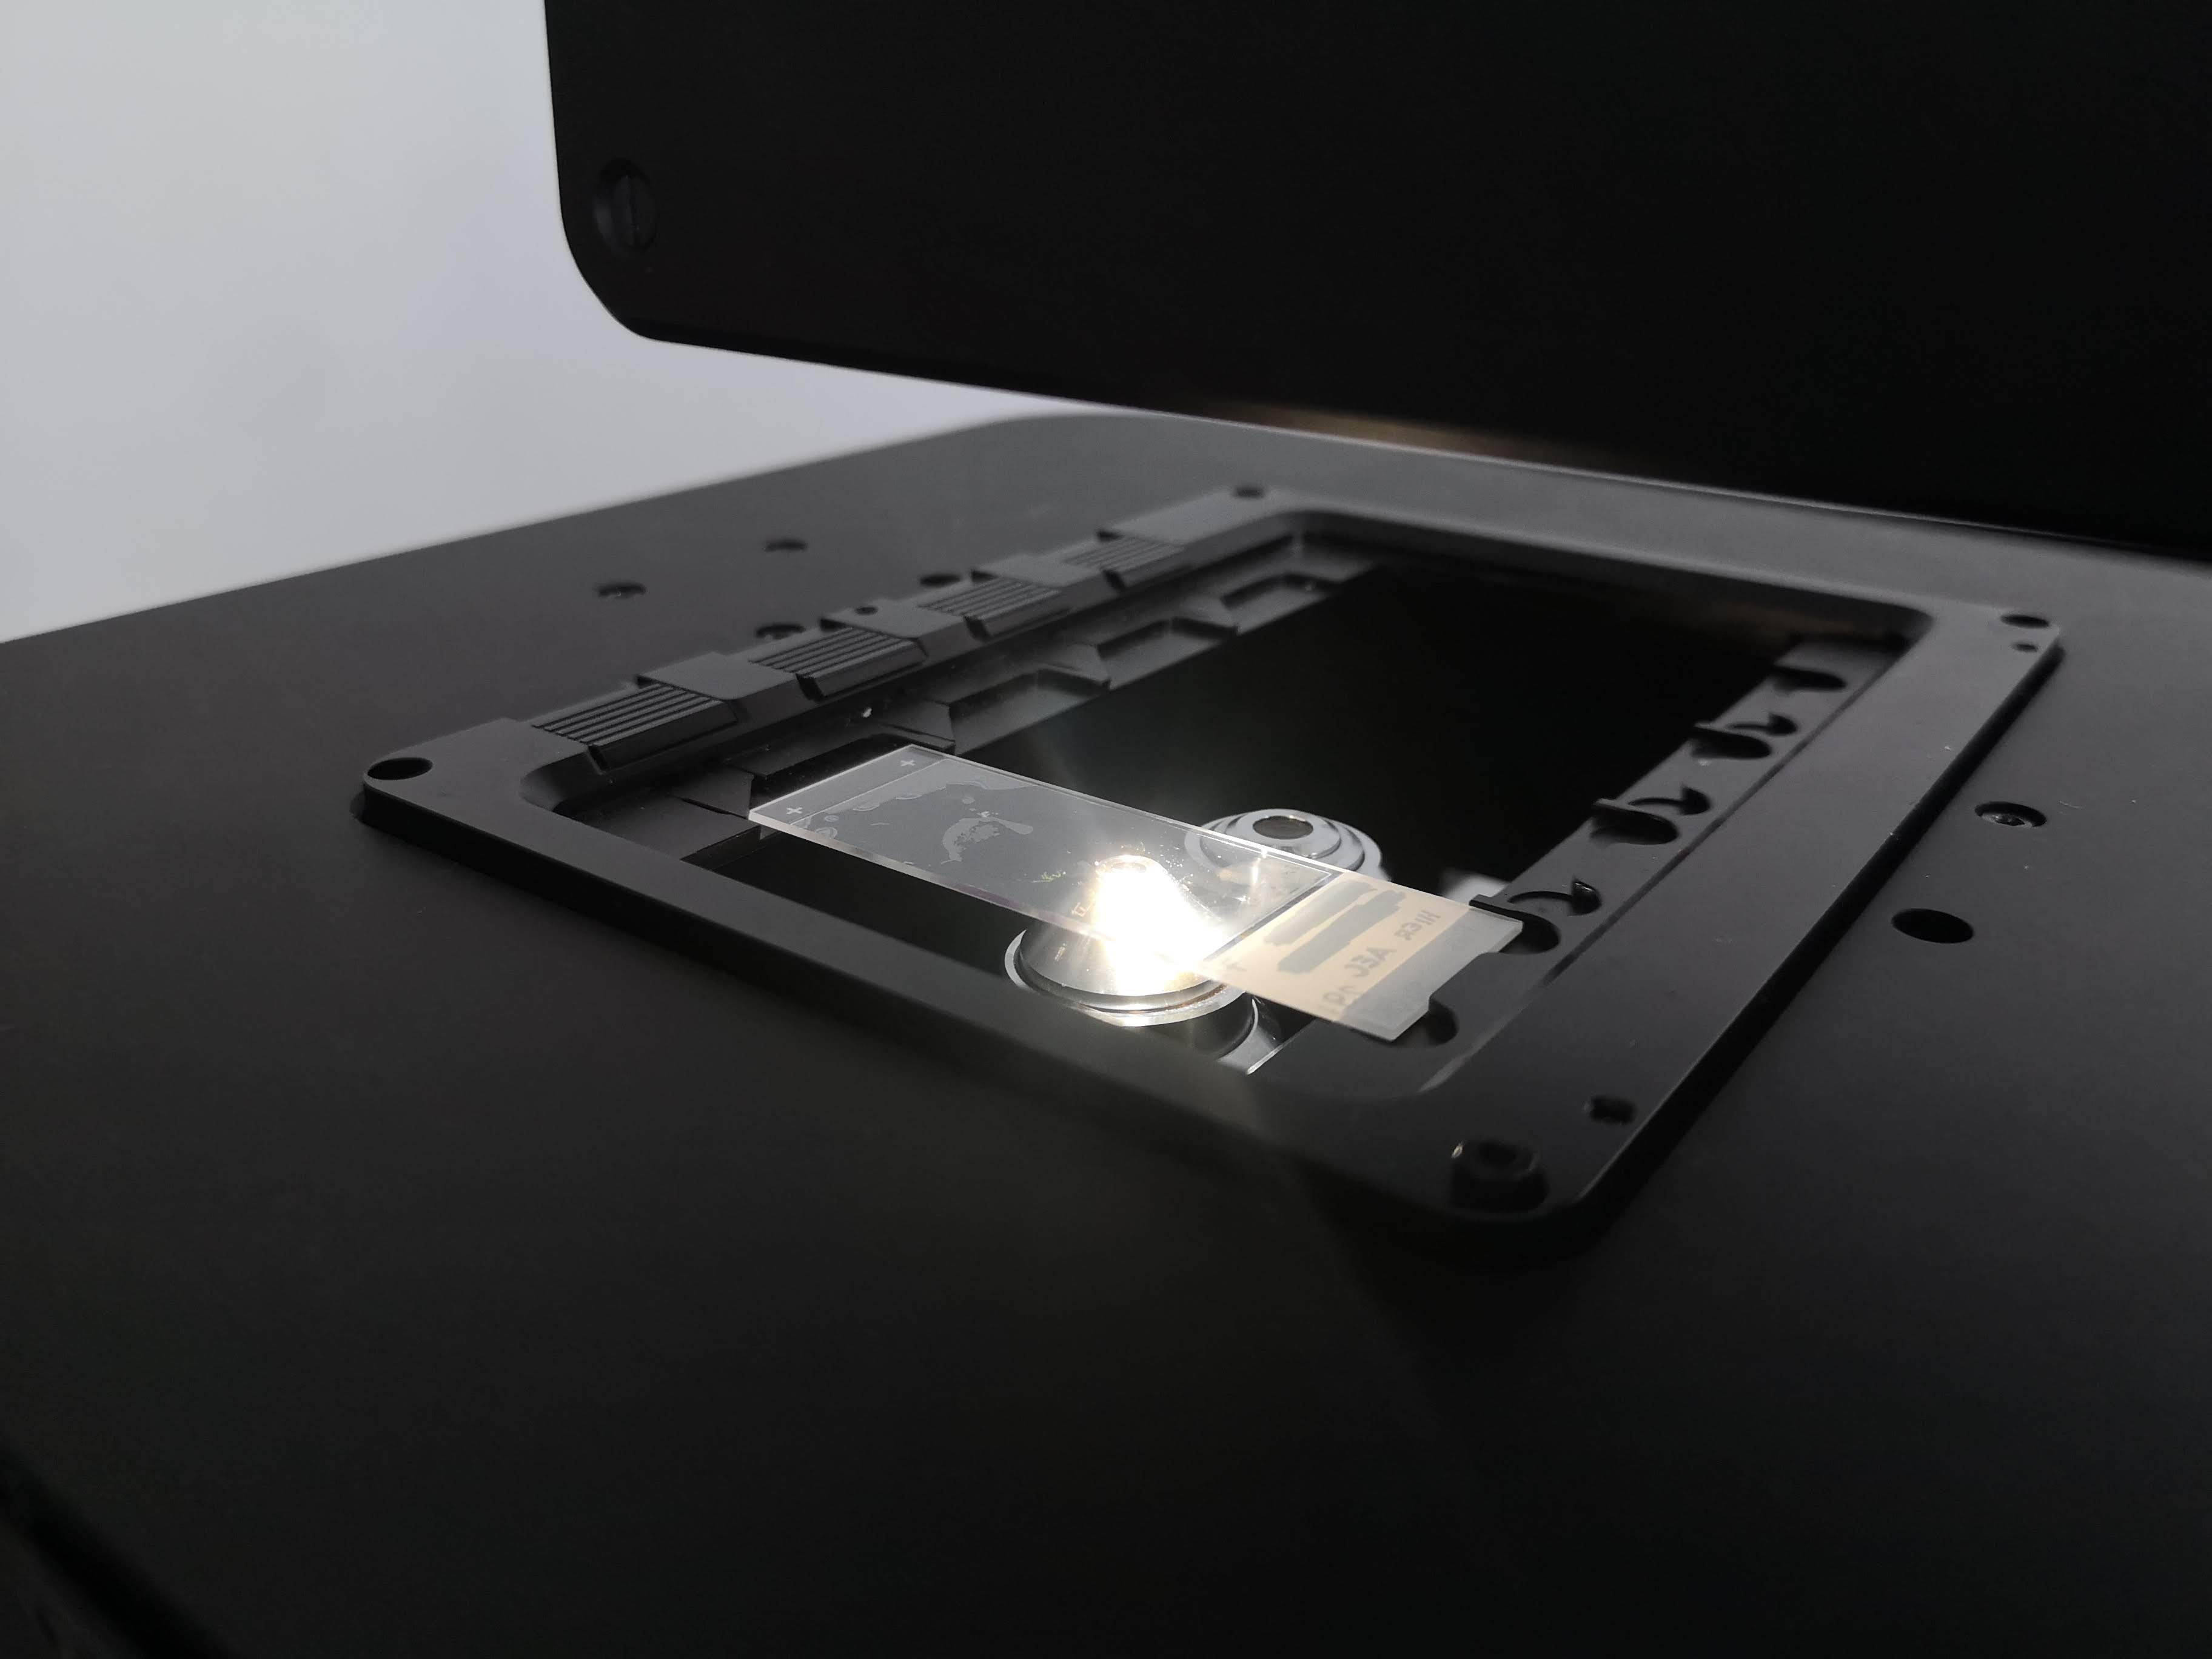
Now you should see light shining on your objective lens:
Adjust exposure
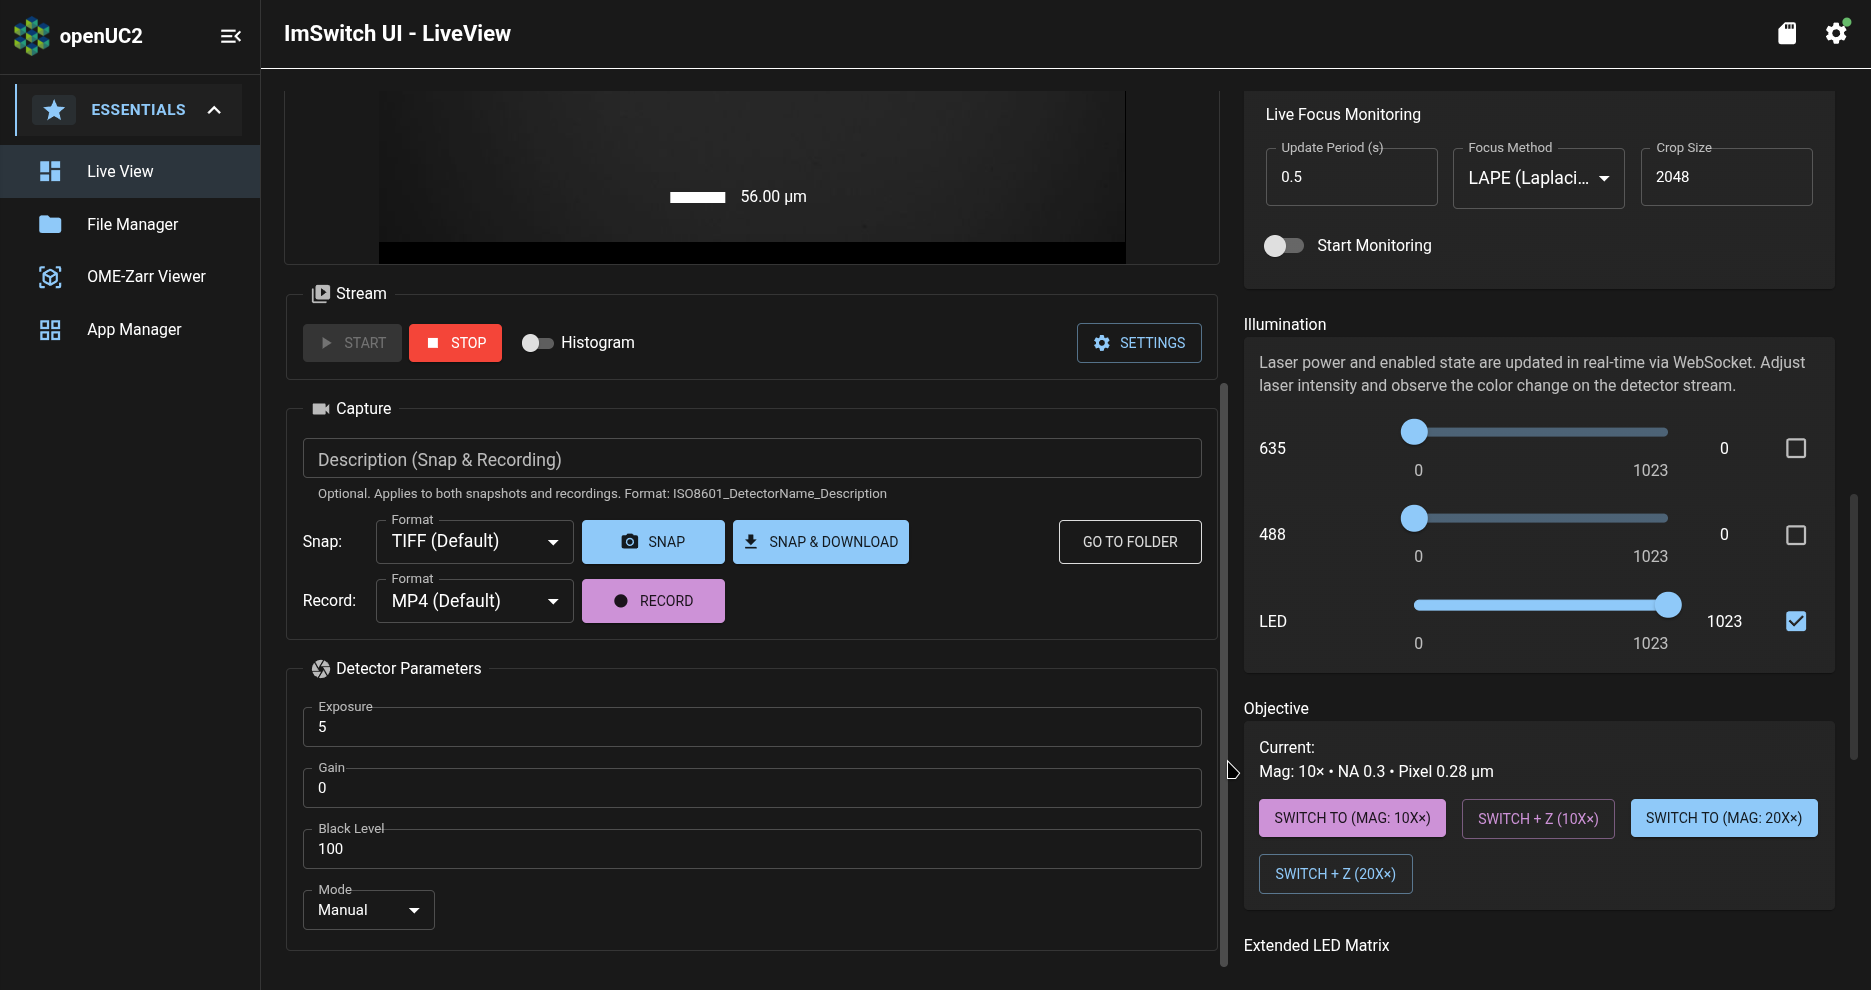
Next, we'll need to adjust the camera's exposure time setting. In the main column of the Live View page, which has the camera preview stream, scroll down to the "Detector Parameters" section:
Then adjust the exposure time as needed to get an image in the camera preview stream which is neither too bright nor too dark:
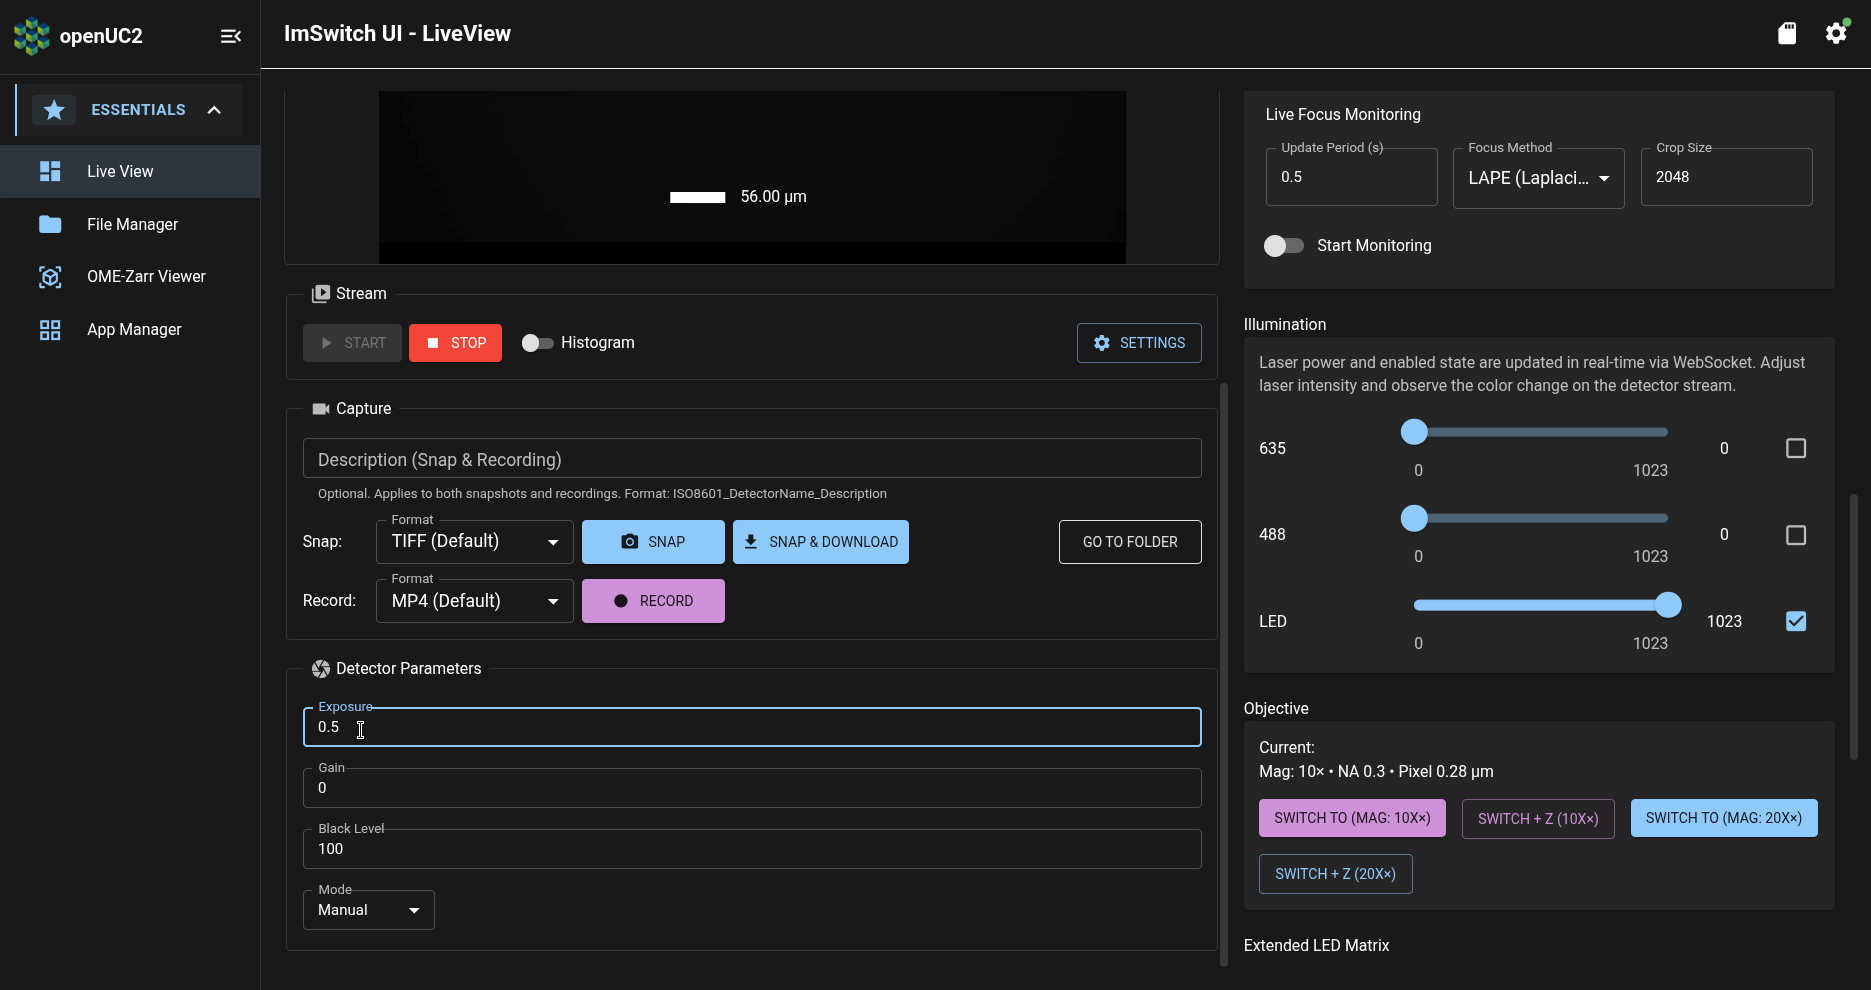
In the above screenshot, the exposure time has been set to 0.5 milliseconds. The optimal exposure setting will depend on the specific camera in your FRAME, but it should probably be below 10 milliseconds. Try to adjust the exposure so that the image in the camera preview stream is a moderate gray color:
Adjust stage x-y position
Now let's move the sample into the view of the camera. In the right column of the Live View page, scroll back up to the Stage Control section:

Now repeatedly press the "+" and "-" buttons for the X Axis and the Y Axis to move the stage until the sample is over the objective lens:
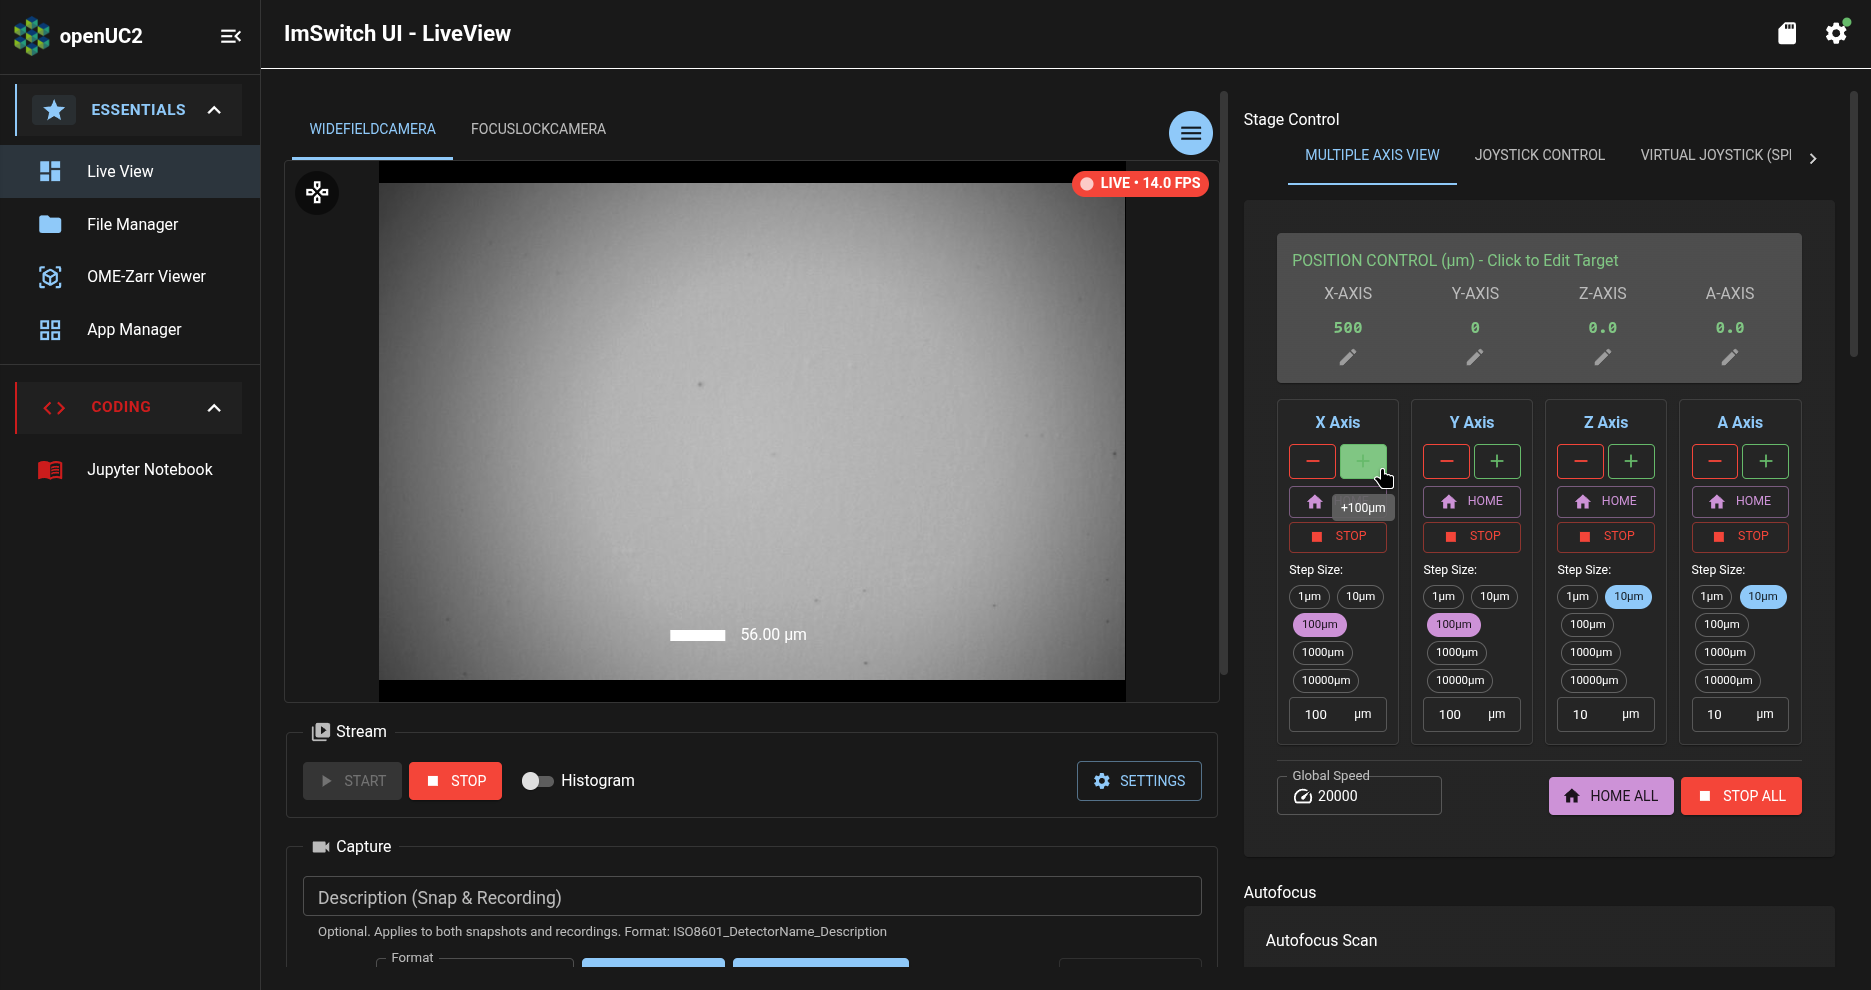
In the above screenshot, pressing the "+" button will move the X Axis by an increment of 100 micrometers. Do move the X Axis by larger increments, we can select a different step size to use for the "+" and "-" buttons:
After enough adjustment of the positions of the X and Y axes, your sample should be located directly over the objective lens:
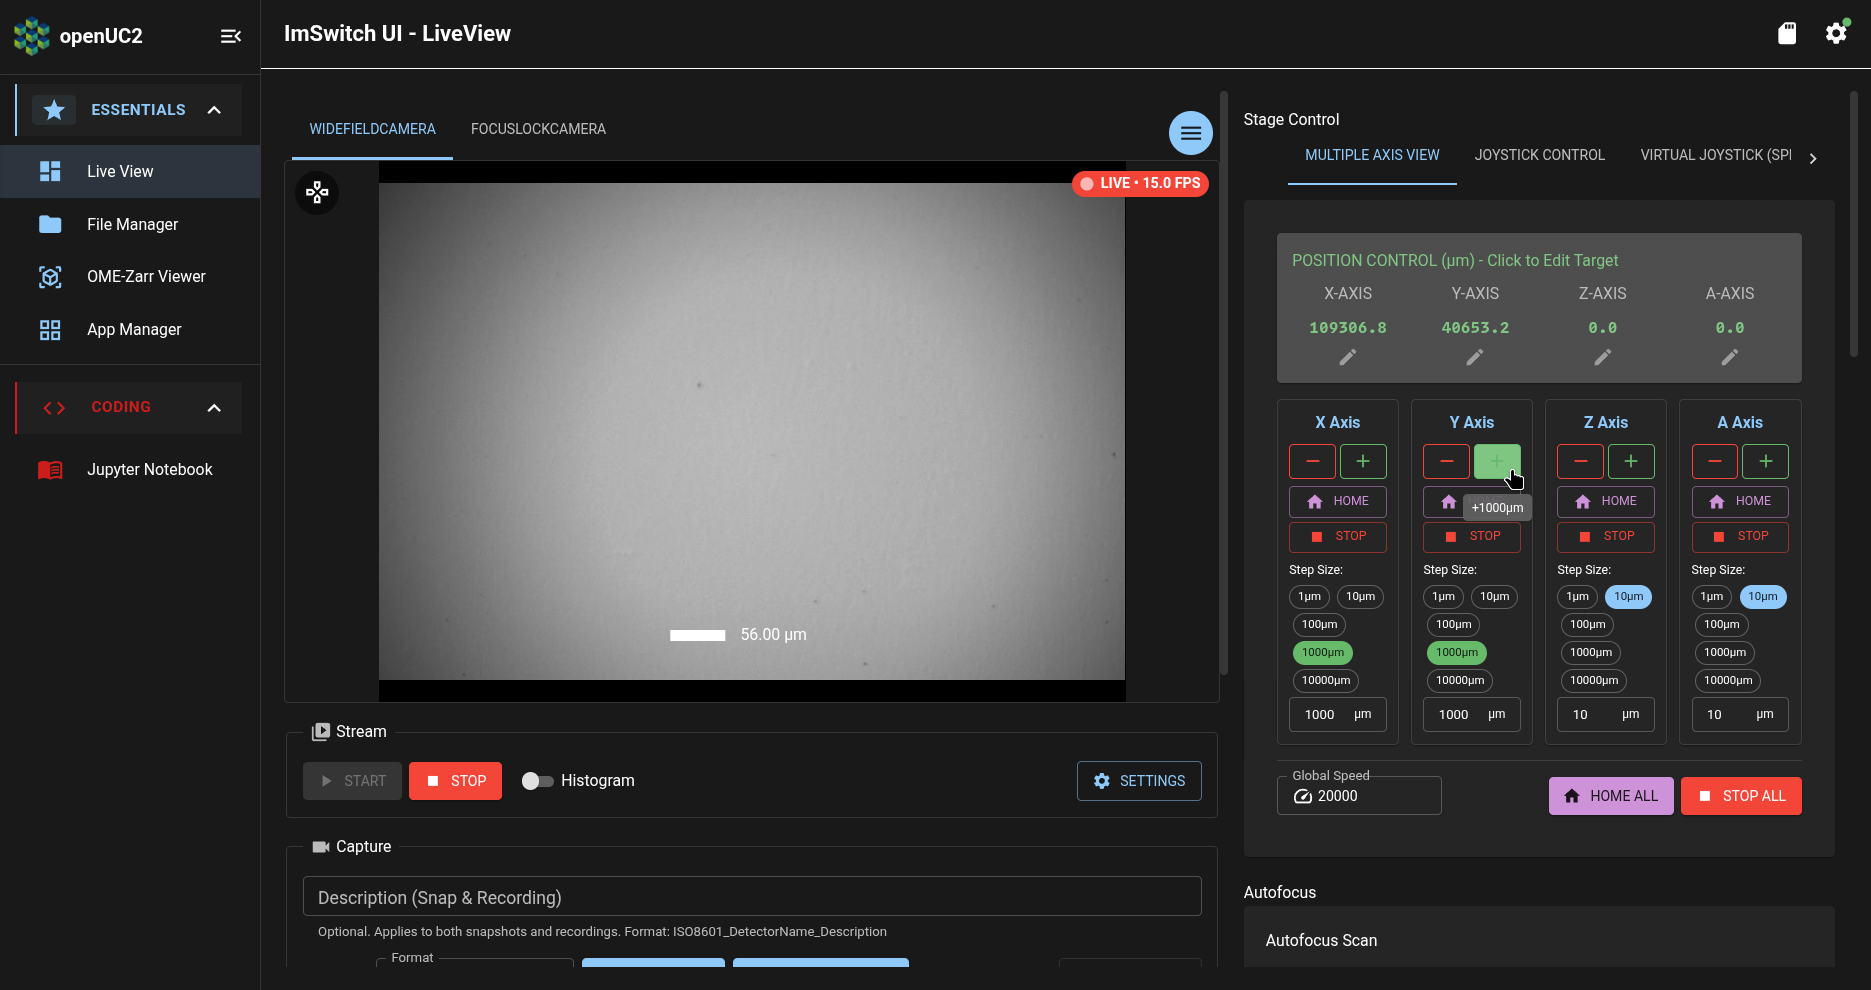
Your sample is probably still out-of-focus, so (like in the above screenshot) you probably still won't see anything meaningful in the camera preview stream.
Adjust stage focus
Now let's bring your sample into focus, so that we can actually see something in the camera preview stream.
First, we'll move the sample as far away from the objective lens as possible, by moving the Z Axis to its zero position. Click on the "Home" button:
If the Z Axis isn't already at its zero position, it will move until it reaches its zero position.
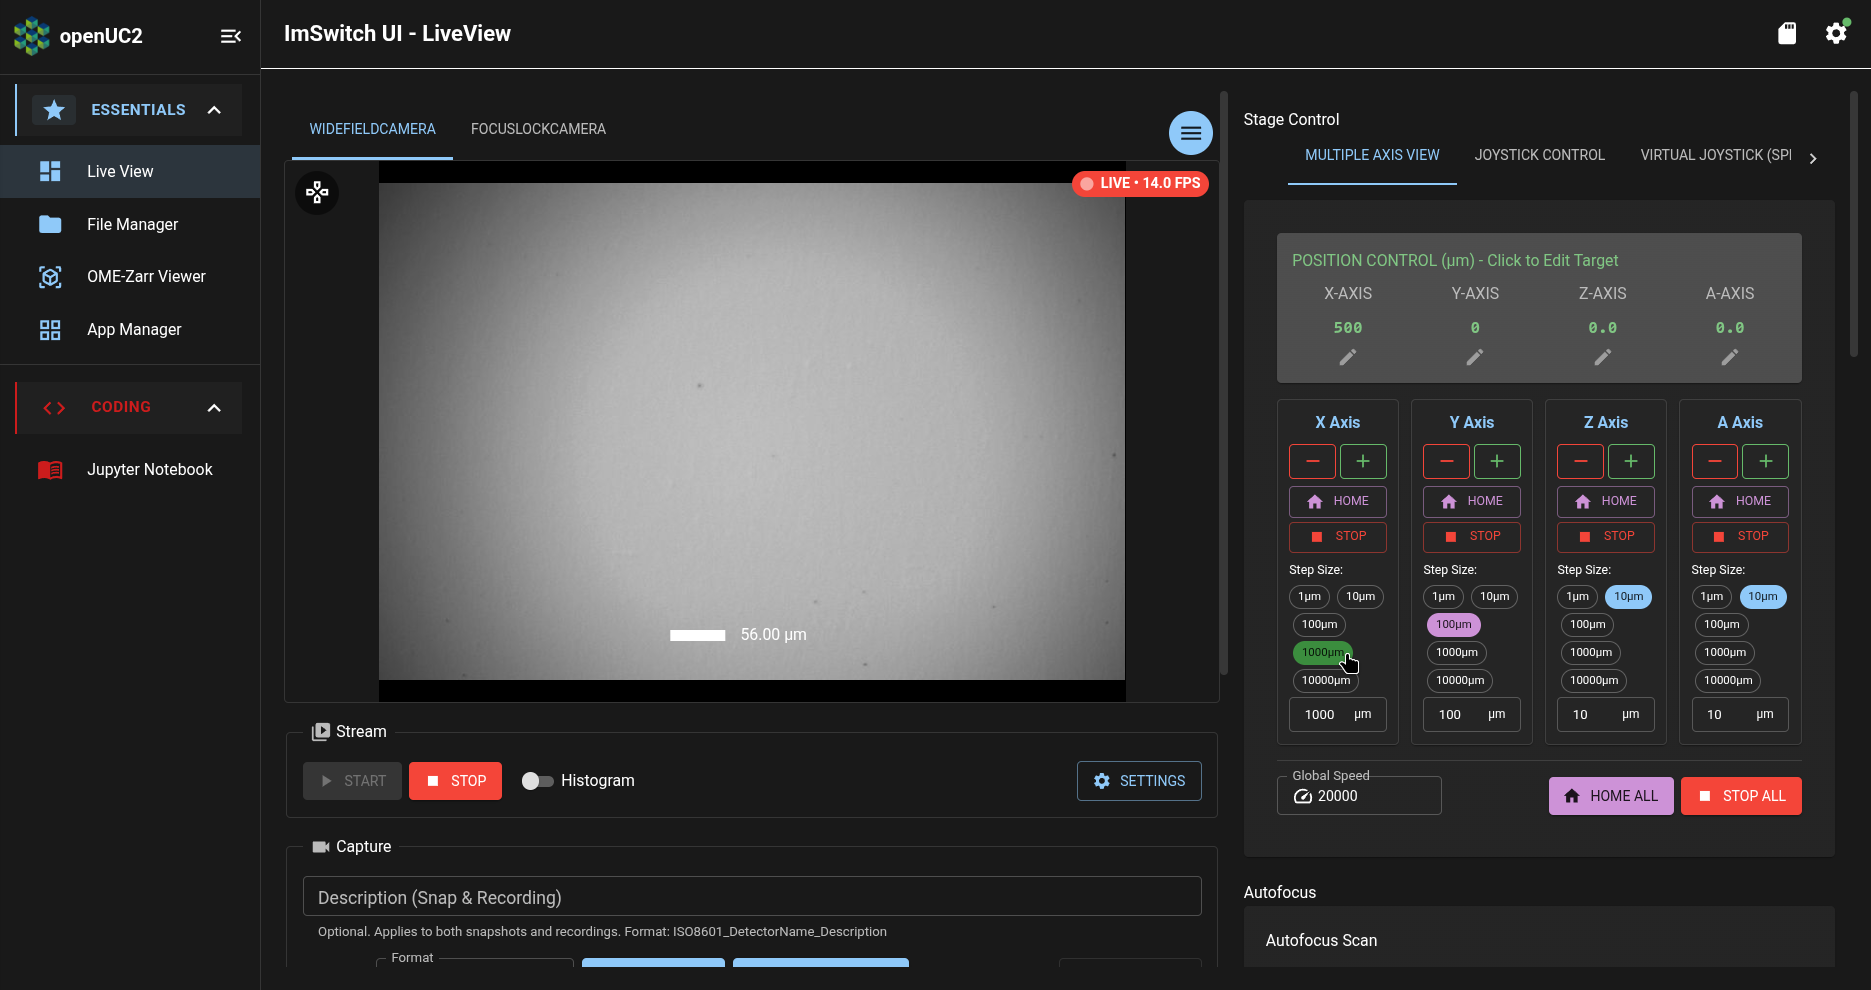
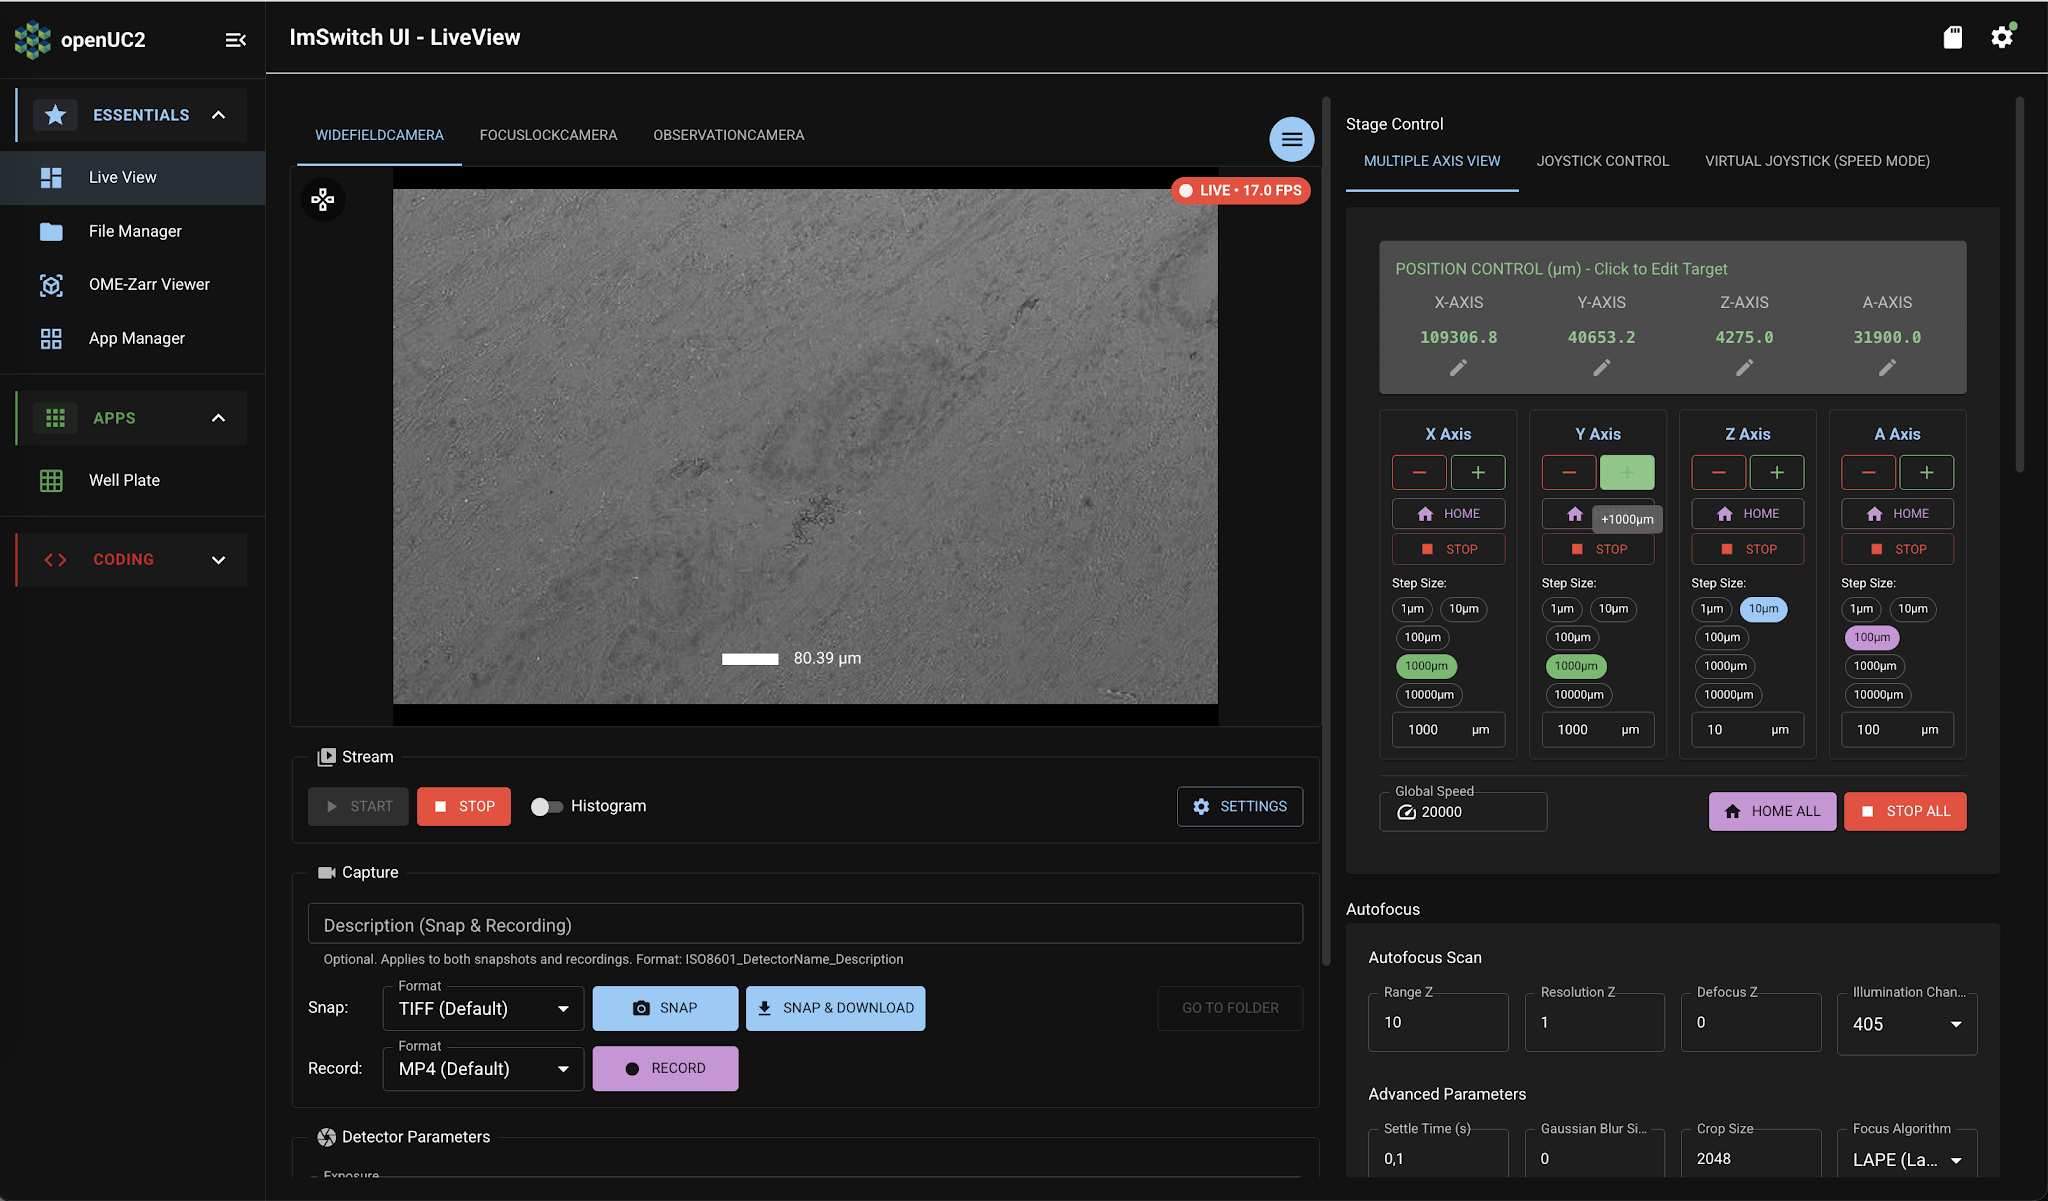
Now we'll perform coarse focusing of our sample: select a Z-axis step size of 1000 micrometers, and repeatedly press the "+" button until you start to see something blurry in the camera preview:

Now we'll perform fine focusing of our sample: using Z-axis step sizes of 100 micrometers and then 10 micrometers, repeatedly press the "+" and "-" buttons until you see a sharp image in the camera preview:
Save your first image
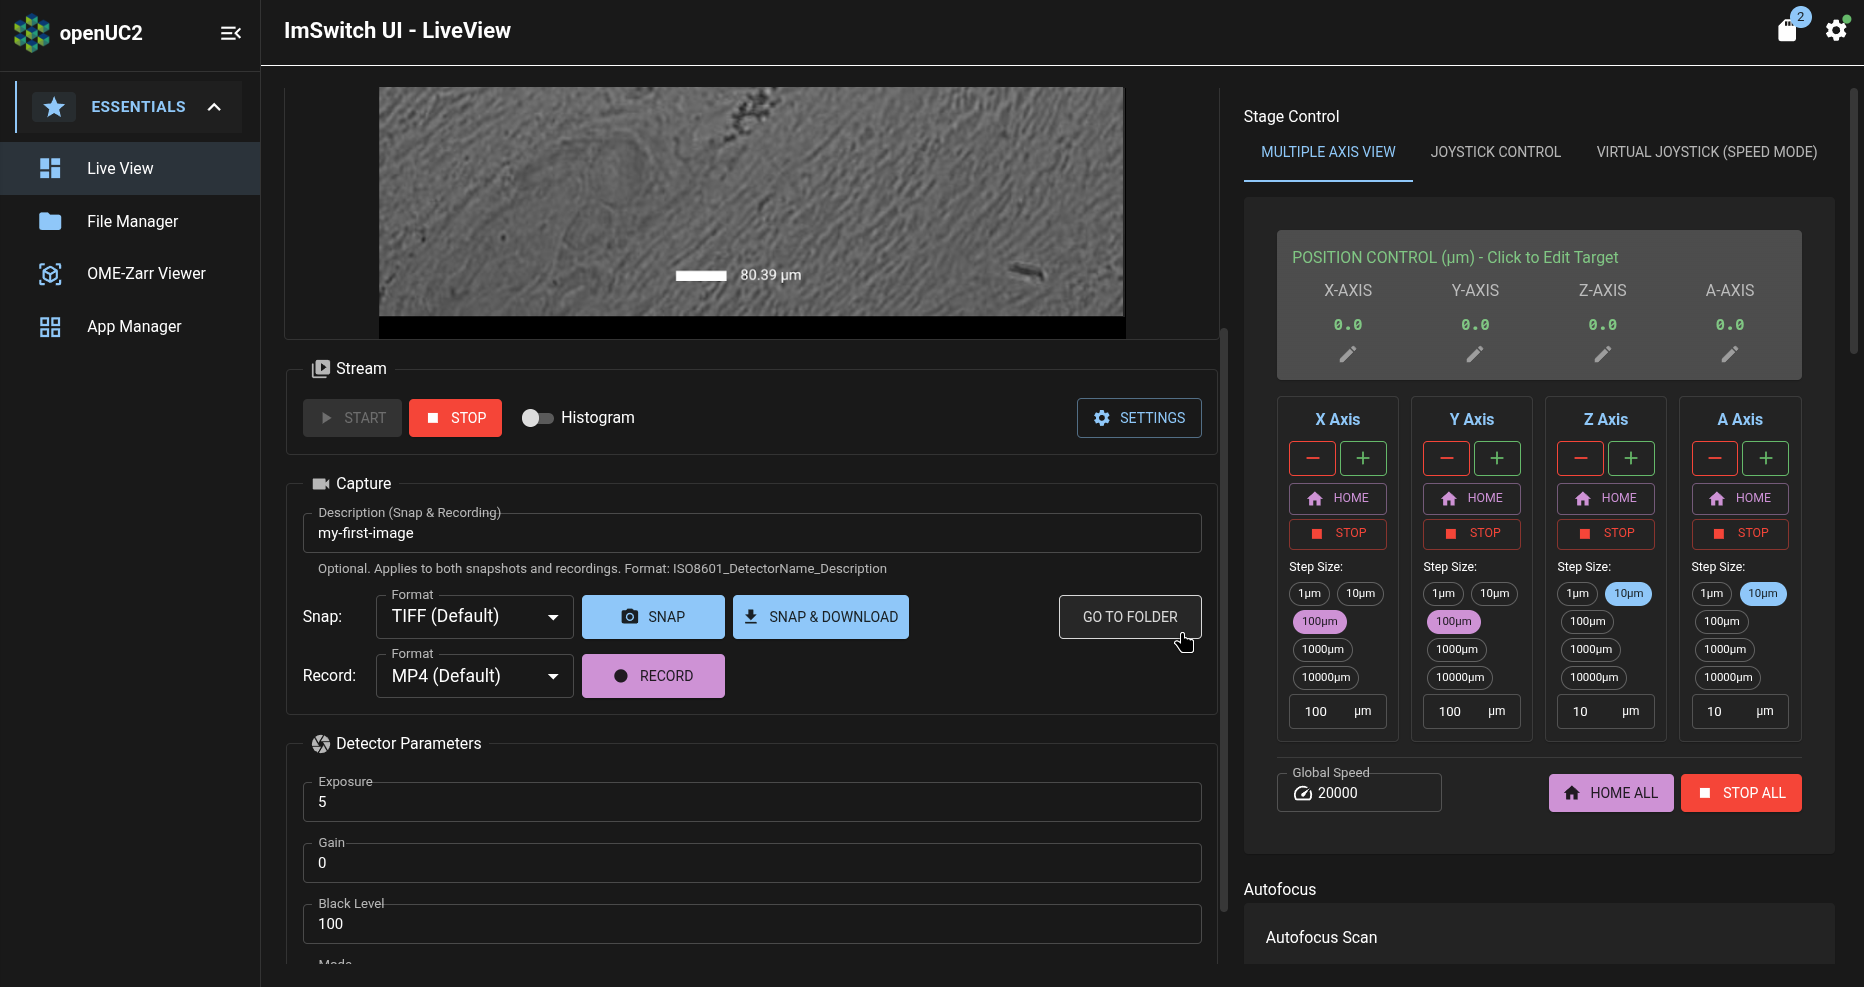
To save your first image of your sample, go to the "Capture" panel below the camera stream:
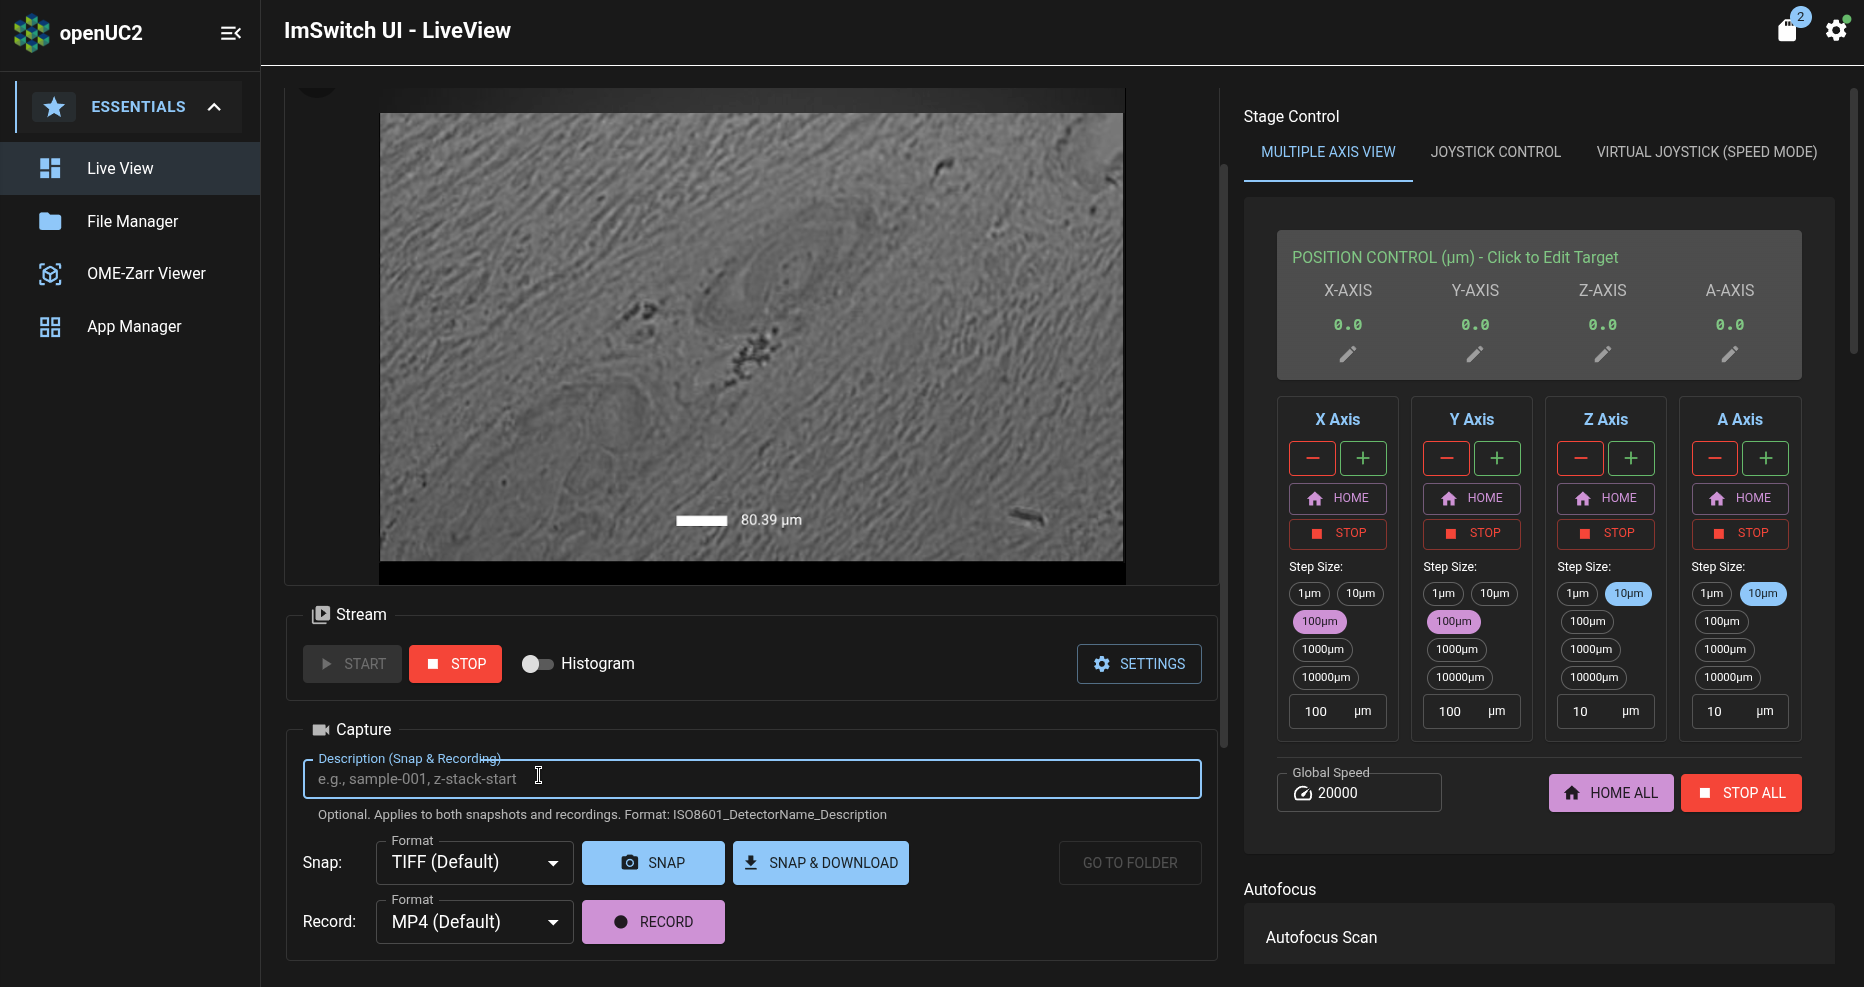
Enter a brief name for the image in the "Description" textbox:
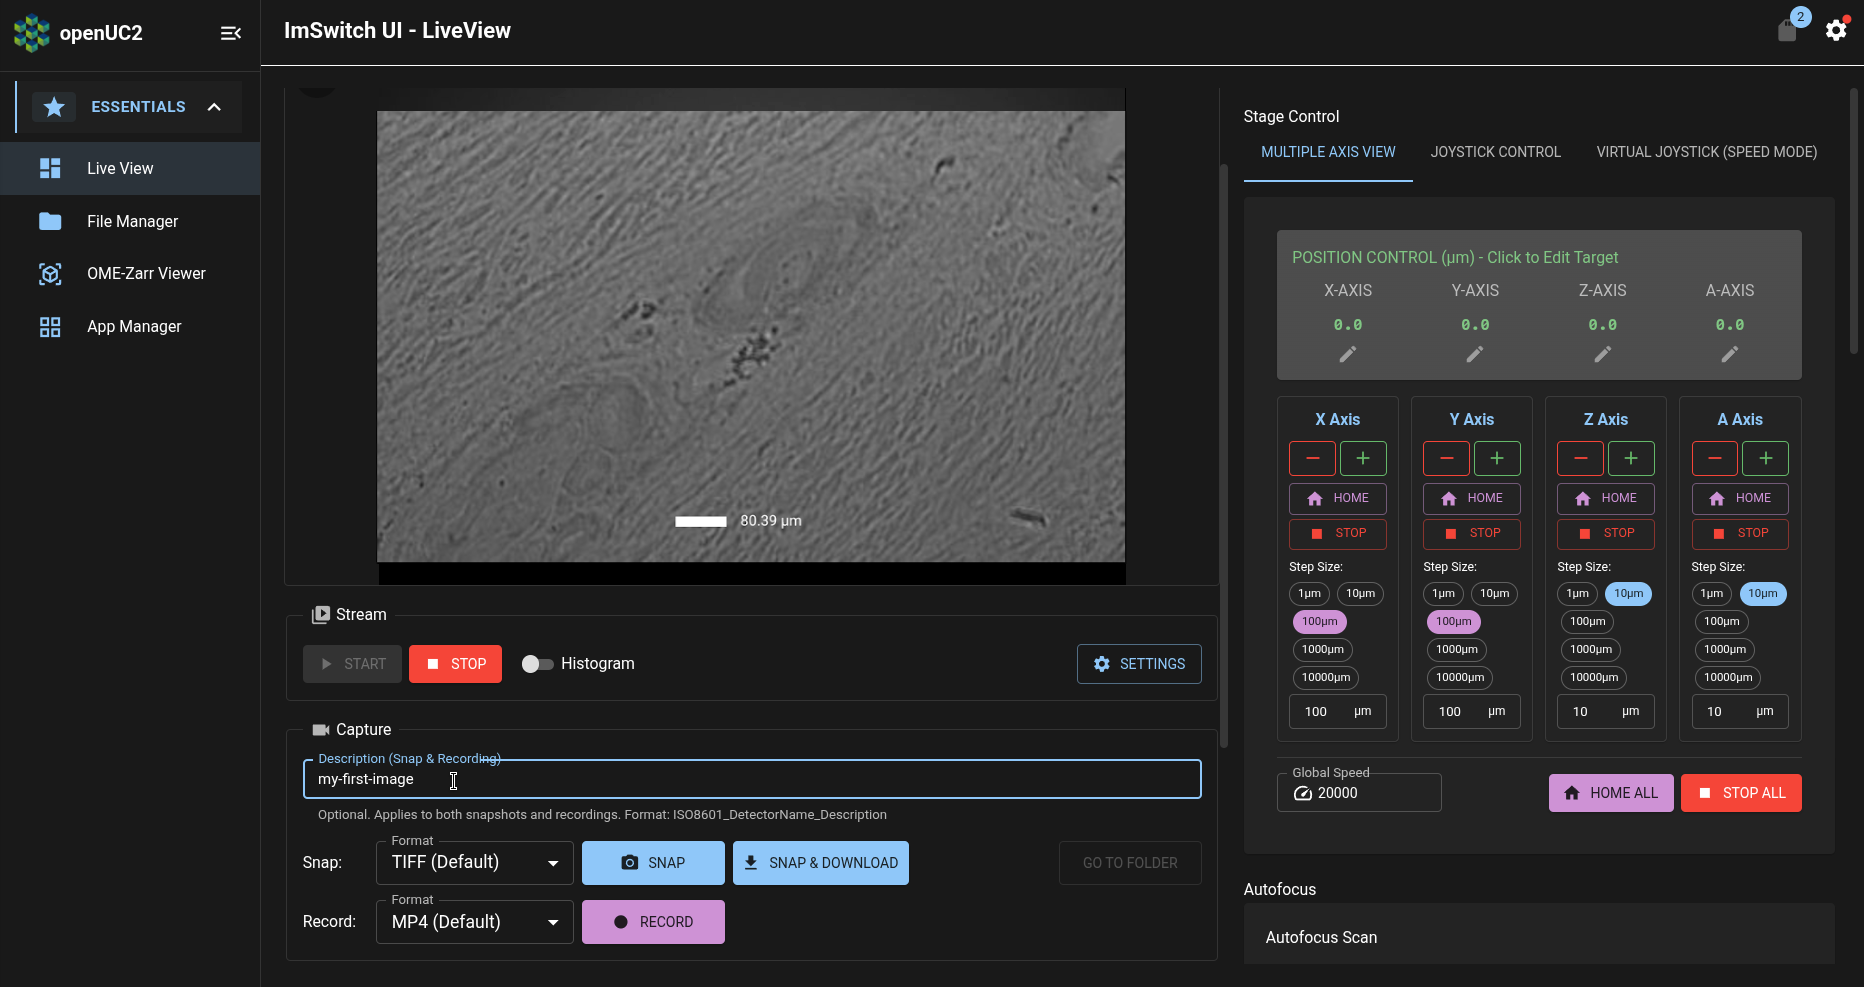
Then press the "Snap" button to save the image to the FRAME's internal storage.
View your first image
To view the image you just saved, press the "Go to Folder" button:
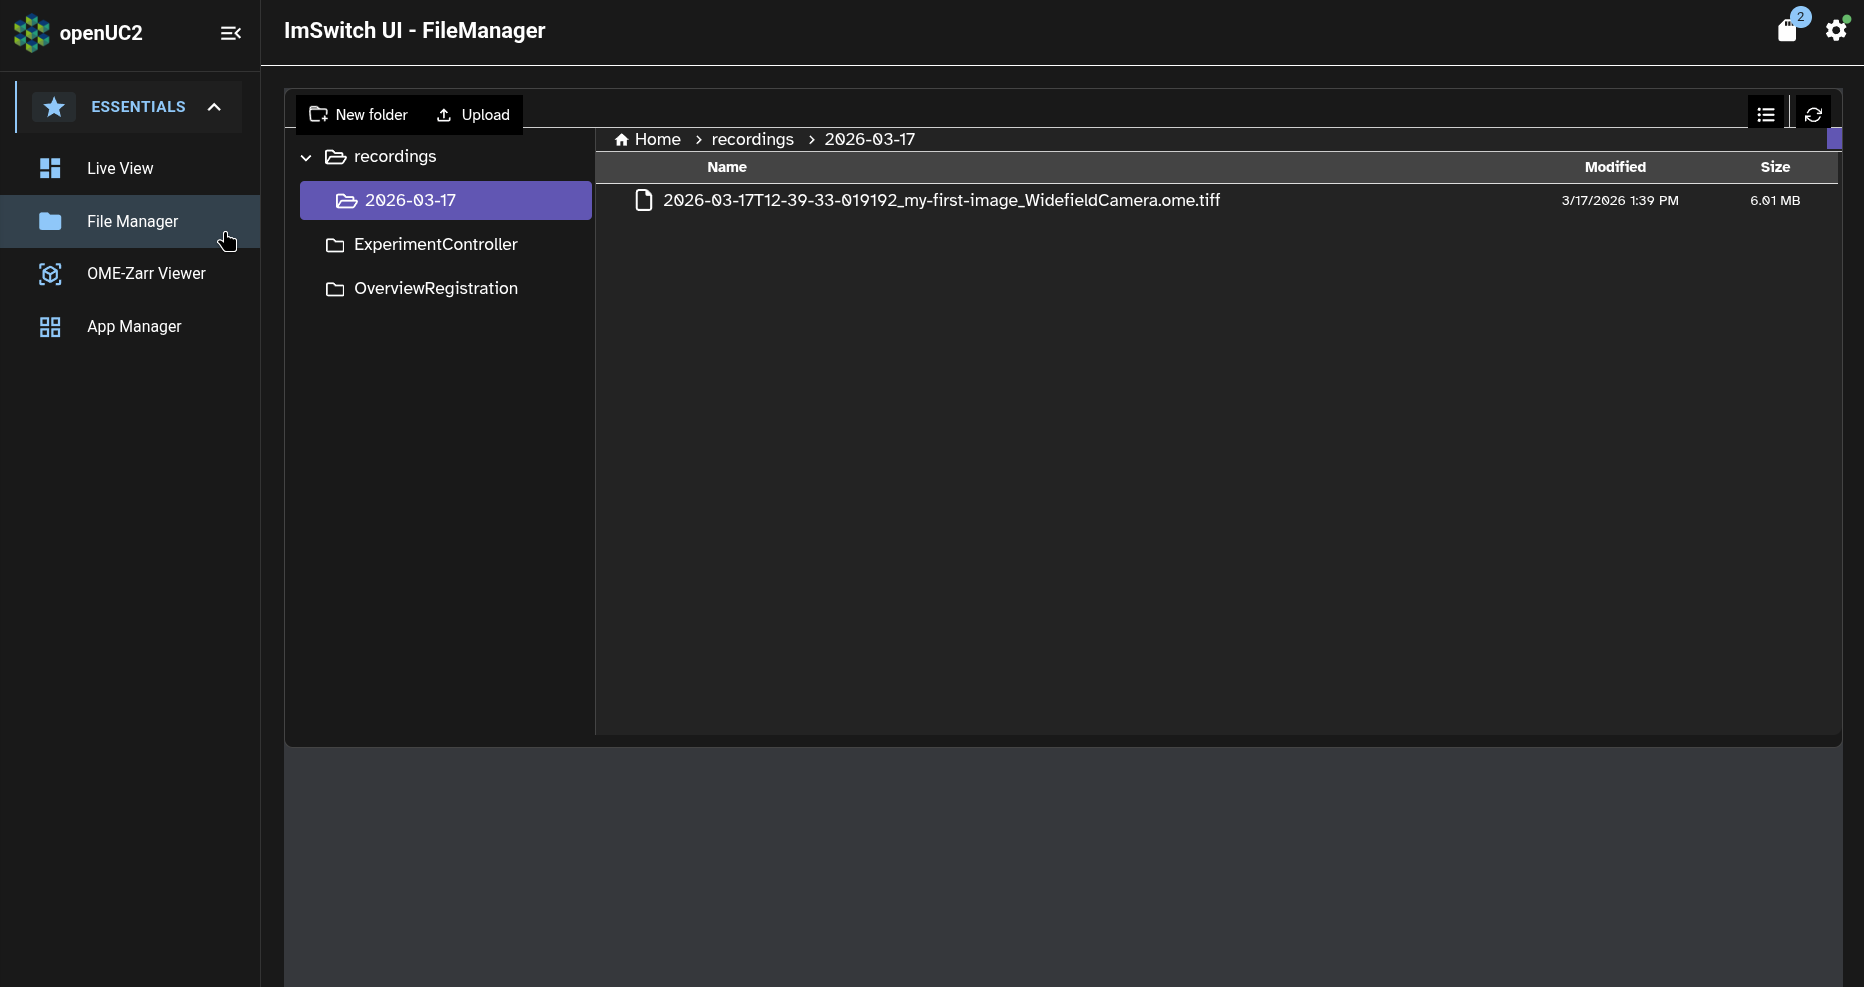
This will display the image file in ImSwitch's File Manager page:
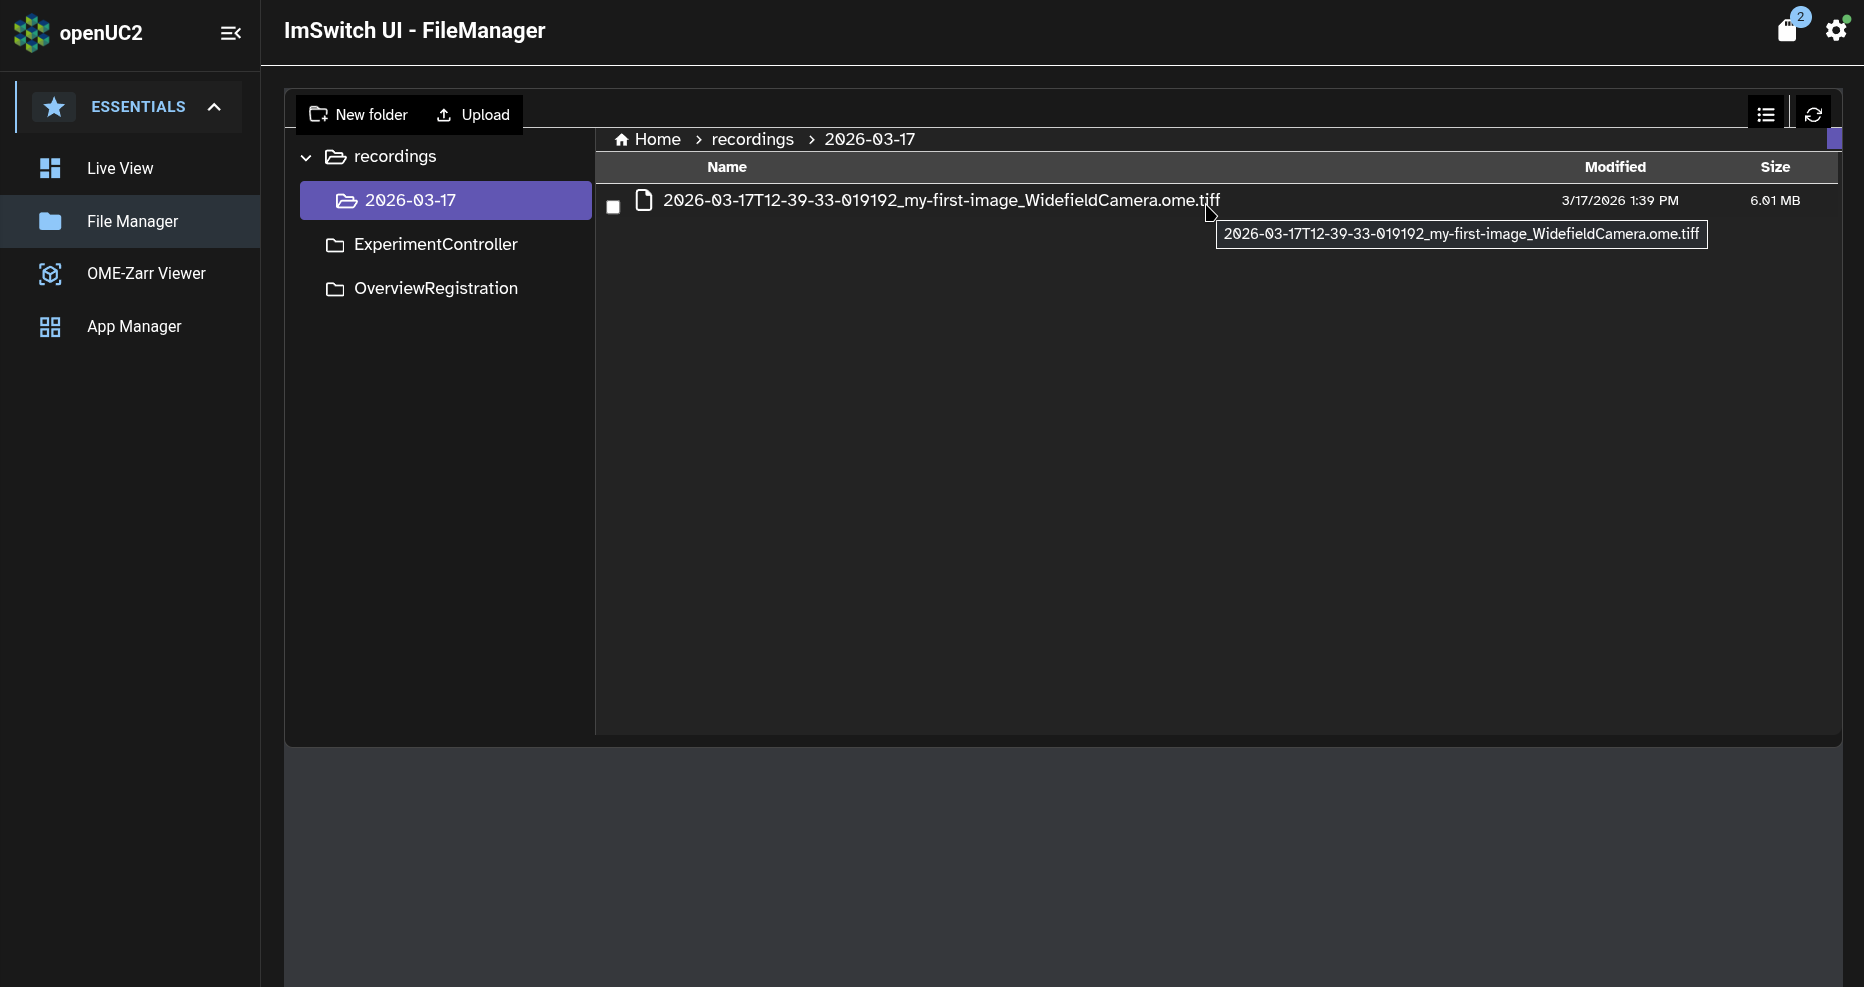
We can see in the above screenshot that the image filename begins with the timestamp 2026-03-17T12-39-33-019192 (i.e. March 17, 2026 at 12:39), while the "Modified" timestamp is 3/17/2026 1:39 PM (i.e. March 17, 2026 at 13:39).
The reason for this one-hour difference is that the timestamp in the image filename is always specified in the UTC timezone, while the "Modified" timestamp is always displayed in the local timezone of your web browser (which for the above screenshot is Central European Time, which is UTC+1).
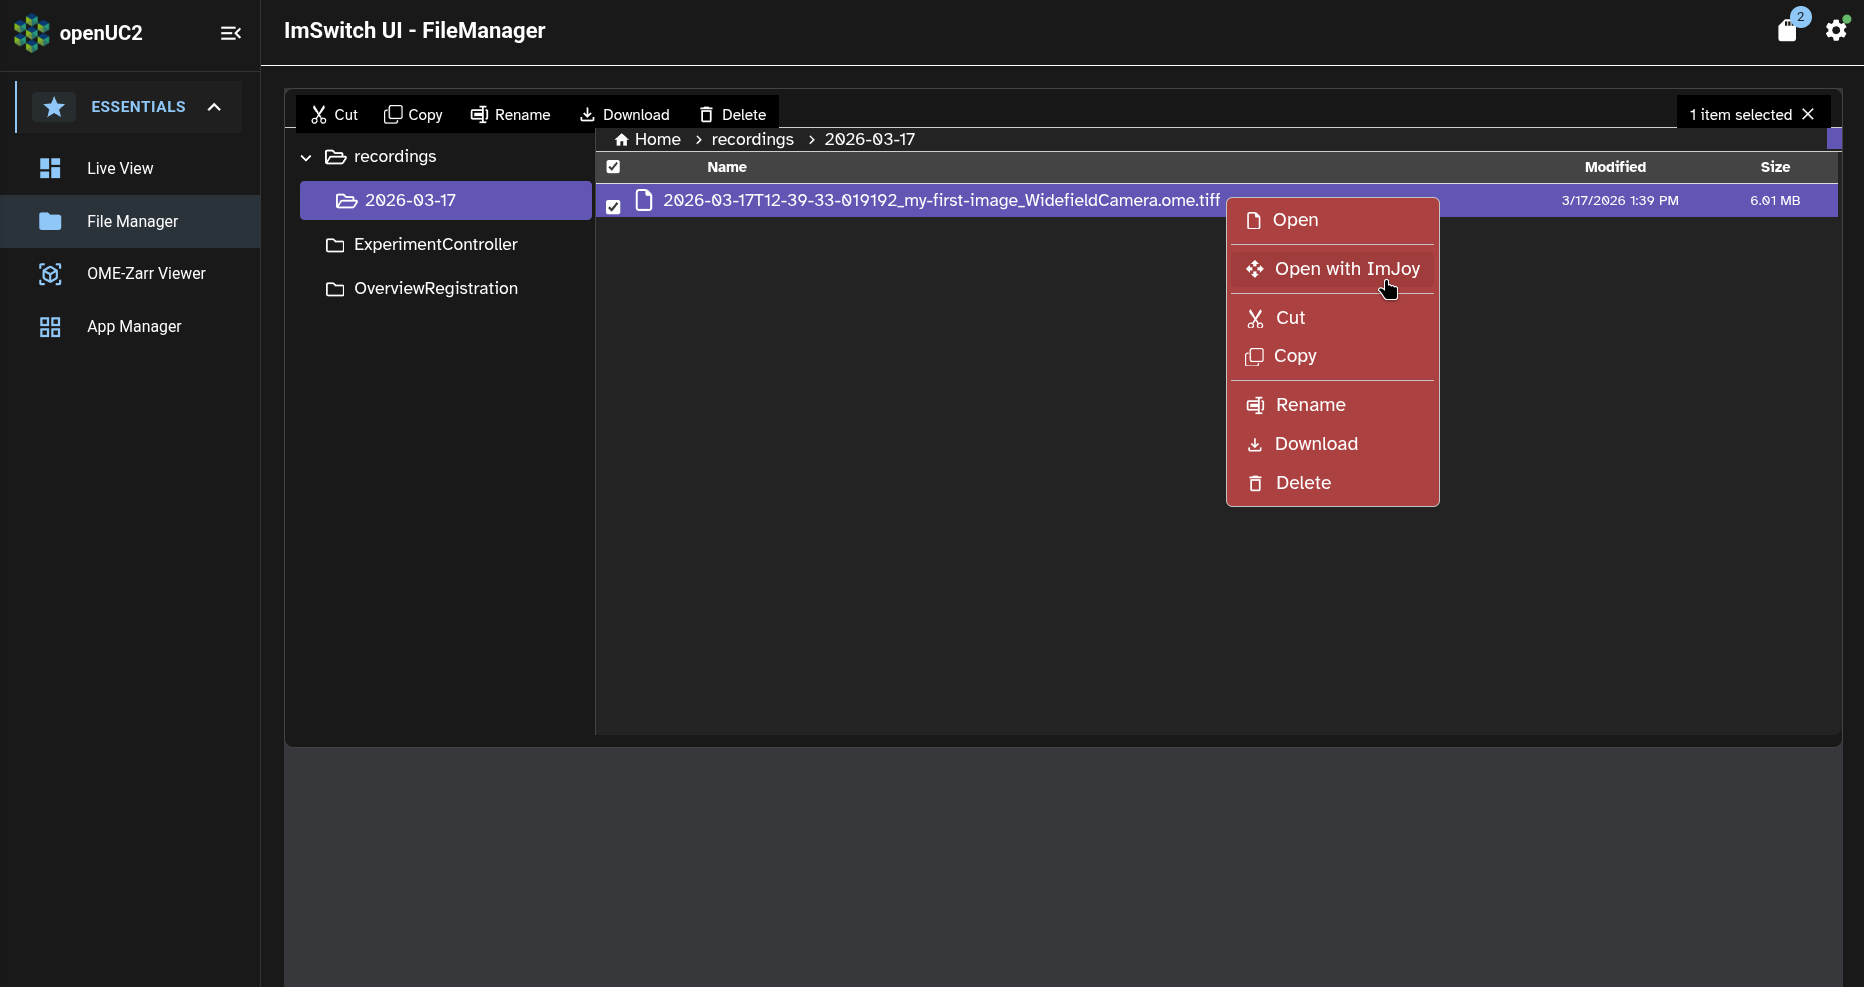
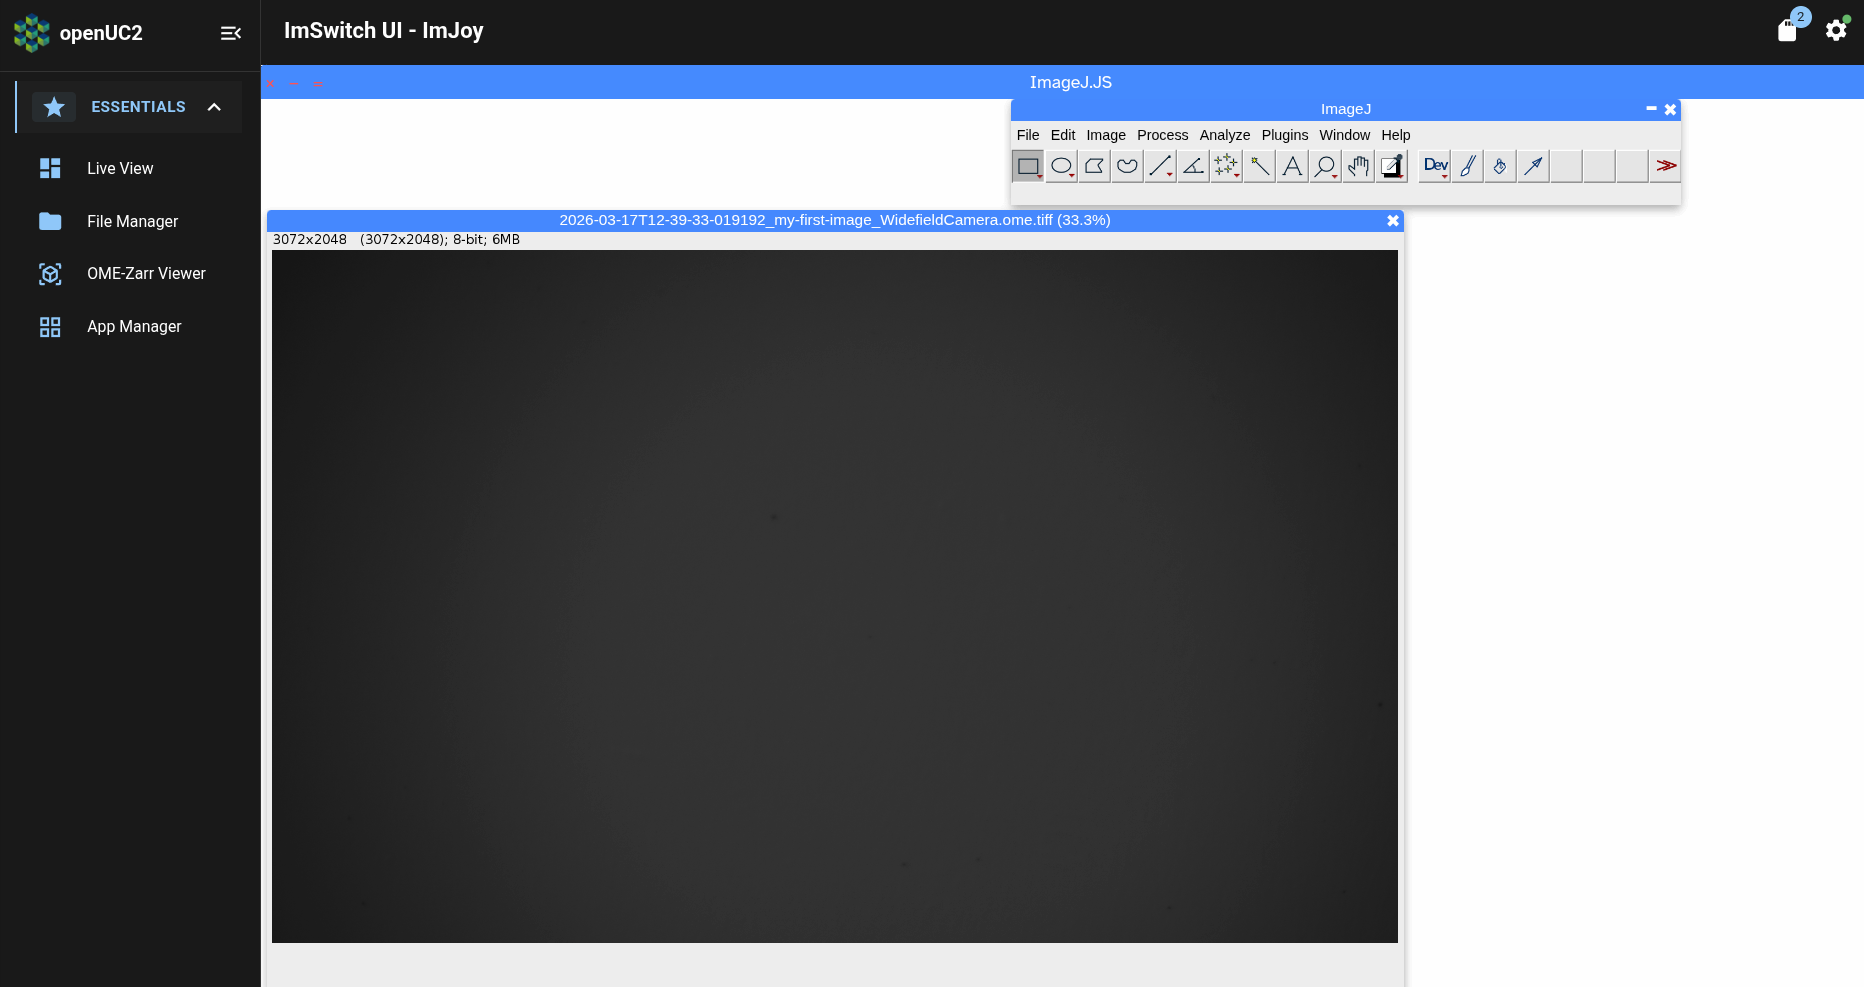
Now we can right-click on the image to open a menu with entries to download the image or to preview it in ImSwitch:
This will open ImSwitch's ImJoy page. After several moments, ImJoy will finish loading and open a window with a preview of the image we had saved:
Download your first image
Now that we've previewed your first image, let's return to the File Manager to download the image to your computer.
Click on the "File Manager" entry in the navbar. This will return us to the file we had previously selected:
Now right-click on the image again, and click on the context menu's entry to download the image:

This will open your web browser's dialogue choose a location on your computer for downloading the image.
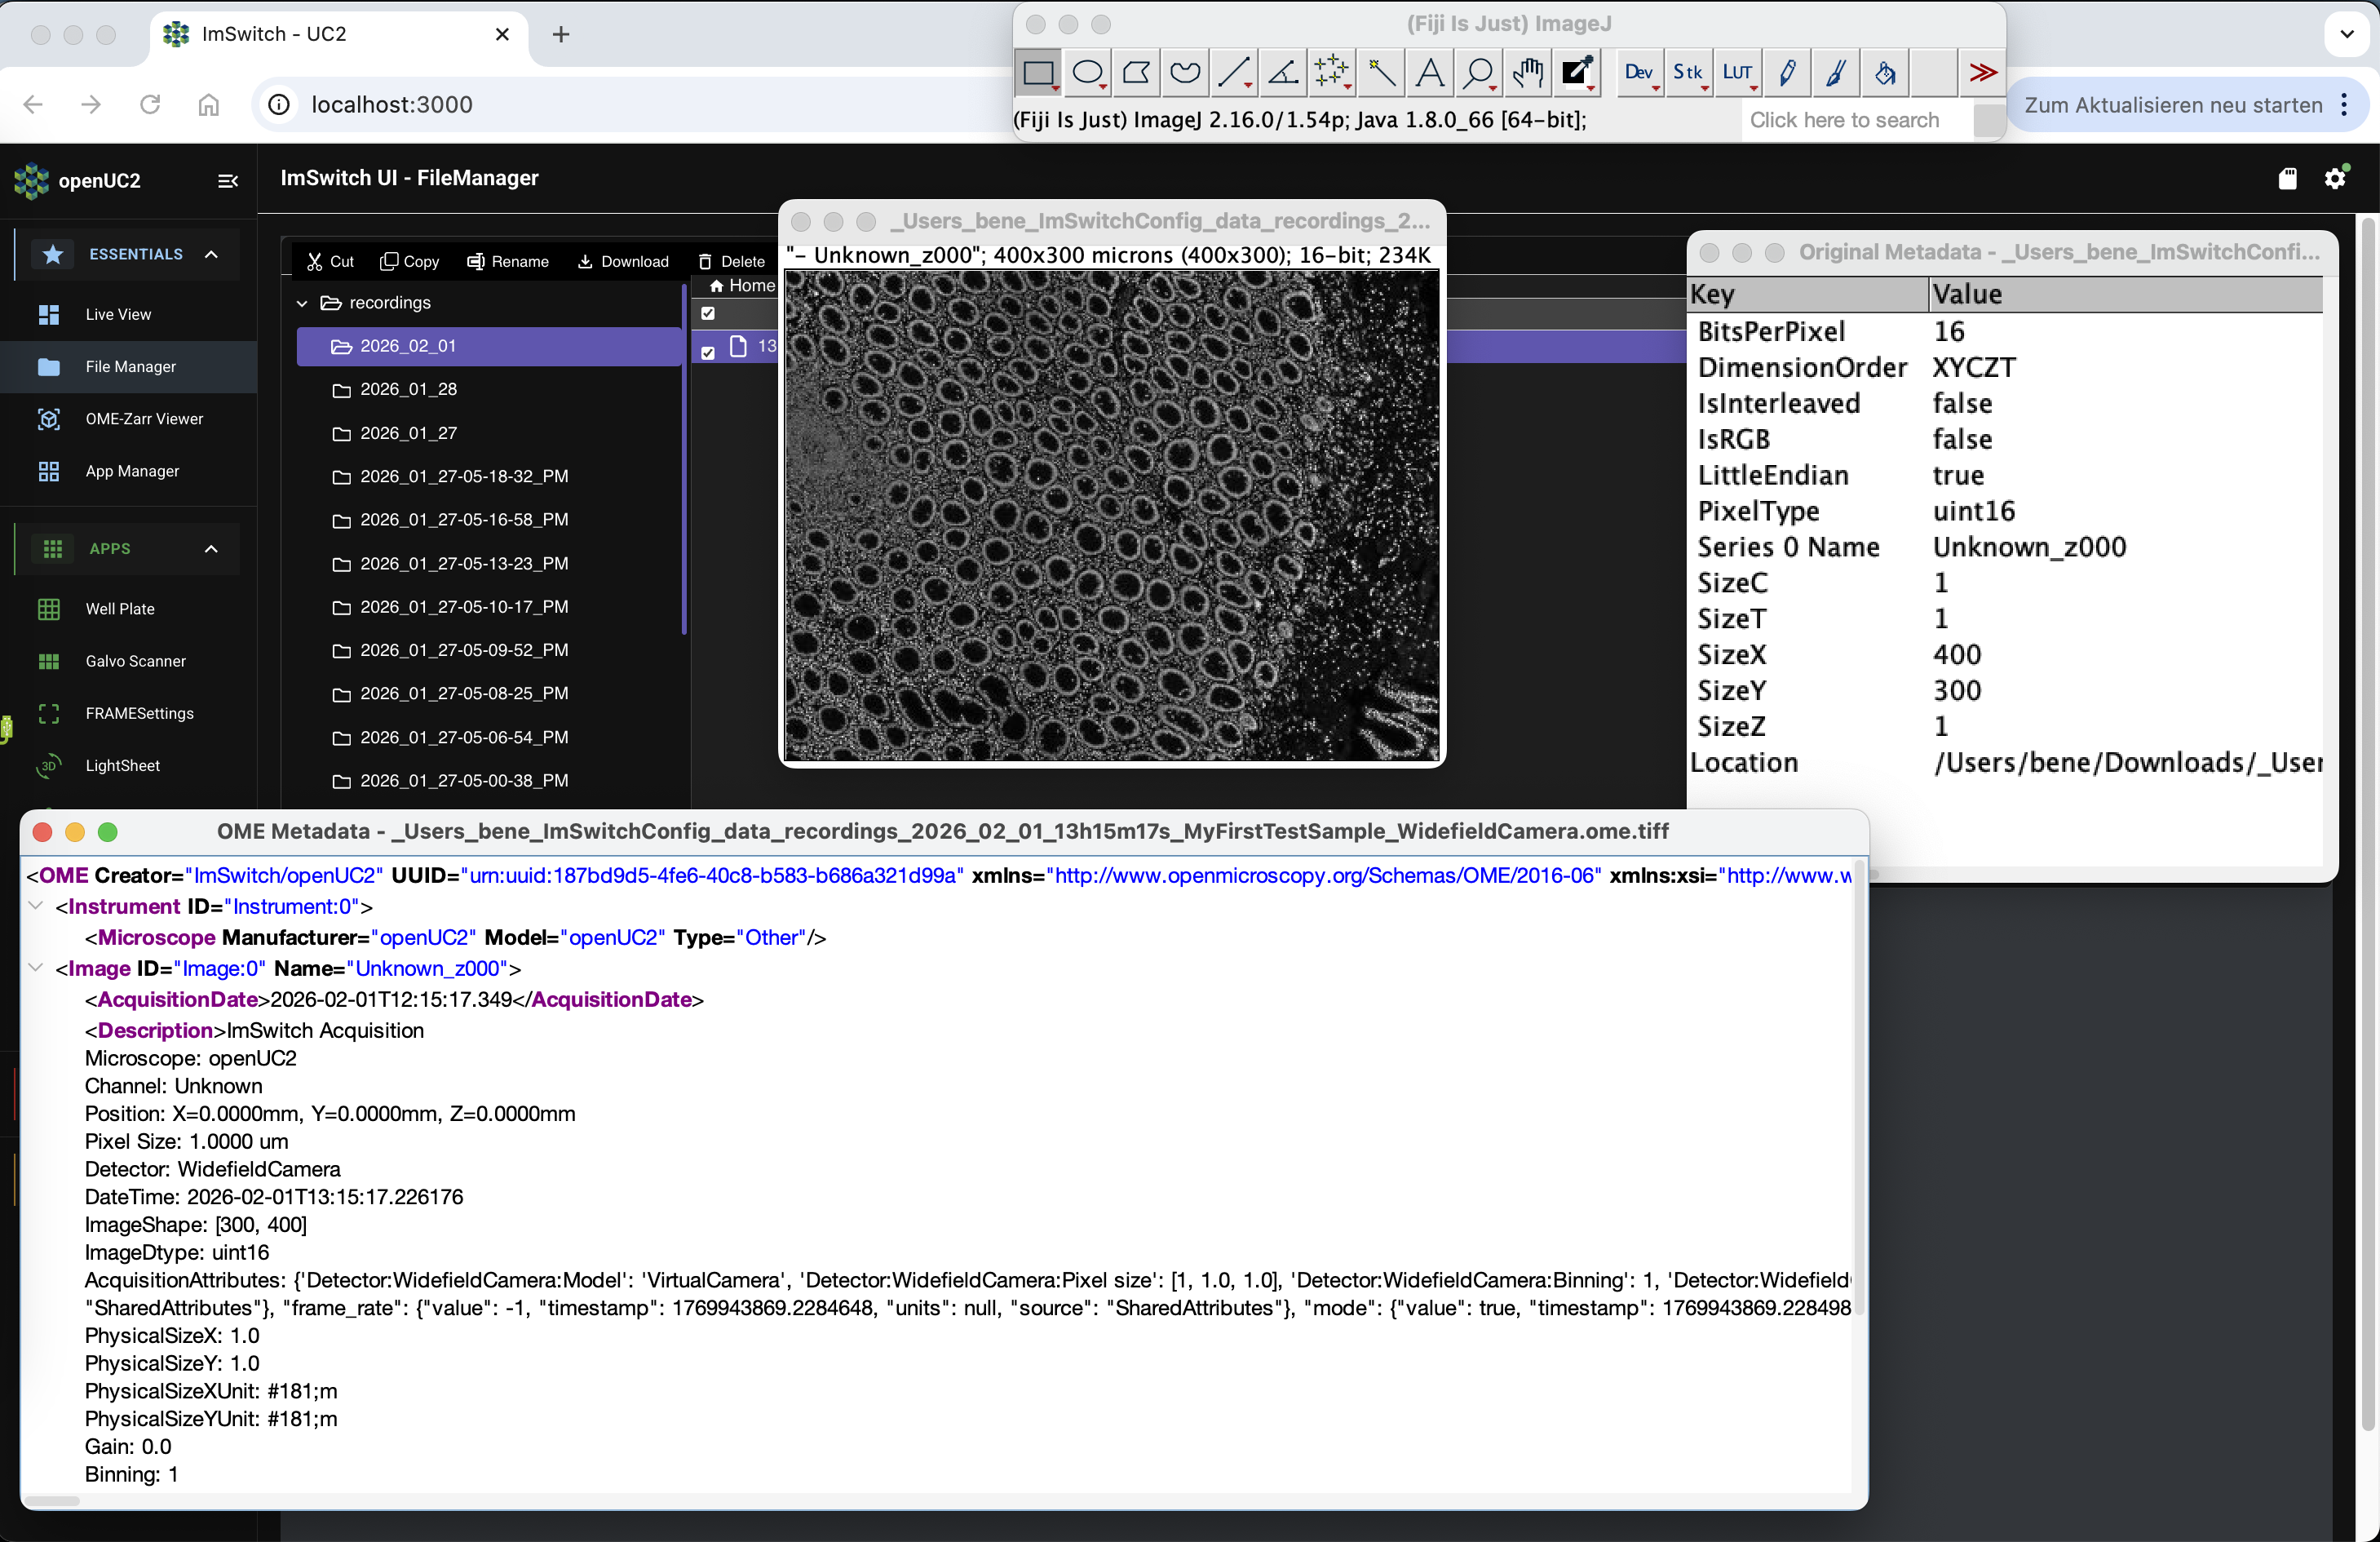
Then you can view the image (and its associated metadata) in other programs on your computer, such as Napari or Fiji:
You can configure ImSwitch to save the image directly to a removable USB storage device, instead of saving the image to the FRAME's internal SD card. When you are acquiring large amounts of data, you should save your data to a removable storage device so that you can transfer it to other computers more easily and more quickly.
To learn how to do this, please refer to our day-2 tutorial.
What's next
Now that we've acquired, previewed, and downloaded our first image, we're ready to learn how to set up your FRAME to be able to get remote assistance from openUC2 customer support.
In the day-2 tutorials, we'll also learn how to acquire data more efficiently, improve your FRAME's imaging settings for your particular sample, and more!