Set Up Remote Assistance on Your FRAME
In this tutorial, we will set up remote assistance on your FRAME machine, so that you know how to enable remote assistance when you need help from openUC2 customer support. Along the way, we will encounter the FRAME's Machine Administration app and see how to use it to adjust various settings in the FRAME's embedded Raspberry Pi computer.
Connect your FRAME to the internet via Wi-Fi
First, let's open the FRAME's landing page in your web browser (we learned how to do this in the First Connection tutorial).
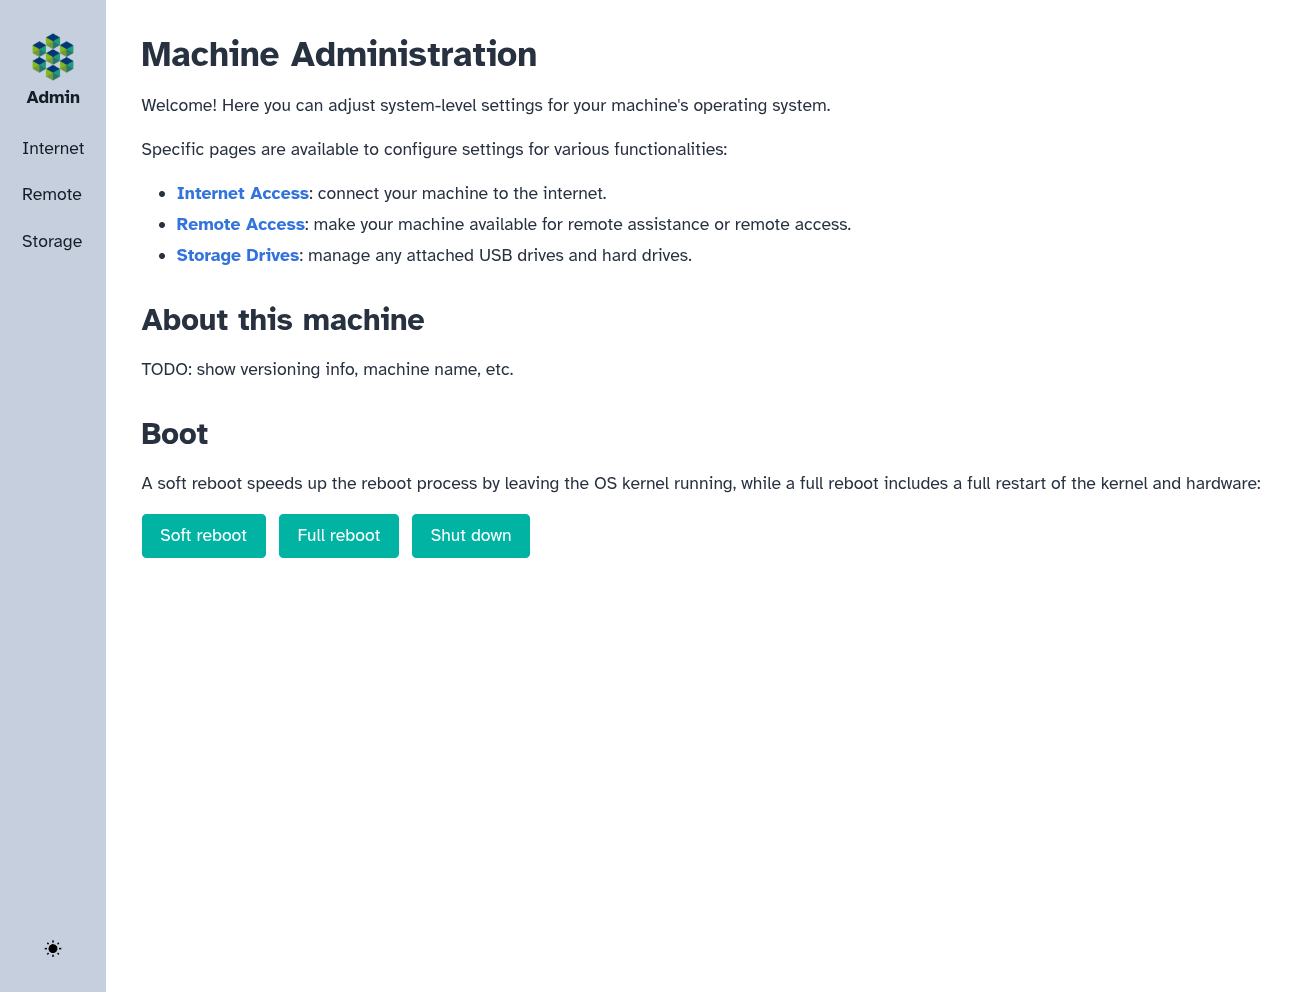
Next, open the "Machine administration" link in the landing page's "Browser applications" section. The Machine Administration app provides a simple way to manage various computer-related settings of the RPi in your FRAME.
In order to enable remote access to your FRAME machine, we'll need to give the RPi access to the internet. We can configure internet-access settings on the Machine Admin app's Internet Access page. To open this page, click the "Internet Access" link on the Machine Admin app's homepage, or on the "Internet" link in the app's navbar:
The Internet Access page shows you the status of your RPi's network devices for Wi-Fi and Ethernet:
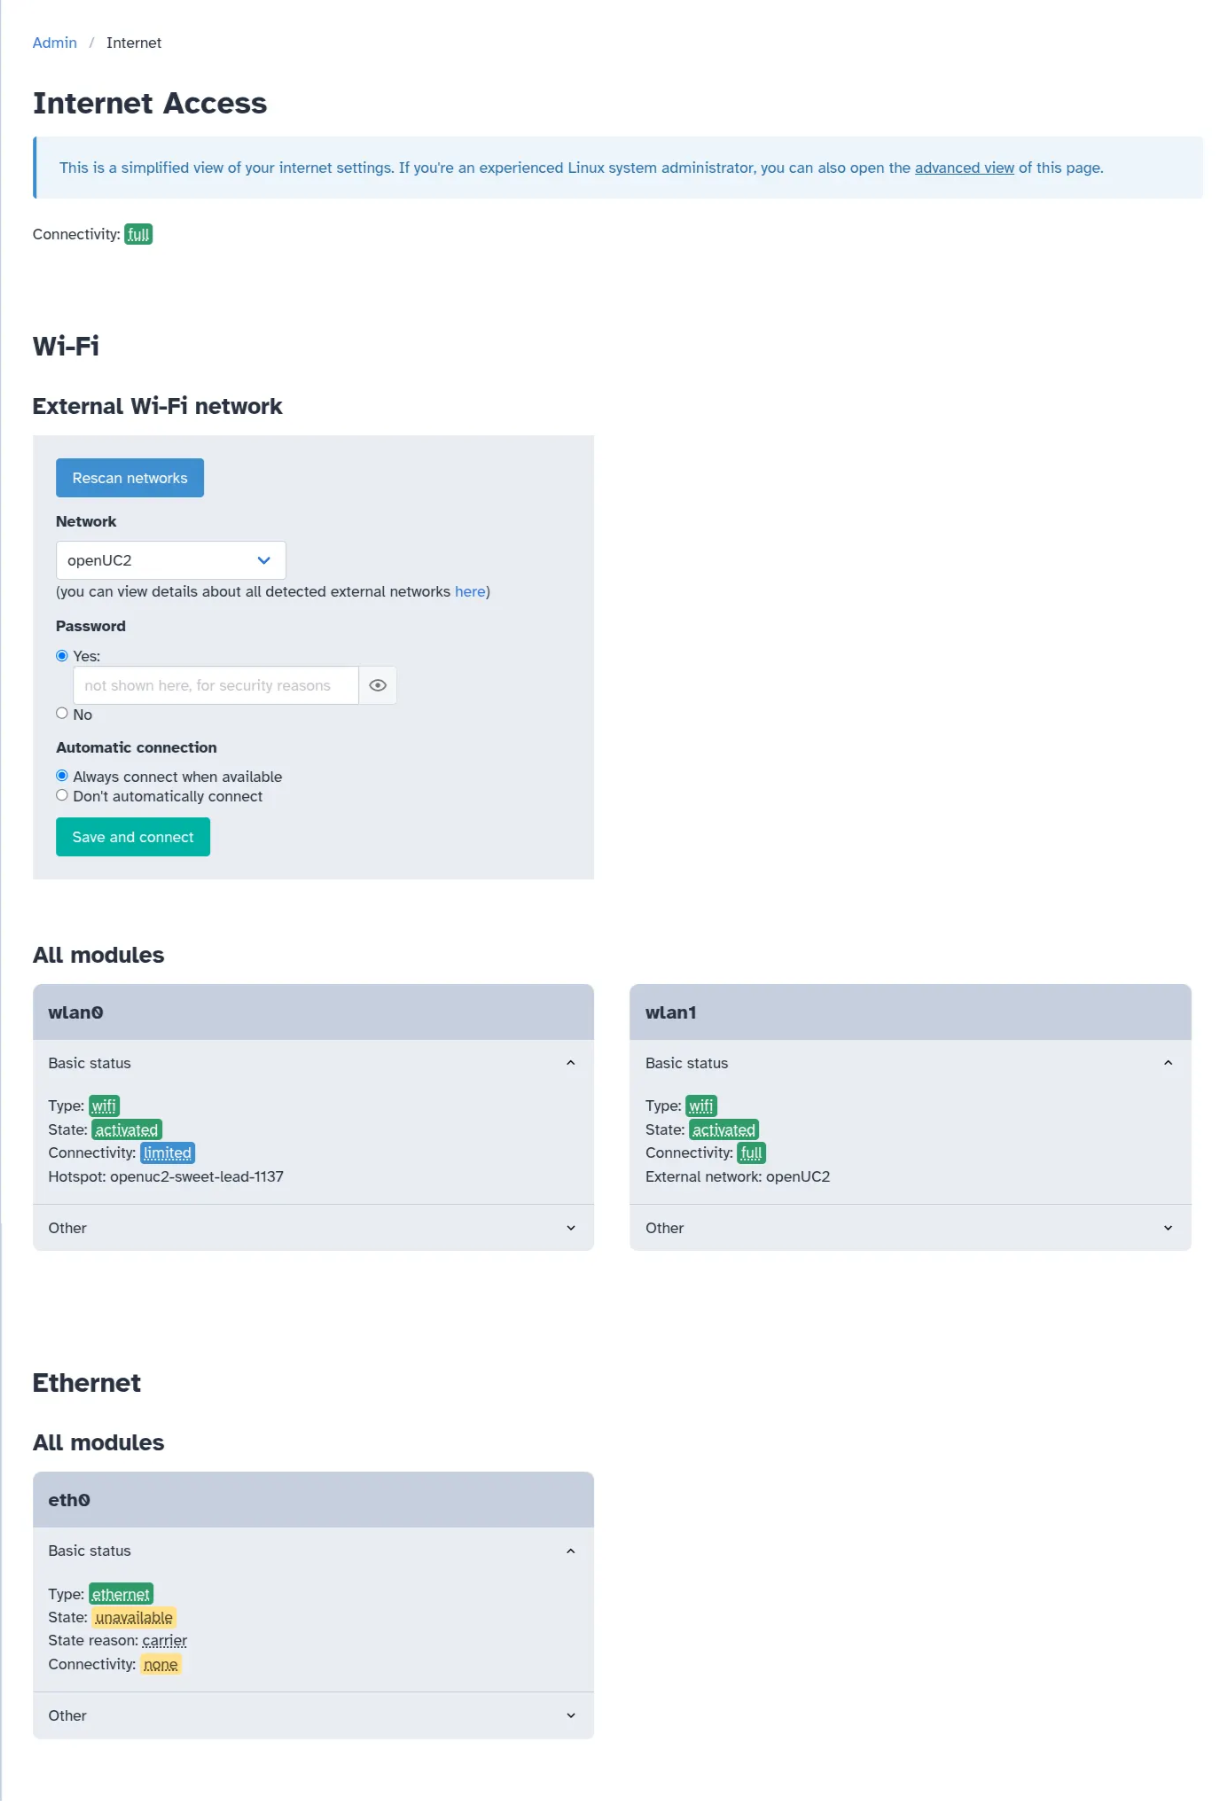
As we can see in the "Wi-Fi" → "All modules" section, your RPi has two Wi-Fi devices, one named wlan0 and the other named wlan1. wlan0 is your RPi's internal Wi-Fi module, while wlan1 is a USB Wi-Fi dongle which is plugged into your RPi.
wlan0 is always used for making your RPi's Wi-Fi hotspot.
wlan1 is reserved for connecting to any Wi-Fi network which is already created by a Wi-Fi access point (commonly called a "Wi-Fi router") near the RPi; we call such a network an external Wi-Fi network, in contrast to the Wi-Fi hotspot generated by the RPi which is internal to the FRAME machine.
We will use the "Wi-Fi" → "External Wi-Fi network" section to configure wlan1 to connect to an external Wi-Fi network.
First, you should choose an external Wi-Fi network which has internet access. You can look for this network in the dropdown list of external Wi-Fi networks detected by wlan1:
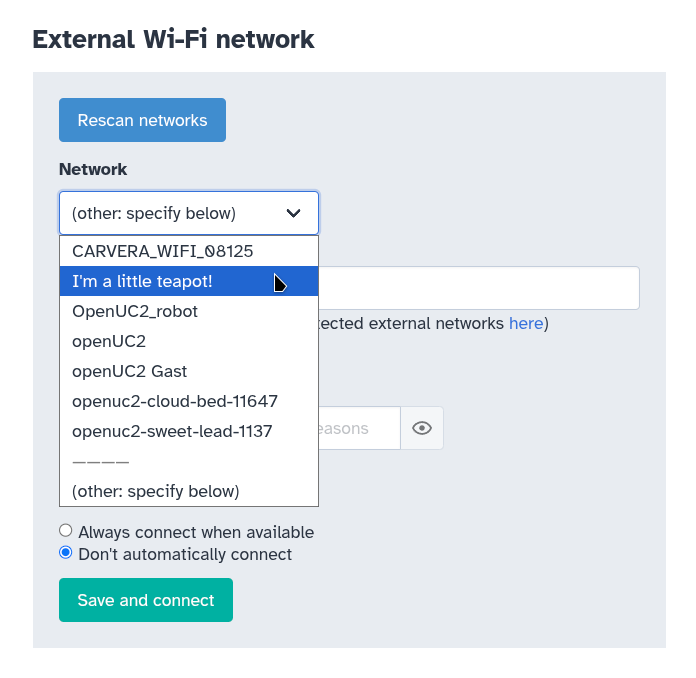
This list will periodically update as Wi-Fi networks appear and disappear. If you want to manually trigger a refresh, you can click on the "Rescan networks" button, which is the blue button in the screenshot above.
If your desired network isn't on the list, then the RPi won't be able to connect to it right now. But if you want to make the RPi connect to the network in the future, you can specify the name of an undetected network, by choosing the "(other: specify below)" option visible in the option above. Once you click on it, you'll be able to type in the exact name of your desired network:
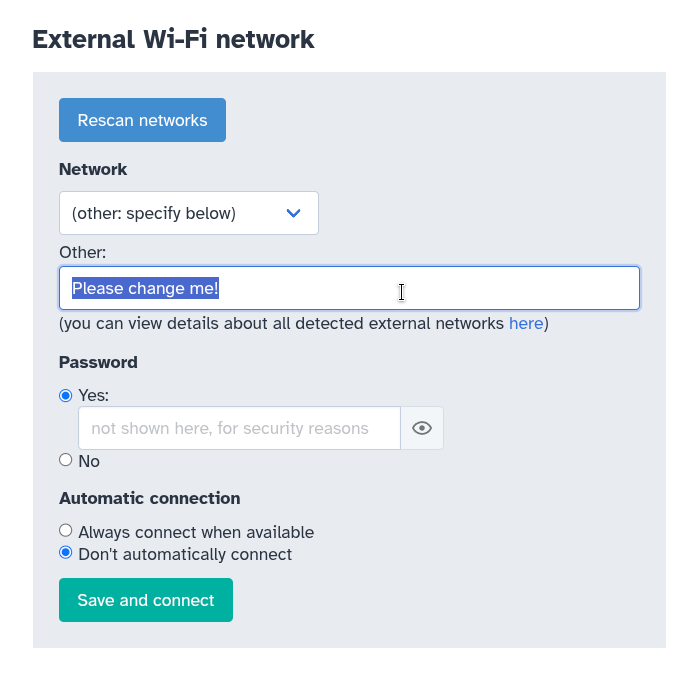
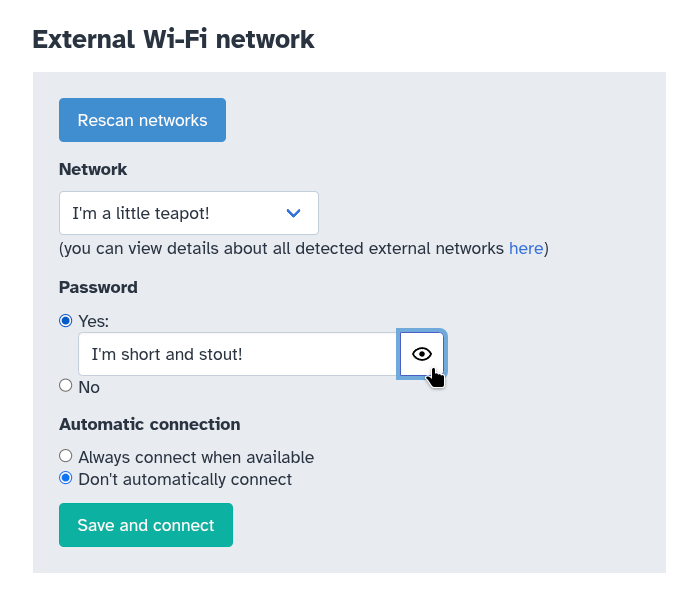
Let's assume we're connecting to the network named "I'm a little teapot!". If it has a Wi-Fi password, you should type in the password. After typing in the password, you can press the "eye" icon to the right of the password to view it and check for any mistakes:
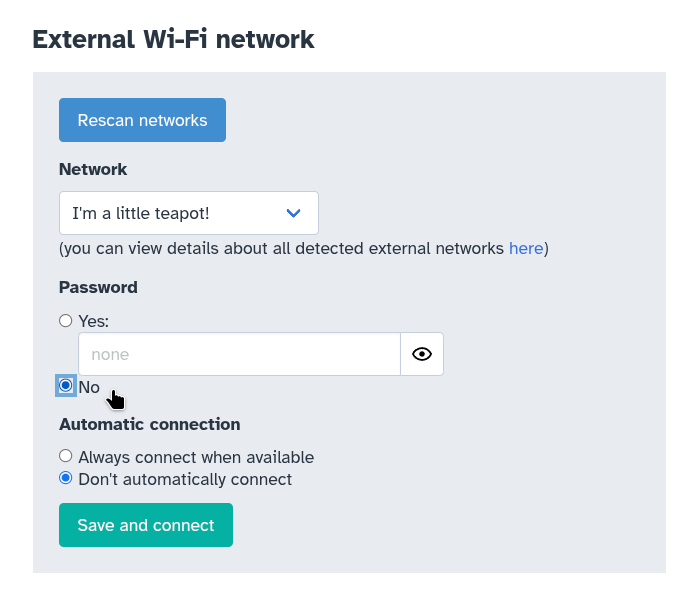
If your desired Wi-Fi network has no password, then you should instead select the "No" option instead:
This tutorial assumes that your desired Wi-Fi network uses either no Wi-Fi security (if you specify that there's no password) or WPA2 security. If you're trying to connect to something like eduroam or a network with WPA2-Enterprise security, that's a more complicated topic which is outside the scope of this tutorial. You may need to ask for guidance from openUC2 customer support.
Next, we recommend selecting the setting to have the RPi always connect to the specified Wi-Fi network whenever it's available:
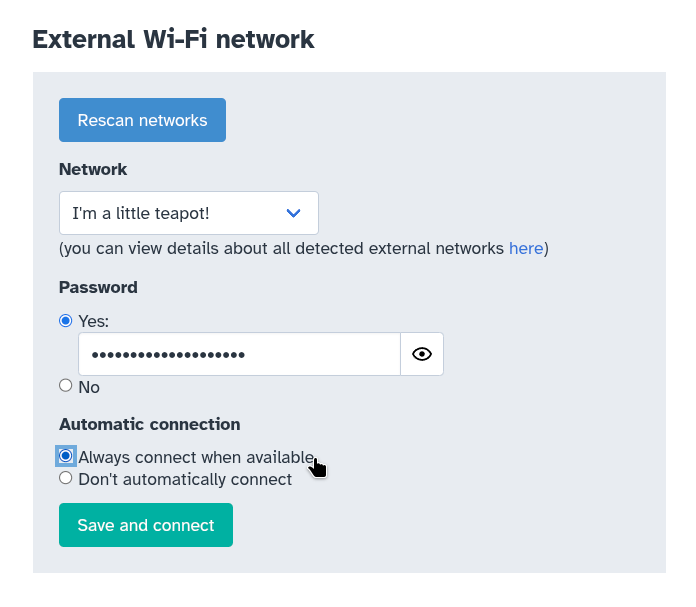
If you don't enable that option, then you'll always need to manually click the green "Save and connect" button (visible at the bottom of the screenshot above) in order to make the RPi connect to the specified network.
Finally, you should press the "Save and connect" button. This will save the Wi-Fi network connection settings and then make the RPi attempt to connect to the network, if it's available. A progress bar will appear for several moments while the RPi attempts to connect:
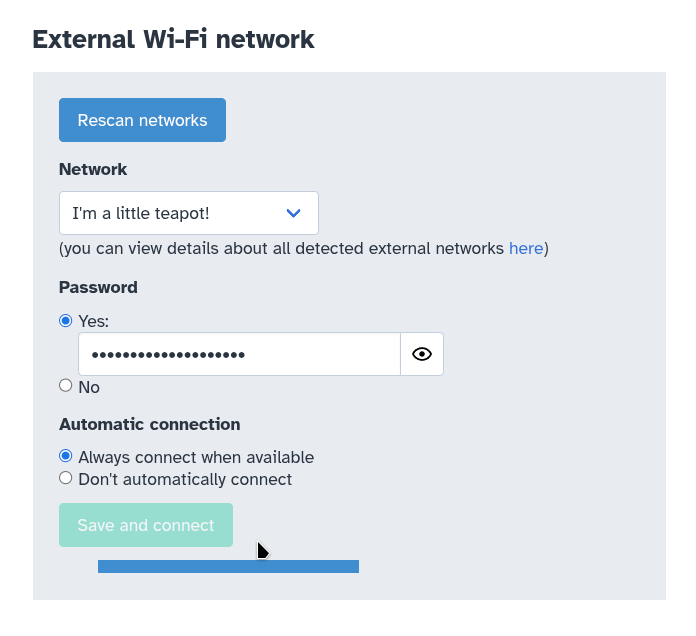
If the network you're trying to connect to requires you to register devices or has a captive portal, please refer to our how-to guide on connecting to external Wi-Fi networks.
If/when the RPi connects, you will see updates to the status of the wlan1 module in the "Wi-Fi" → "All modules" section:
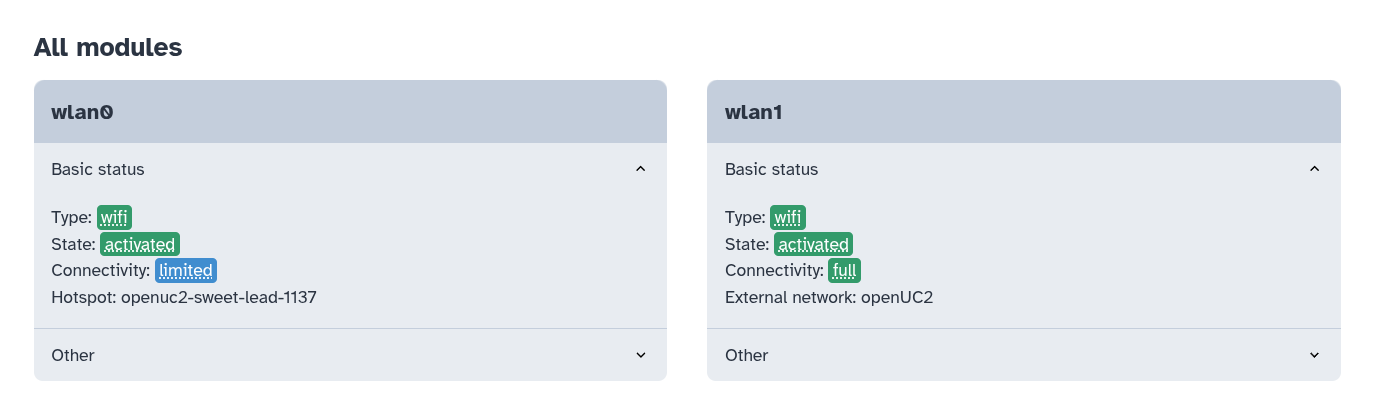
Here, you should see wlan1's status be reported as "activated" and its connectivity be reported as full, which indicates that the FRAME's RPi has internet access to the internet through wlan1.
Finally, the name of the external network (which is "I'm a little teapot!" above) should match what you expect.
Now that we've connected your FRAME machine to the internet, we're ready to enable remote assistance!
Enable remote assistance
First, open the "Remote Access" page of the Machine Administration app by clicking on the link labeled "Remote" in the navbar. The page may initially look like one of the two following options:
| Not pre-registered | Already pre-registered |
|---|---|
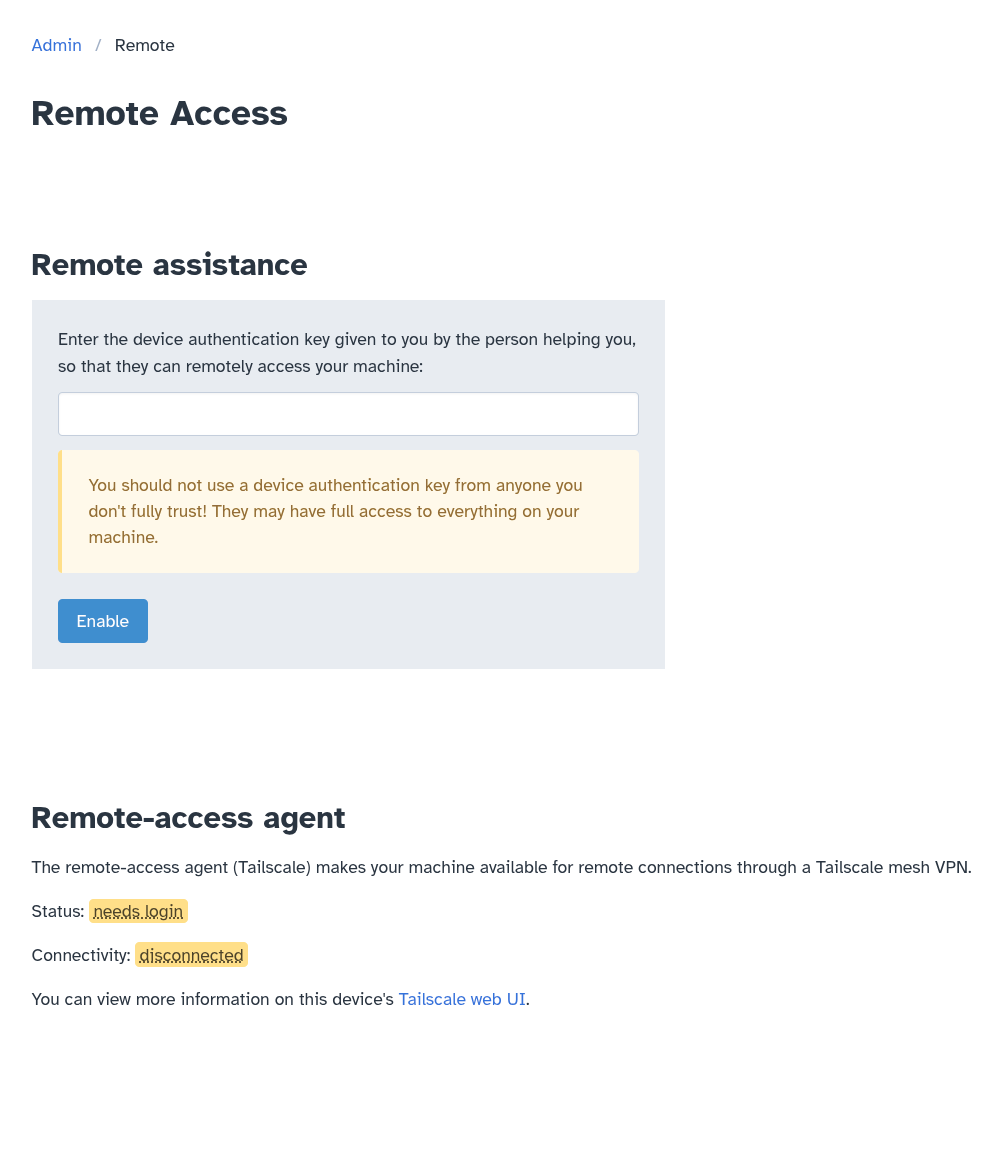 | 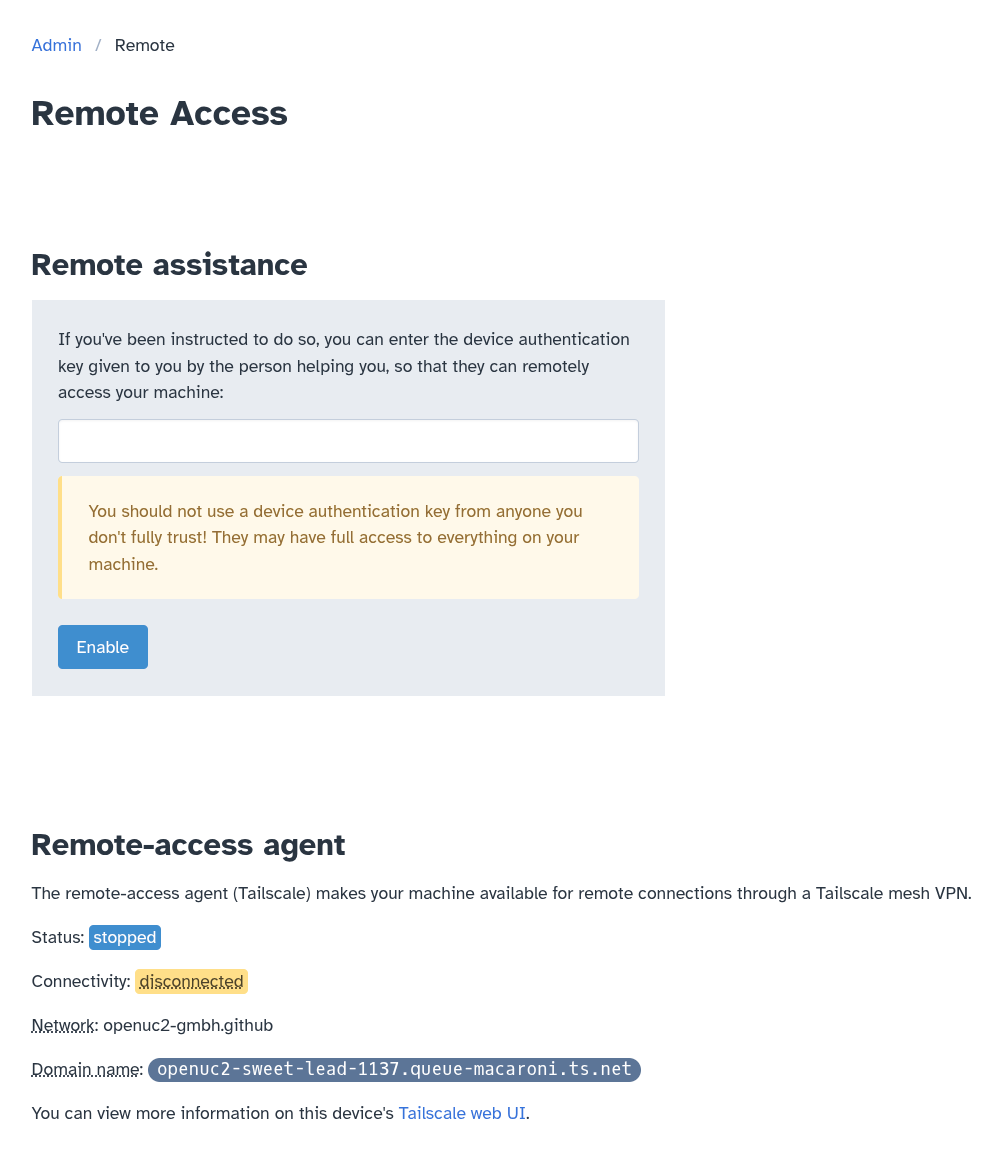 |
On the left, the status is listed as "needs login", and there is no "network" or "domain name" listed. This means that openUC2 has not pre-registered your machine with openUC2's remote-assistance network. By contrast, on the right, the status is listed as "stopped", and a "network" and "domain name" are listed. This means that openUC2 has already pre-registered your machine.
If the page looks like the left (i.e. "needs login" is the status), then in the "Remote assistance" box you should enter the device authentication key given to you by openUC2 customer support, and then you should press the "Enable" button:
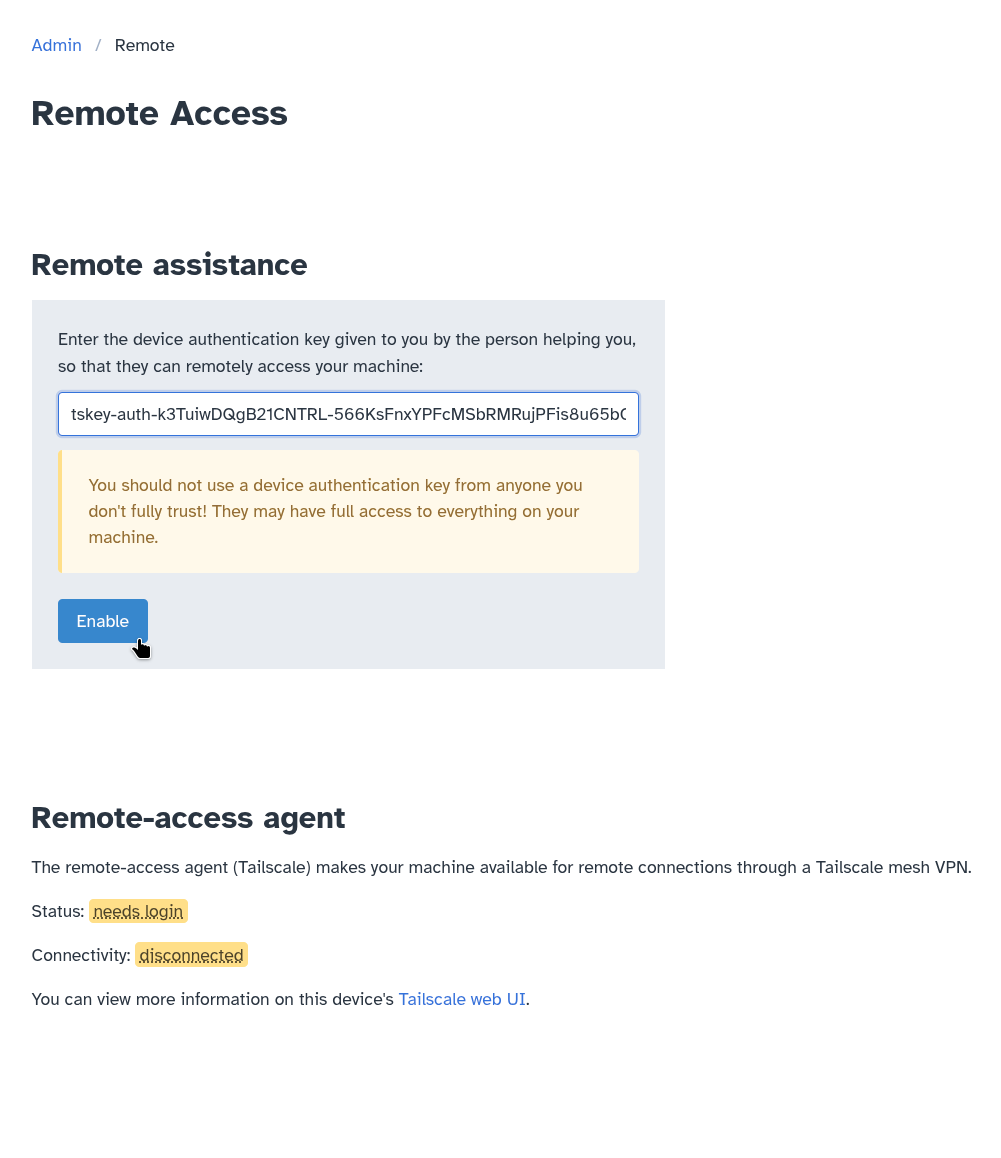
For security reasons, your device authentication key can only be used once. This device authentication key adds your RPi to openUC2's remote-assistance Tailscale virtual network so that customer-support staff at openUC2 can connect to your RPi through that Tailscale virtual network.
Otherwise (i.e. openUC2 already pre-registered your machine) you can simply press the "Enable" button without entering a device authentication key:
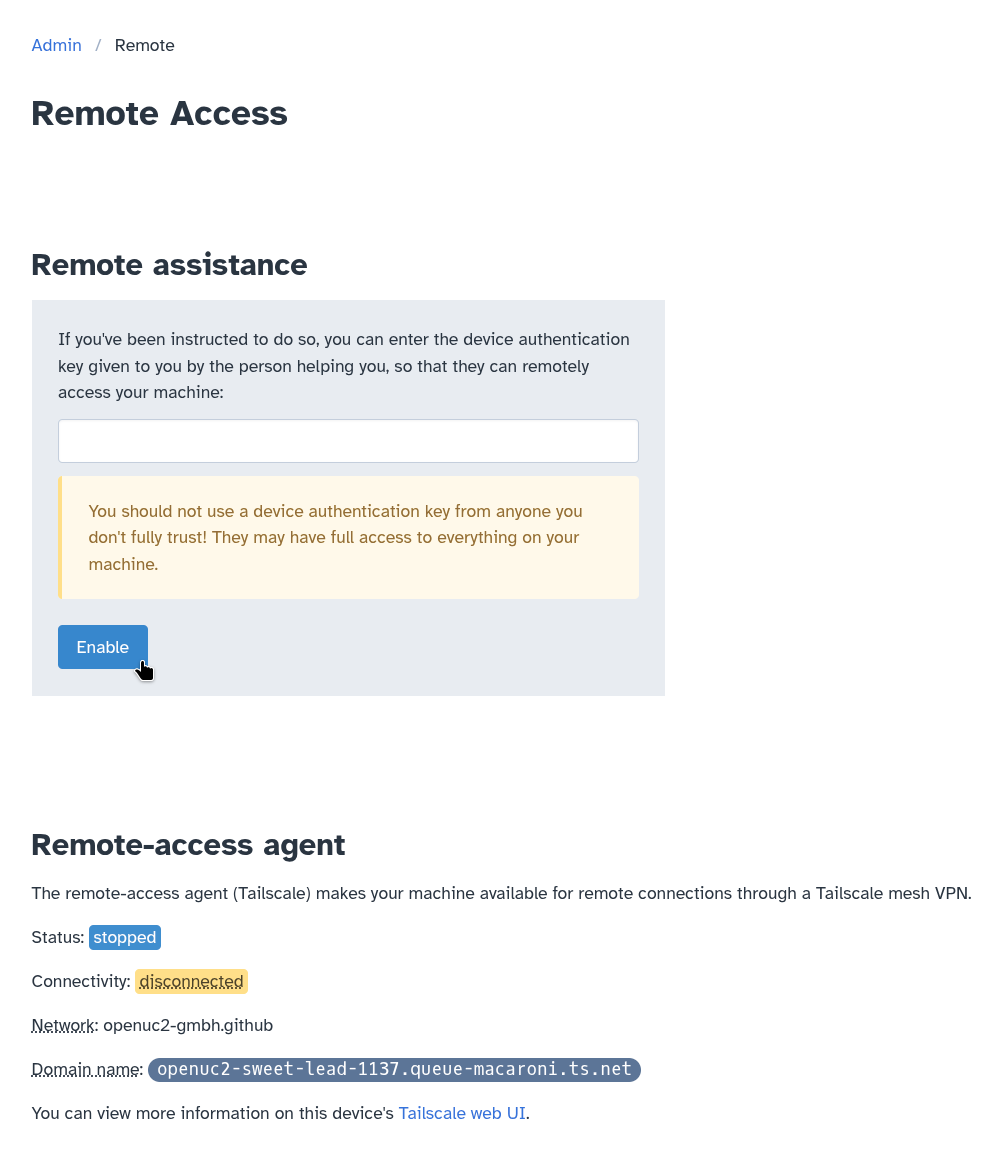
Assuming your RPi has internet access, then the status will be updated to "running", and the connectivity will be shown as "connected":
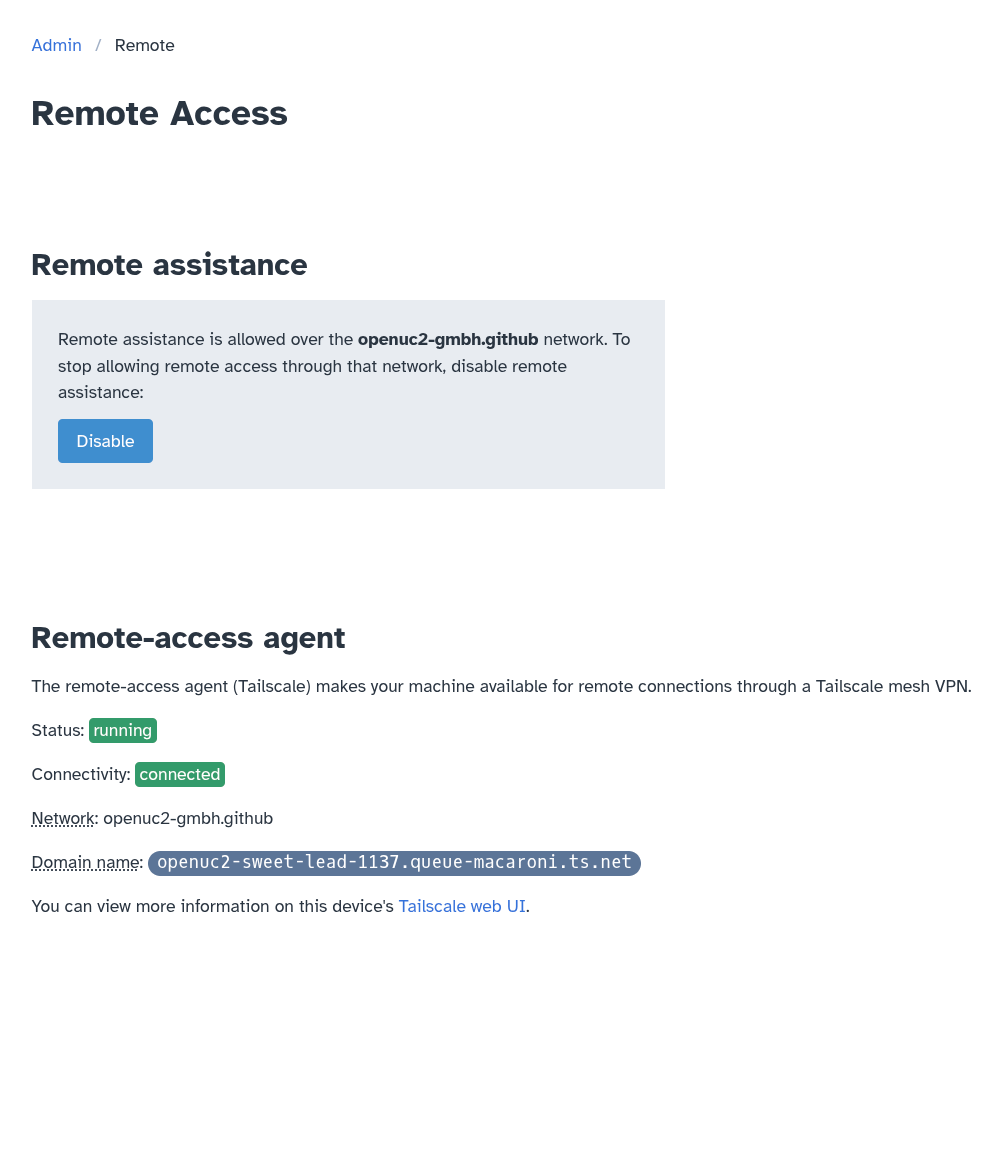
Additionally, as you can see above, the domain name will be the domain name for the customer-support staff at openUC2 to connect to your RPi to help you.
Here it's openuc2-sweet-lead-1137.queue-macaroni.ts.net.
Congratulations! Now we know how to enable remote assistance on your machine for getting help from openUC2 customer support.
Disable remote assistance
In general, it's probably better for your own computer security to only enable remote assistance when someone at openUC2 actually needs remote access to your RPi. When remote access isn't needed, you can disable remote assistance by pressing the blue "Disable" button visible in the screenshot above. Then the Remote Access page will look like this:

Note how the status is reported as "stopped" and connectivity is reported as "disconnected". As described above, you can re-enable remote assistance from this state simply by clicking the blue "Enable" button.
What's next
Now that we know how to make your FRAME machine available for remote assistance from openUC2 customer support, we're almost done with the day-1 tutorials! Next, we'll learn about how to safely shut down your FRAME machine in a way that prevents data corruption of the data you acquire on your FRAME.