Principles of sample movement
This guide helps you to understand basic settings in sample movement and corresponding movement of axes based on the coordinate system implemented. There are different approaches to this, let's do it step by step.
Step 1 - implemented sample coordinate system
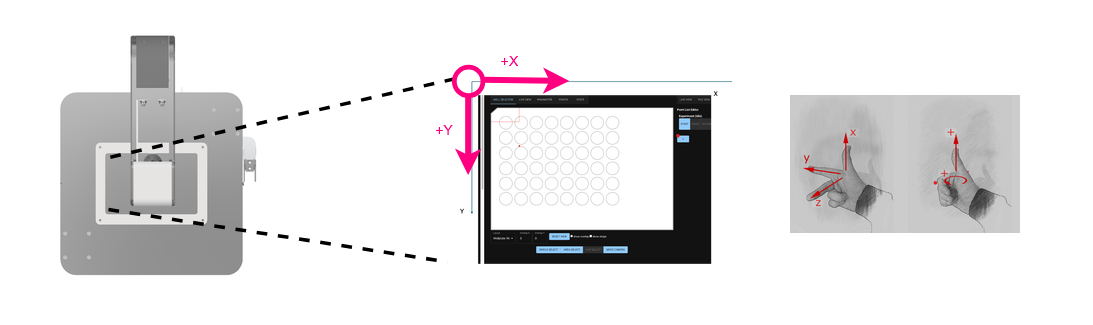
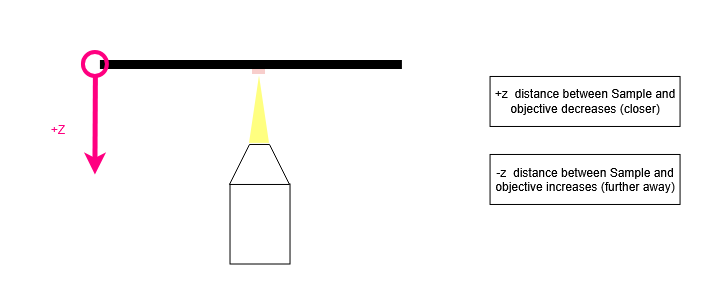
Let's look at the sample coordinate system first. The image below shows the FRAME from a bird's perspective and the sample holder. It also shows the origin of the sample coordinate system in the upper left hand corner of the sample holder and X and Y axis as well as their positive directions. According to the right hand rule positive Z is facing "into the screen", which means that positive Z is moving the sample closer to the objective.
Step 2 - using different controls to move the sample
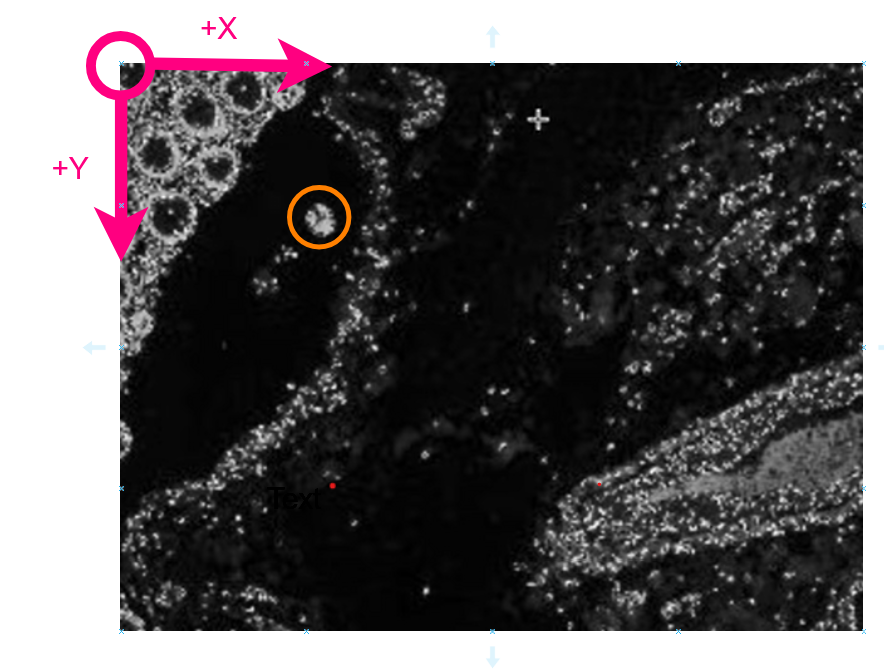
In the picture below we want to center the structure marked with an orange circle into the middle of the camera preview window. Let us look at the 4 main options available to do that.
Using the Game Controller
We can use the game controller to move the sample. For instructions on how to pair and use the game controller please refer to the Controller instructions.
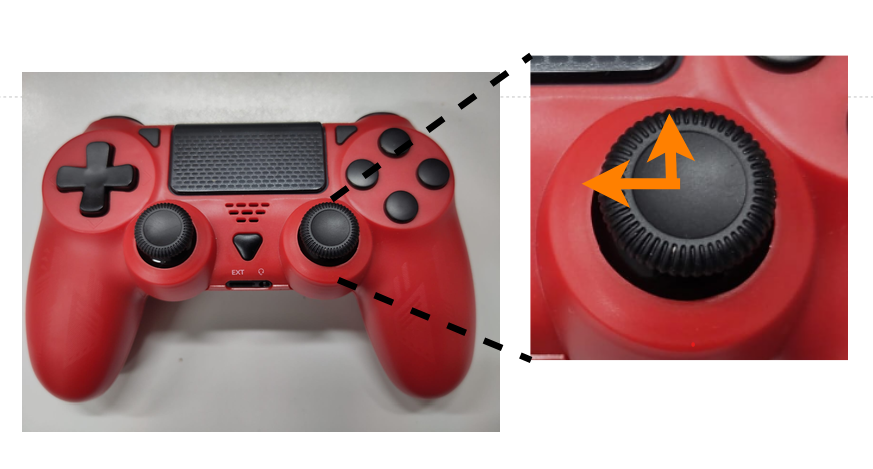
Since our point of interest is towards the upper left hand corner of the preview we will get there by moving the joystick up and left as depicted in the image.
Using the Click-Function in the preview window
Another way to get there is by simply double clicking on the structure we want to center in the middle of the preview window - in this case the orange circeled structure.
Using the Axis View tab in the Stage Control Section
You can access the Stage Control section in the column on the right hand side in the Live View App. Choose the tab Axis View (usually the default tab).
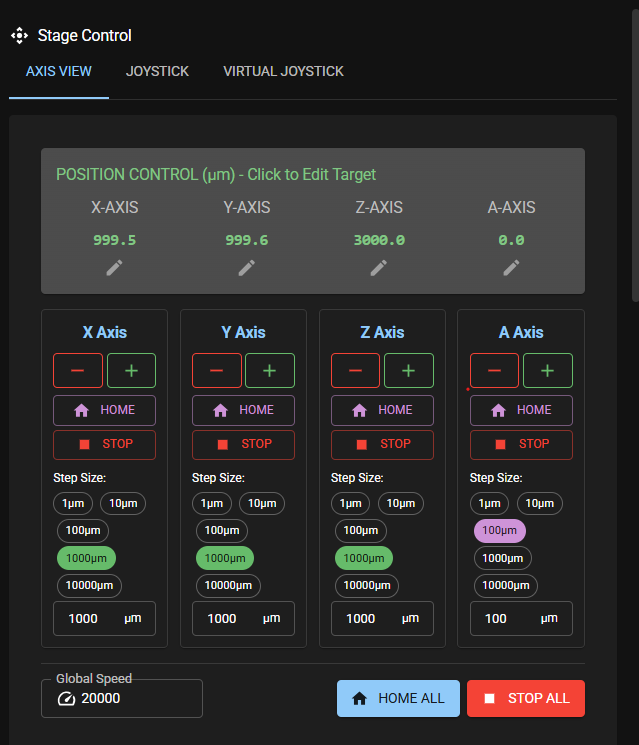
It comes with a lot of options so let us first look at them one by one:
- In the top row you can manually enter a position value for each axis by double clicking on the current position value and entering the new value.
AttentionBe careful with that option, especially in Z, to avoid the risk of the objective colliding with the sample or the stage! - Below this top row you find a column for each axis with a similar set of options. Use the "+" and "-" symbol to move the corresponding axis. The stage will move with the selected step size (marked green, e.g. 1000um for X Axis), so before pressing make sure you have selected the correct step size. You can also enter any desired step size into the square window at the buttom of each column. Just double-click and enter the value.
- You can also Home or Stop each axis individually.
- In the bottom row you can change the global speed for all axes. The default is "20.000". And you can Home all or Stop all.
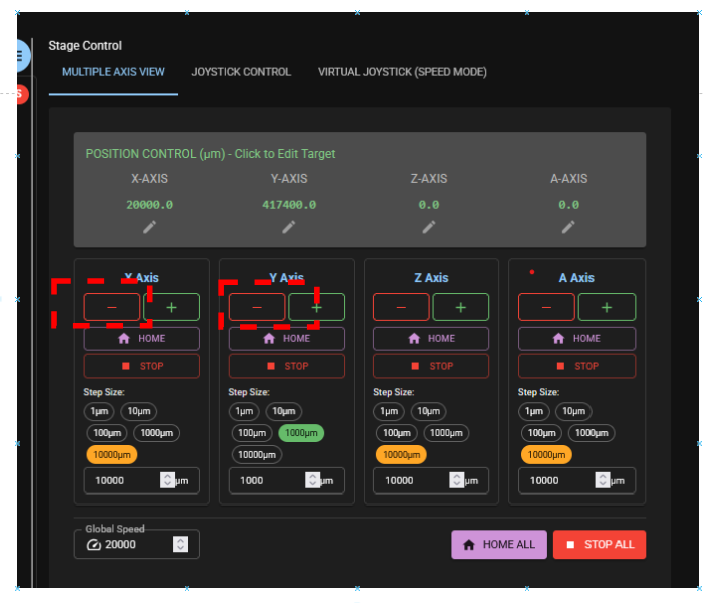
Let us come back to our task of centering the structure in the orange circle. Refering to the sample coordinate system as depicted above we need to move in negative X and Y to center the structure (Note Step size is not selected adequately in below image probably 10um or 100um would work best in above case).
Using the Joystick tab in the Stage Control Section
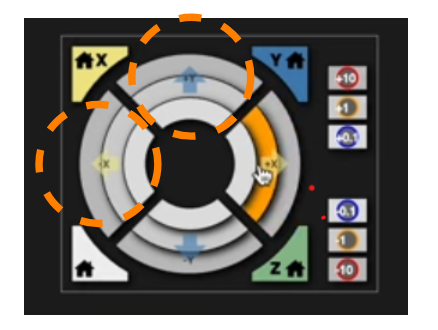
You can access the Stage Control section in the column on the right hand side in the Live View App. Choose the tab Joystick.
First select the desired step size for X and Y (not shown in the image below). Then, quite similar to the game controller use the buttons to the left and up to center the structure selected. The different rings of the digital joystick let you move with different step sizes.